
Subscribe to Our Youtube Channel
Related Manuals for Arizona Tucson


Summary of Contents for Arizona Tucson
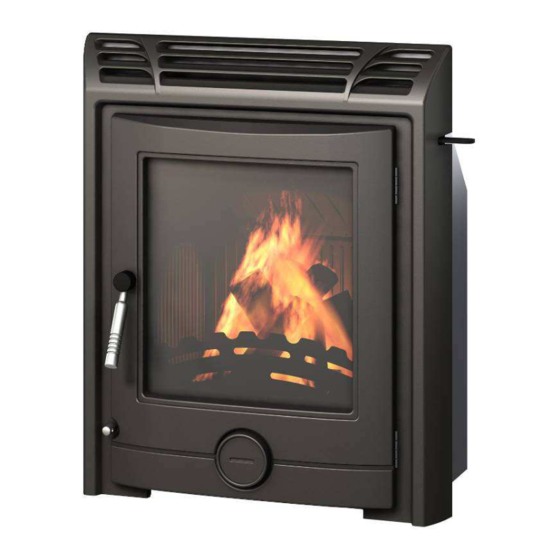
- Page 1 Introductions for Installation and Use Tucson Inset Stove Imported and Distributed by Micon Distribution Ltd. 1a Hallstown Road, Ballinderry Upper, Lisburn BT28 2NE Arizona brand exclusively owned by Micon...
-
Page 2: Table Of Contents
Contents Pre-installation checks Installation introduction with technical data 1. Technical data 2. Installation introduction 2.1 Unpacking the stove 2.2 Installing the stove 2.3. Pre-Installation Assembly 2.4. Chimney 2.5. Fitting Instructions 2.6. Down Draughts 2.7. Ventilation & Combustion Air Requirements 2.8. Permanent Air Vent Extractor Fan 2.9. -
Page 3: Pre-Installation Checks
Pre-installation Checks Installation of a fireplace must be according to local codes and regulations in each country. All local regulations, including those which refer to national and European standards, must be observed when installing the product. Both an installation manual with technical data and a manual on general use and maintenance are enclosed with the product. -
Page 4: Unpacking The Stove
Dimensions, distances etc.: figure 2 Technical data according to EN13229 Recommended chimney draught: 12 Pa Operational mode: Intermittent Intermittent combustion in this context means normal use of the fireplace, i.e. fuel is added as soon as the fuel has burnt down. 2. -
Page 5: Chimney
To remove the loose baffle, lift the front edge until it hits the top and then slide it forward. Then drop the rear edge and the baffle will slide down. To remove the fixed baffle, loosen the two screws and slide it forwards, it will then drop down. -
Page 6: Fitting Instructions
ALL FLUE INSTALLATIONS ARE THE RESPONSIBILITY OF THE CUSTOMER. The stove must be connected to a chimney with a minimum continuous draught of 12 Pascal’s (.05” WG). Poor draught conditions will result in poor performance. FITTING INSTRUCTIONS Step 1 Prepare the fireplace area with fireback or millner brick removal. Ensure the opening is suitable for fitting of the insert stove opening required, i.e. - Page 7 Step 7 Lay the sealing gasket on to the flue spigot, then fit the flue spigot to the end of the flexi flue liner using the 3 grub screws provided. Step 8 Then using the M6 screws secure the stove to the convection chamber. Push the insert stove against the fireplace before fully tightening these bolts.
-
Page 8: Down Draughts
3. Grate The grate simply lays into the grate support but care needs to be taken that the riddling bar will rest in the middle of the fork. 4. Loose Baffle Hold the baffle by the ‘L’ shaped end with the fold turned up. Manoeuvre it diagonally through the door opening and then drop the rear edge to the rear of the stove. -
Page 9: Ventilation & Combustion Air Requirements
2.7 Ventilation and Combustion Air Requirements This appliance is rated less than 5kW, therefore there is no mandatory requirements for additional air unless a flue draught stabiliser is fitted then the air requirement is 15cm . However, we suggest that it is advantageous to provide an air supply into the room. -
Page 10: Permanent Air Vent Extractor Fan
2.8 Permanent Air Vent Extractor Fan Permanent Air Vent The stove requires an adequate air supply in order for it to operate safely and efficiently. The installer may have fitted a permanent air supply vent into the room in which the stove is installed to provide combustion and/or ventilation air. This air vent should not under any circumstances be shut off or sealed. - Page 11 If the mantlepiece protrudes further than 100mm from the fireplace, then it will be necessary to have further clearance to the top of the stove. The distance the mantle protrudes past the 100mm should be added to the clearance. For example, if the mantle protrudes 200mm, the clearance to the mantle should be 650mm.
-
Page 12: Floor Protection
2.12 Floor Protection It is recommended that this appliance is installed on a solid, level, concrete base, a non combustible hearth conforming to current Building Regulations must extend to the front of the appliance. 3.0 User Manual 3.1 Choice of Fuel Recommended fuel: Wood - Use hard wood logs. -
Page 13: Use
“Green wood” and “recovered wood” can eventually cause a chimney fire. Prohibited fuels: plastic bags liquid fuels, waste materials and any form of bituminous coal or petroleum based coke. This may harm the product and pollute the atmosphere. The appliance should never be used as an incinerator. 3.2 Use Odours when using the fireplace for the first time Painted products: the fireplace may emit an irritating gas when used for the first... -
Page 14: Use With Solid Fuel
• When the stove body is very hot, close the lower control. • The burning rate can now be lowered by moving the top air control to smaller air inlet. Re-fuelling Figure 8 • Slide the top air control to open. Open the lower control. •... - Page 15 • When the fire is burning fiercely, add further fuel. • When the stove body is hot, close the top air control. • The burning rate can now be adjusted by the lower control. Re-fuelling Figure 8 • Open the lower control. •...
-
Page 16: Ash Removal
temperature, but settle as soot (unburned gases) in the chimney and stove. Extreme conditions, such as poor draught in the chimney, large quantities of wood or wet wood, may, in the worst-case scenario, cause an explosive ignition. When firing in the summer period, when there is minimal need for heat, the combustion will be poor. -
Page 17: External Surface Cleaning
will normally be burned off when the air wash vent is opened all the way and a fire is burning briskly in the fireplace. Good advice! For normal cleaning, moisten a paper towel with warm water and add some ash from the burn chamber. Rub it over the glass and then clean the glass with clean water. - Page 18 stabiliser. Consult your Fire burns too Dealer. − Do not continuously Poor quality wood. quickly. burn small wood, sticks, bundles, carpentry offcuts (plywood, pallets), etc. − Burn paper and kindling Flue duct is cold. wood to increase heat. Room is in −...
Need help?
Do you have a question about the Tucson and is the answer not in the manual?
Questions and answers