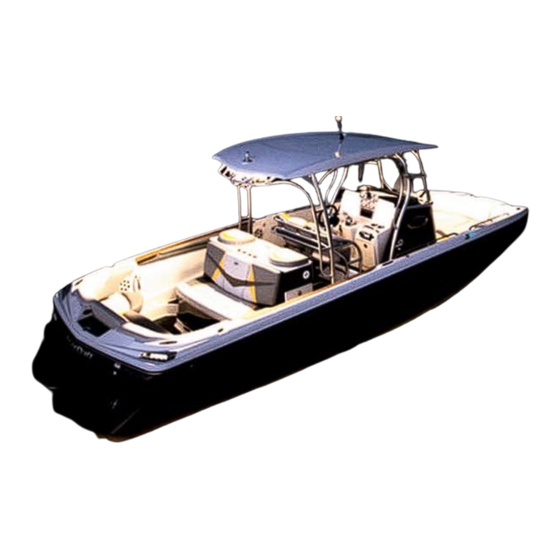
A reasonable effort has time of printing. Because of our policy of continuous been made by MasterCraft and its suppliers to pro- product improvement, we reserve the right to make vide the applicable information required to ensure a changes at any time, without notice, in specifications long-lasting and enjoyable boating experience.
Page 3
MasterCraft dealer prior to operating again. Failure to follow these instructions could result in death or seri- ous injury/illness. (Pages 1-2, 1-3) WARNING indicates a potentially hazardous situ- ation which, if not avoided, could result in death or Opening an engine compartment when there is indication of a fire serious injury.
Page 4
Do not add any attachments clean water and immediately seek medical attention. (Page 17-1) that are not approved for use on your MasterCraft boat. Do not climb on, sit on, stand on, jump off of or dive off of the tower. Never allow When charging, batteries generate small amounts of dangerous hydrogen passengers to sit behind the tow rope attachment point. Never allow gas. This gas is highly explosive. Keep all sparks, flames and smoking well loose tow rope ends to dangle. Always be certain that all bolts are in...
Page 5
While the boat is underway do not move one plate up or down significantly as this may cause listing. Be sure all fasteners used are approved and rated for marine use. Most While at higher speeds do not over-trim, as this will cause the bow fasteners used on MasterCraft boats are stainless steel or specially to lower quickly, resulting in a reduction of speed and may cause the coated to resist corrosion. (Page 13-1) boat to veer. When in following seas or when running an inlet, the plates should be All replaced fuel components must meet United States Coast Guard fully retracted. This will allow for optimal performance.
Page 6
Extended storage with fuel in the system can affect the fuel’s stability and may require system inspection and fuel filter replacement when the unit is placed back into service. (Page 7-2) Lifting slings must never contact shafts, struts or hardware protruding from the hull. Damage may result that would void the warranty. (Page 12-1) When the boat is out of the water, it is important to support the hull correctly to avoid any hull damage. Such damage may void the war- ranty. (Page 12-1) Crossing cables or jumper cables may result in damage to the electri- cal components due to incorrect battery connections. Such damages may not be covered by your warranty. (Page 17-3) Attention must be paid to any leakage occurring in the propeller shaft log area. Water intrusion into the transmission, which can happen if excessive leakage is occurring may cause serious damage. Such dam- age may not be covered by the warranty. (Page 17-2) Add-on equipment may adversely affect the alternator output or Engines should always be operated within engine manufacturer overload the electrical system. Such damage may not be covered by guidelines.
Page 8
Shower or Wash Down ...........6-5 Stereo Equipment ............6-6 Swim/Boarding Platform ..........6-6 Tables ..................6-7 Towers ................6-7 Video Screen ..............6-7 Water Heater ..............6-8 Preparation Using Care When Fueling ..........7-1 Indmar Engines ..............7-1 What Type of Gasoline To Use ........7-1 When the Boat Is Not Used for a While .....7-2 Using Oxygenated Fuels or Fuels with Alcohol ..............7-2 Fuels Outside the U.S.
Page 9
Acceptable Upholstery Cleaners ........ 14-4 Storage and Winterization ......... 18-1 Unacceptable Upholstery Cleaners ......14-4 General Preparation ............. 18-1 MasterCraft Boat Care Products......15-1 Fuel System Treatment ..........18-1 All Purpose Cleaner ............15-1 General Power Package Preparation ......18-1 Boat Cleaner &...
The precautions listed in this Owner’s Manual and on the boat are not all-inclusive. If a procedure, method, tool or part is not specifically recommended by MasterCraft, using it may place you and others in Required Equipment an unsafe situation; in addition, you may render your warranty void.
B (UL Approved) and Class C (energized elec- tory, but it can be ordered from MasterCraft with your boat and can trical equipment). These units should be used also be purchased from an authorized MasterCraft dealer.
PFDs as soon as possible and prior to running the boat when underway. Your MasterCraft dealer can, and will be happy to, again, unless operation is assist you with your purchase of appropriate PFDs.
Use of these devices must still meet Coast We suggest the following equipment as a minimum (your MasterCraft Guard requirements, information for which is available online and dealer can also assist you with additional recommendations): from the Coast Guard.
Do not add any attachments that are not approved for use on your MasterCraft boat. Do not climb on, sit on, stand on, jump off of or dive off of the tower.
and tight before and during use. When the tower is up, watch for low obstacles such as tree limbs, bridges or power lines. Warning Plates and Labels Read and note ALL warning plates and labels from bow to stern, including those that are installed inside the engine compart- ment, lockers and under seating.
In other situations when entry into cold water is necessary: • Wear a PFD. • Button all clothing. • Cover your head if possible and enter the water slowly. • Keep your head out of the water if at all possible. •...
Page 18
discharge of oil, discharge of garbage and the operation and discharge from sanitation devices. It is the boat owner’s and operator’s respon- sibility to determine what the laws and regulations are and to ensure that those laws and regulations are respected and enforced. Details are available through the Coast Guard.
This may result in serious injury or death, to ensure that every measure has been taken to keep boating enjoy- as well as significant damage to the boat, which will not able for many years to come. A MasterCraft boat can be the source be covered by warranty. of countless hours of family fun, as well as building friendships. But the...
r u l e s o f t h e o pe n wat e r determine how best to avoid you. The vessel that does not have the right of way has the duty to take positive and timely action to stay out of the way of the stand-on vessel. Normally, the give-way vessel should not cross in front of the stand-on vessel. Slow down or change direction briefly and pass behind the other vessel. Y ou should always move in such a way that the stand-on operator can see what you are doing. Rules When Encountering Vessels There are three (3) main situations in which you may encounter other vessels, and you must avoid a collision. These are: • Meeting (you are approaching another vessel head-on).
Other Special Situations There are additional rules to remember when operating your boat around other ves- sels, such as: • When navigating in narrow channels, you should keep to the right when it is safe and practical to do so. • When preparing to go around a bend that may obstruct your view of other water vessels, you should sound a prolonged blast on the horn or with a whistle for four (4) to six (6) seconds. Even if no reply is heard, you should still proceed around the bend with caution. Sailing Vessel Right-of-Way Sailing vessels should normally be given the right-of-way. The exceptions to this are: • When the sailing vessel is overtaking the power-driven vessel, the power-driven ves-...
Aft ski pylon (At press time, the final determination of the location of the fire suppres- Blower exhaust (top of deck near transom) sion system manual override had not been finalized. Prior to operating 27 Stern light receptacle (if equipped with tower, the light will be in center aft of tower) the boat for the first time, the boat owner must determine this information 28 Shower wand & switch/Slick Boot wand & switch (where from an authorized MasterCraft dealer.) equipped, inside storage compartment) 29 Stern cleat 30 Fuel tank filler ’ • 2010 4 - 4 m ast e rc r a f t ow n e r s m a n ua l...
Page 27
07, 08, 09, 10, 11 01 Bow light 31 Ski pylon 02 Bow filler cushion 32 Shift/throttle control (where equipped) 03 Bow cleat 33 Steering wheel 04 Ballast thru-hull pump-out 34 Fire suppression unit manual override 05 Stereo CD Player Sirius 35 Instrument panel (inside glove box, where equipped) (details elsewhere in this section) Satellite Radio 36 Subwoofer (where equipped) (where equipped) 06 Glove box 37 Circuit breaker panel (on kick panel beneath instrument panel) 07 Battery 38 Ballast thru-hull vent...
Page 28
m a r i sta r 200 07, 08, 09, 10 05 04 38 39 40 01 Bow cleat 31 Automatic fire extinguisher 02 Bow filler cushion (where equipped) 32 Subwoofer 03 Stereo CD Player ; Sirius (inside glove box, where equipped) 33 Heated seat (where equipped) Satellite Radio (where equipped) 34 Armrest stereo remote 04 Glove box 35 Shift/throttle control 05 Nav/anchor light 36...
Page 29
m a r i sta r 215 07, 08, 09 39 40 01 Bow light 31 Automatic fire extinguisher 02 Bow cleat 32 Cooler (under seat) 03 Bow filler cushion 33 Subwoofer (where equipped) 04 Stereo CD Player ; Sirius 34 Heated seat (inside glove box, where equipped) (where equipped) Satellite Radio 35 Armrest stereo remote (where equipped) 05 Glove box 36 Shift/throttle control 06 Walk-thru seat...
Page 30
m a r i sta r 230 07, 08, 09 35 36 01 Bow light 31 Bilge thru-hull vent 02 Bow filler cushion 32 Stern light receptacle (where equipped) (if equipped with tower, the light will be in center aft of tower) 03 Bow cleat 33 Fuel tank filler 04 Stereo CD Player ; Sirius (inside glove box, where equipped) 34 Automatic fire extinguisher Satellite Radio (where equipped) 35 Subwoofer 05 Glove box 36 Heated seat 06 Walk-thru seat...
Page 31
m a r i sta r 235 03, 04, 05 01 Bow cleat 31 Automatic fire extinguisher 02 Bow filler cushion 32 Fuel tank filler (where equipped) 03 Stereo CD Player ; Sirius 33 Sink and shower (inside glove box, where equipped) (where equipped) Satellite Radio 34 Upright refrigerator (where equipped) (under sink, where equipped) 04 35 Heated seat (where equipped) (where equipped) 05 iPod interface 36 Armrest stereo remote (where equipped) 06 Nav/anchor light...
Page 32
m a r i sta r 245 08, 09, 10, 11 39 40 01 Bow cleat 31 Engine compartment 02 Bow filler cushion (where equipped) 32 Engine exhaust (two, on top of port and starboard deck near 03 Stereo CD Player ; Sirius (inside glove box, where equipped) transom) Satellite Radio 33 Stern cleat (where equipped) 04 Glove box 34 Bilge thru-hull vent 05 Nav/anchor light 35 Fuel tank filler 06 Center drain plug 36...
Page 33
m a r i sta r 255 04, 05, 06 01 Bow cleat 31 Stern cleat 02 Bow filler cushion 32 Engine compartment (where equipped) 03 33 Fuel tank filler (where equipped) 04 Head 34 Upright refrigerator (under sink, where equipped) 05 Hand-held fire extinguisher 35 Sink and shower (beneath observer seat) (where equipped) 06 iPod interface 36 Heated seat (inside head, where equipped) (where equipped) 07 Nav/anchor light 37...
Page 34
sta r 08, 09, 10 01 Bow cleat 31 Heated seat (where equipped) 02 Bow filler cushion 32 Armrest stereo remote (where equipped) 03 Stereo CD Player ; Sirius 33 Shift/throttle control (inside glove box, where equipped) Satellite Radio 34 Nav/anchor light (where equipped) 04 Glove box 35 Steering wheel 05 Walk-thru seat 36 Fire suppression unit manual override (where equipped) 06 Ballast thru-hull vent 37 Instrument panel (details elsewhere in this section) 07 Nav/anchor light 38 Circuit breaker panel...
Page 35
m a r i sta r 280 X -80 06, 07 03, 04, 05 44 45 42 43 01 Bow cleat 31 Automatic fire extinguisher 02 Bow filler cushion 32 Engine compartment (where equipped) 03 33 Bilge thru-hull outlet (where equipped) 04 iPod interface 34 Fuel tank filler (inside head, where equipped) 05 Stereo CD Player ; Sirius Satellite Radio 35 Refrigerator drawer (where equipped) (where...
Page 36
c s X 220 14 13 25, 26 31, 32, 33 01 Bow cleat 31 Amp (where equipped) 02 Sirius Satellite Radio antenna 32 Subwoofer (where equipped) (where equipped) 03 Bow filler cushion 33 iPod interface (where equipped) (where equipped) 04 Circuit breaker panel 34 Stereo CD Player ; Sirius Satellite Radio (where equipped) (where 05 Steering wheel equipped) 06 Hand-held fire extinguisher 35 Nav/anchor light (under helm)
Page 37
Ski pylon (At press time, the final determination of the location of the fire suppres- 30 Transom stereo remote (where equipped) sion system manual override had not been finalized. Prior to operating 31 Stern cleat the boat for the first time, the boat owner must determine this information 32 Battery circuit breaker panel (including batteries ON-OFF switch) from an authorized MasterCraft dealer.) 33 Batteries 34 Fuel tank filler ’ • 2010 4 -15 m ast e rc r a f t ow n e r s m a n ua l...
Page 38
i n st r u m e n t pa n e l s CSX 265 Bilge pump switch Nav/anchor lights switch Gauge panel upper: Ignition switch Port engine tachometer Video display gauge MariStar 200, MariStar 215, Starboard engine tachometer Gauge panel lower: MariStar 230, MariStar 245, X-2, Port engine multiple gauge: gas (upper left);...
......18 people or 3,000 lbs........ 7 people or 1,087 lbs......11 people or 1,609 lbs. X-Star ProStar 197, X-7 MariStar 215, X-15 Length of Boat ........24’9” Length of Boat ........19’8” Length of Boat ........21’8”...
Models; Remote Control on Arm- rest, iPod and MP3 Player Connections with Stereo Installation) Boats may be equipped with a range of entertainment opportunities Proper control of MasterCraft boats extends beyond the steering from radios and CD players to connections for personal devices. ALL wheel. Each boat is equipped with multiple gauges that provide infor- radio and CD players will be located within the glovebox of the boat.
An LED light is in the tip of each switch. At the conclusion of the Uneven Load: When equipped with a dual system, if one side of FILL process, the light will blink six times in succession, pause for two- the boat is higher than the other while running, press BOW DOWN to-three seconds, and then blink an additional six times. This signals on the switch on that side. This will lower the tab on the listing side that the FILL process is complete. If the system senses any potential (low side) to bring the boat level. problems, the LED lights may blink from one to five times (each signi- Porpoising: To stop porpoising, press BOW DOWN on both sides fies individual issues). If this occurs, see an authorized MasterCraft of a dual plate system, BOW DOWN on a single system. The plate(s) dealer for analysis and correction. Do not attempt to correct the issue needs only to be deployed slightly to correct this adverse situation. on your own or continue to FILL the ballast as it may result in damage to the system. Manual and Automatic Bilge Pump Switch (All Models) The bilge pumps on all V-drive models will be in the automatic mode when the ignition key is turned ON. Some models may have two (2) switches, one for the forward bilge and one for the aft. In these instances, the...
ON the circuit. If the cruise control provider. circuit continues to trip, there is a problem somewhere that must be attended to immediately. See your Display Selector Switch authorized MasterCraft service department to resolve this matter. (ProStar 190, ProStar 197, X-7) The location of the main circuit breaker board is under the dash On the models equipped with the Multi-Function gauge, this panel. In some models, there is an additional breaker panel to assist switch allows the operator to toggle between functions. with the accessory load, and where equipped is located near the bat- tery box. There may also be a waterproof fuse for the stereo amplifier, where equipped. If the boat’s accessories are malfunctioning, check Dual Battery Operation Switch and then re-set breakers as necessary.
Please see information provided by the charger manufacturer. motor oil before operating again or have your boat ser- Battery chargers installed by MasterCraft are of the charger/maintainer viced by your local authorized dealer’s service depart- variety. The charger may be left connected to the batteries indefinitely. ment. Note that damage to your engine from inappropri- ate oil levels can be costly to repair.
At this point, the system will begin functioning with both is little or no motion present. engines in synch. The starboard throttle will control the speed MasterCraft recommends that operators do not run the boat for both engines as long as the synch switch is ON. below a quarter of a tank, except as necessary to return to shore, and not until the boat has been operated enough times to develop...
(ProStar 190, ProStar 197, X-7, X-1, Ignition Key Slot base MariStar models only) (All Models) This gauge provides several functions MasterCraft boats come equipped with of interest and support to the boater. As an ignition key, which must be inserted in a tachometer, it indicates the engine the ignition key slot and used to activate the speed in crankshaft revolutions per min- boat’s electrical system. This, in turn, will al-...
Starboard engine shifter Other Alarms CSX 265 (All Models) Sensors check the oil pressure, engine and transmission tempera- tures. If the system detects readings outside the acceptable range, the system shuts off the stereo and sounds the alarm for a period of one MariStar 280, X-80 (1) minute. This signals the need to return to shore as soon as pos- sible and seek assistance from your authorized MasterCraft dealer’s In the MariStar 280 and X-80 the boat is equipped with a four-le- service department to diagnose and, if necessary, repair the problem. ver control. The port side lever closest to the driver is the port engine shifter, which allows the boat to move forward when shifted forward, and backward when shifted aft. The next lever is the starboard engine Refrigerator Switch shifter and performs the same function. If both engines are running and the boat is moving, the shifters should be shifted together and in (MariStar 280, X-80, CSX 265, X-65) the same direction. Doing otherwise can damage the system.
on it will signal the system that fuel should be sent to the port engine. The • If the course time is not within that tolerance range, press up or engines can be run at different levels of throttle. down on the calibration rocker switch to adjust the speedometer’s The CSX 265 has a two-lever control. On the port side is the port speed interpretation. engine shifter/throttle control, and pushing forward will move the boat forward. The starboard side lever is the starboard engine shifter/throttle Tachometer control. The engines can be run at different levels of throttle. This system allows greater maneuverability in docking, as well as (All Models) when the boat is in operation. However, it requires more practice On boats not equipped with a multi-func- and skill in order to avoid potential damage to the boat. See tion gauge, a separate tachometer gauge is Engine Synchronizing Switch in this section of the Owner’s found. The tachometer indicates the engine...
• Adjusting the trim brings up the Trim screen • Press SELECT again to store the change • Adjusting the ballast brings up the Ballast screen • Pushing the Perfect Pass button brings up the Perfect Pass screen • Any alarm condition brings up a warning MasterCraft boats equipped with the screen. video display gauge feature integrated Per- fect Pass Wakeboard Pro speed control soft- Selecting the DEPTH tab goes to the ware. screen illustrated. This screen digitally dis- plays depth, water temperature, air tem- perature, and illustrates the depth trend.
Switches item and press SELECT. Make the desired changes and press MENU to save and exit. Please note that not every gauge or switch explained in this Owner’s Manual is found on every model. Some equipment is optional and not every option is available on all models of MasterCraft boats. All system Warning Messages are dis- Also, MasterCraft utilizes a variety of gauge and switch styles from played on the video display gauge. They will the gauges or switches pictured in this Owners Manual. These differences stay on for a minimum of 10 seconds but can between the various styles of gauges and switches are not in functionality. be acknowledged and hidden by pressing the If a boat is equipped with a gauge or switch that is labeled as described MENU button. Once acknowledged after 10 above, it will operate in the same fashion as the description even if its ap- seconds the alarm will go away for 5 min- pearance is different, as the appearance changes periodically.
MasterCraft offers significant standard and optional items to make boat will remain in a stationary position. Environmen- the boating experience more enjoyable. Some of these items come...
Boat section of A, B and C fires. The law requires that for all boats more than 26 feet in length, which includes the MariStar 280, X-80 and CSX 265 models, you this Owner’s Manual for more information. must have on board two (2) five-pound, dry chemical fire extinguishers, Note that towing with unapproved covers on the boat may result rated for Class A, B and C fires. The dry chemical fire extinguisher is op- in damage to the gel coat. MasterCraft recommends the use of our towable cover only for towing. Other canvas and covers have been tional equipment, which is not automatically included in your boat from developed and are available only through authorized MasterCraft the factory, but it can be ordered from MasterCraft with your boat and can also be purchased from an authorized MasterCraft dealer. dealers for a variety of uses. If any of the fire suppression system canisters on board your boat are discharged (whether a canister in an automatic system or a por- table fire extinguisher), then they must be replaced. The automatic fire suppression system available on all V-drive and CSX 265 models has an indicator light at the helm that will be green if the system is fully charged and will be red if the automatic fire suppression system has been discharged. If the clean agent canister associated with the...
dle to open the slide valve, then push to close. This relieves air pressure that may be created in the lower holding tank due to changes in temperature or altitude. Step 2: Pull the flush handle to release waste in the lower tank. Step 3: Push the flush button to rinse the bowl. Push the flush han- dle to close the slide valve. To empty the holding tank: Step 1: When the tank level indicator shows “FULL,” or at the end of an outing, empty the lower tank. Step 2: Pull up on the rear latch to separate the upper tank from the lower tank. Carry the lower tank to an authorized waste disposal area or a normal toilet. (DO NOT DISPOSE WASTE IN ANY LOCATION, INCLUDING NAVI- GPS and Chartplotter GABLE BODIES OF WATER, WHERE SUCH DIS- POSAL IS ILLEGAL OR CREATES AN ENVIRON-...
Manual and other important material regarding the boat. any time, if the steering is sluggish, difficult, or shows any signs of Use only rapid-dissolve toilet paper with these head systems, and not working smoothly and properly, the boat should immediately be only deodorant specially formulated for this type of head system. See taken to an authorized MasterCraft dealer for attention. The hydrau- instructions for details. In the event that anything from the head’s lic steering system is not accessible to the consumer for repair or bowl or holding tank escapes, it should be cleaned as soon as prac- maintenance, all of which should be done by an authorized Master- ticable. Failure to clean any spillage may result in unpleasant odors, Craft dealer.
The refrigerator operates by opening the coolbox door and turn- ing the thermostat knob clockwise. Shutting it off requires turning the thermostat knob counterclockwise. Seat Heaters For real comfort, some models offer a seat heater option, which will be for the driver’s seat, and sometimes in the observer’s seat. It is not offered for any other seating in the boat. Note that the ignition must be ON for the seat heater to work. The heater(s) operate by a switch on the control panel. If the switch is turned ON and the seat does not warm up, or appears to become too warm, turn the switch to OFF and seek assistance from your authorized MasterCraft dealer in remedying the issue. Shower or Wash Down Many models offer a shower or wash down option. A single three- position switch mounted in an aft position storage area controls the optional shower and optional Slick Boot functions. The switch is marked for each. Turn the switch toward the Shower marking to turn ON the shower. Return to center for OFF. Turn to the other direction to turn ON the Slick Boot. Return to center for OFF. These instructions work whether the boat is equipped with one (1) or both of the options, but will not be found in boats that are not equipped with either option. On MariStars, CSX 220 or 265, the X-Star and the Saltwater Series a tank option within available models can provide a fresh-water wash of the boat interior. The tank will be eight (8), ten (10) or twenty-five...
Swim/Boarding Platforms Many 2009 models are equipped One of the most attractive aspects of all MasterCraft boats are the with a swim platform that may be fold- swim platforms attached to the transom of the boats. Whether teak or ed down. To determine whether the fiberglass with inlays, the swim platforms are a source of enjoyment. boat is so equipped, look beneath the MasterCraft reminds consumers to review the Common Sense Ap- platform and see if the bracket with pin proach section of this Owner’s Manual, and pay particular attention to appears as in the photo. If so, the swim avoiding “teak surfing” or “platform dragging,” which expose the partici- platform can be folded. To do so prop- pant to excess carbon monoxide; and to the information regarding use erly, follow these instructions: of the optional shower while standing or sitting on the swim platform.
MasterCraft has determined that for the tower uti- lized on the current models, the total weight of all ac- cessories mounted on the tower should never exceed 85 pounds, regardless of whether the accessories are MasterCraft-approved and supplied or have come from an aftermarket supplier.
The shower is located in the head compartment and at the tran- som. Water is drawn in by way of a pump that is turned on at the breaker panel in the head compartment. The heat is provided by run- ning the port side engine for 15-to-20 minutes. After the water has been heated, however, the insulated tank will retain the hot water for several hours. This allows the shower to be run without the engine running, and if the engine is OFF, it is possible to shower while stand- ing on the swim platform. (See Common Sense Approach section for cautions regarding using the shower with the engine running.) The water pumped into the heater comes from a freshwater hold- ing tank, and it can be left in the water heater when the boat is not in use, EXCEPT during extended periods of storage. As with any part of the boat in which there is water, it must be removed at the time the boat is winterized to avoid freezing that may cause damage to the boat, the holding tank or the water heater. The water is removed by running the shower until all the water has come out or by discon- necting the plumbing fittings in the forward service bay under the helm seats. Water Heater On the CSX 265 model, a four-gallon hot water heater is an op- tion. Unlike the shower option on other models, which draws heat from a running engine, the CSX 265 water heater functions as a hot...
Indmar recommends purchasing fuel from a supplier that the fuel capsule and associated parts. Replacement parts must advertises availability of fuel that meets “TOP TIER” specifications. This meet OEM requirements as specified by MasterCraft. fuel has additives and detergents that will reduce the build-up of de- The fuel line in the boat’s bilge area that goes from the tank to posits in the engine.
Fuels that contain methanol will damage the engine. Damage caused by the Volkswagen Diesel Engine use of unapproved fuels is not covered by warranty. If the MasterCraft boat is equipped with a V olkswagen diesel engine, refer to the owners manual that comes with it for important informa- tion regarding fueling and starting the engine. When the Boat Is Not Used for a While Indmar recommends the regular use of Sta-Bil® fuel stabilizer for...
Safety Check. A problem could lead to an acci- dent during the outing, resulting in death or serious injury. Any and all problems should receive attention immediately. See your authorized MasterCraft dealer’s service depart- ment for assistance. Before Each Operation These tasks are best accomplished before the boat is launched.
(10) hours of operation. At that time, an oil level frequently during the first fifty (50) hours of operation since the change should be performed on the Indmar engines by piston rings and cylinders require that much time to seat properly. an authorized MasterCraft service technician at an au- See the Scheduled Maintenance Checks and Services section for thorized MasterCraft dealer. more details.
Re-engage the control lever after warm-up by returning Step 1: Lift the engine cover and inspect the bilge and engine com- the lever to neutral and pushing the throttle button back into the partment for any fluid/vapor leakage. MasterCraft recom- engage position. mends lifting the engine compartment cover for inspection before each use.
Step 2: Turn the ignition key to the OFF position to stop the en- ver control. The port side lever closest to the driver is the port engine gine. shifter, which allows the boat to move forward when shifted forward, Step 3: If any problems were encountered during operation, have and backward when shifted aft. The next lever is the starboard engine the boat inspected by an authorized MasterCraft dealer. Re- shifter and performs the same function. If both engines are running quest any necessary repairs before resuming operation of and the boat is moving, the shifters should be shifted together and in the boat. the same direction. Doing otherwise can damage the system. The next middle lever is the port engine throttle, which allows the boat to feed fuel into the engine and operate in motion. Pushing forward on it will signal the system that fuel should be sent to the port engine.
Courtesy Always respect the rights of others on the water. Keep wide when MasterCraft urges all who will be operating the boat to seek passing, slow down in crowded areas, be alert and be aware of your certified instruction from the local boating authorities. This section is wake and wash.
However, be aware that changing the propeller may void the war- ranty. Again, working with an authorized MasterCraft dealer is your best bet to ensure excellent performance.
Before tying up the boat, be sure to use enough dock bumpers to protect the boat from damage. If possible, tie-up with the bow toward the waves. Use good quality double-braided nylon line. Tie-up only to the lifting or tie-down eyes. Never use the handrails or ski pylon. If the boat is to be moored for a long period of time, use chafing protectors to protect the gel coat finish.
Such damage may void the warranty. Storage Cradle When the boat is hoisted from the water, proper use of the stern eyes or a sling system is required for all MasterCraft models. Though If a storage cradle is used, the hull must be properly supported stern eyes are designed to lift a boat from the water, care must be to prevent load damage. This can occur with as little as fifteen (15) taken to ensure you do not damage your boat. A spreader bar used...
Salt Water Corrosion The boat has been designed for operation in fresh water unless it is a model in the MasterCraft Saltwater Series. If operating a fresh-wa- ter model temporarily in salt, polluted or brackish water, thoroughly flush the boat with fresh water as soon as possible afterward. The entire engine cooling system should be flushed with fresh water for at least ten (10) minutes after each use in such waters.
MasterCraft vinyl is made to withstand the effects of sun, heat, acid rain and soiling, under normal conditions, but this does not preclude the cleaning requirements. Please consult the following cleaning rec- ommendations before cleaning your upholstery. Certain household cleaners, powdered abrasives, steel wool, and industrial cleaners may cause damage and discoloration, and are not recommended for use. Dry cleaning fluids and lacquer solvents should not be used as they will remove the printed pattern and gloss. Waxes are not recommended, as many contain dyes and solvents that can permanently damage the vinyl’s protective coating.
should be oiled one or two times a month during the first season; then as needed after that. The platform should be covered when not in use or when stored for the winter. Many products such as boiled linseed oil, tongue oil, teak oil and other outdoor wood preservatives can be found at marinas, paint stores or home improvement stores. Some oils such as linseed oil should be thinned with a thinner like mineral spirits before use. (70 percent oil-30 percent thinner.) When oiling a platform, apply a coat of oil with a wet cloth, work into the seams, end grain and edges. Allow the oil to set approximately 15 minutes and then wipe off the excess oil with a dry cloth. Do not...
Canvas Covers infrequently as possible. The cleaning mixture should be mixed as follows: The material used in constructing Bimini tops and boat covers is • Four ounces (one-half cup) of chlorine bleach. made from 100 percent solution-dyed polyester fiber with a urethane • Two ounces (one-fourth cup) of natural soap. coating to provide excellent water repellency and mildew resistance. • One gallon of water. This design allows the material to be easily maintained. By following Clean with a soft-bristle brush and allow the mixture to soak no a few simple care and cleaning steps, the fabric will continue to look longer than twenty (20) minutes. Rinse thoroughly and allow to com- good and maintain its fine qualities for seasons to come. pletely air dry. Repeat if necessary. If the top or boat cover is suitable in size for a washing machine, Important Background Information these steps should be followed: Because the fabrics are woven, they are breathable.
Dry cleaning fluids and lacquer Acceptable Upholstery Cleaners solvents should not be used as they will remove printed pat- MasterCraft Vinyl Dressing tern and gloss. Do not use bleach as it will deteriorate the Vinyl Finish Vinyl Cleaner thread.
Safe for fiberglass, wood and metal boats, and requires no scrubbing. Part #559124. At MasterCraft we have made very effort to produce the most MasterCraft Hull Cleaner environmentally friendly products available for our boat care line. We MasterCraft Hull Cleaner is the product of choice for the re- understand that as lovers of the outdoors, we should do our part to moval of water stains, iron and metal deposits and marine algae from preserve our environment for the next generation of boaters. fiberglass boat hulls and bottoms. This non-acid based cleaner is safe for you, your boat and the environment.
This premium marine motor oil was formulated specifically for MasterCraft to use in high-performance marine engines. The Marine Motor Oil provides high viscosity and film strength for engine protec- tion in high-load applications. MasterCraft Marine Motor Oil is de- signed to protect against corrosion, wear, oxidation, varnish and sludge deposits. When used as directed, this oil assures compliance with Mas- terCraft warranty requirements, as do the filters.
• Check the alignment of the propeller shaft. (See Annual Mainte- • Inspect the complete fuel system for leakage. nance also.) • Check the fire extinguisher and suppression units on-board. • Have an authorized MasterCraft service department change the fuel filter after the first fifty (50) hours of operation, and then Details follow in the next few sections. again at one hundred (100) hours for Indmar engines. The fuel filter...
Step 3: Return the filter in place injection controls the engine or the overall electrical system and recover. Tighten the wing nut, functions. Before adding electrical equipment, consult an but do not over-tighten as it may authorized MasterCraft dealer’s service department. Other- eventually strip the threads hold- wise, the engine may not perform properly. ing the wing nut in place. Inspect the Battery...
Page 79
MasterCraft recommends the use of a spiral-cell type battery, ONLY by using specialized tools that are not available to such as the Optima brand. These batteries exceed other batteries in the public. holding and extending a charge. Inspect the Throttle and Shift Cables for The engine box serves as a machinery guard. The en- Kinks, Wear and In- gine must be OFF whenever the box is open. Clothing...
Page 80
Fuel System for Leaks Charge dead batteries with a battery charger before attempt- This function should be performed ing to start the engine. (Some MasterCraft models offer an optional after about three (3)-to-five (5) battery charger; but never jump-start the battery.) Jump-starting minutes of running the engine to from another boat or battery is dangerous! Charging a dead...
(Every One Hundred [100] Hours) Refer to the Corrosion Prevention and Cleaning the Boat sections of MasterCraft recommends that your annual—or one hundred this Owner’s Manual. After each outing, the boat should receive a gen- (100) hour—maintenance requirements be performed by an au- eral cleaning and drying prior to being stored. Even if the boat is kept thorized MasterCraft dealer. The staff there has the proper equip- in a slip, owners/operators should wipe down the interior and should ment and technical training to best meet your service needs. periodically remove the boat from the water for a general cleaning. Annual Maintenance Inspections...
Because this process should be completed while all movable com- Check the ponents of the drive train are NOT Propeller Shaft in motion, MasterCraft recom- mends this be done while the boat Coupling Alignment is out of the water. Later-model MasterCraft boats...
MasterCraft dealer. Fuel system service on later-mod- el MasterCraft boats requires special service tools and special training. Due to the potential for serious consequences when Inspect the...
Step 4: Perform the annual maintenance as described in this Own- er’s Manual. General Power Package Preparation Step 1: Lubricate the throttle and shift linkages and cables with multi-purpose grease. Without proper preparation, storage for long periods of time (at Step 2: MasterCraft recommends that batteries be removed from any time of the year) may cause harm to various components of the the boat for winter storage. Batteries should be fully charged boat and drive train. Also, if the boat has been stored in below-freez- before being stored in a cool, dry location, protected from ing temperatures with water inside the bilge or engine cooling system the elements and fully re-charged before being re-installed in (including the heater or, shower, ballast tanks, wash down tanks, cool- the boat. Never store batteries close to heat, spark or ers, or any container or area in which water has been located), this flame-producing devices.
Step 8: MasterCraft recommends the battery or batteries be re- Step 3: Apply a coat of wax to the entire surface of the boat. We moved from the boat for winter storage. Batteries should suggest MasterCraft Premium Marine Wax for excellent be fully charged before being stored in a cool, dry location, coverage.
Dish soap or some similar product will Step 3: Follow all instructions for reactivating the drive train as help slide the connects back together. Note that the red ring detailed in the engine owner’s manual. NOTE: Due to the goes over the raised ring to ensure a working connection. complex nature of the reactivation process, MasterCraft recommends having an authorized MasterCraft dealer per- form this function. Step 4: Ensure that all drain plugs throughout the boat and drive train have been reinstalled to avoid unwanted intrusion of water.
Clamp a small rule scale to the shaft strut, parallel to the shaft so that the end of the scale is 3/32-inches from the leading edge of a propeller blade. Step 3: Rotate the propeller slowly. There should be no more than 3/32-inch variance between the blades. If the propeller is damaged, see an authorized MasterCraft dealer. ’ • 2010 19-1 m ast e rc r a f t ow n e r...
The following chart will assist you in finding and correcting minor mechanical and electrical problems with your MasterCraft boat. Engine manuals include troubleshooting suggestions regarding drive train issues.
Page 89
Steering problems. Corroded cable. Clean and lubricate the cable. Rudder worn. See authorized MasterCraft dealer’s service department. Excessive vibration. Bent strut. Replace the strut. Fouled propeller. Remove objects from the propeller shaft and rudder. Damaged propeller. Replace the propeller. Misaligned propeller shaft coupling.
Cleaning the Boat sections of the MasterCraft Owner’s THE EXCLUSION OF IMPLIED WARRANTIES AND/OR DO Manual, the gel coat, which is applied to all MasterCraft NOT ALLOW LIMITATIONS ON THE AMOUNT OF TIME boats at the factory, will be warranted for a period of one...
Page 92
MasterCraft will provide the owner with a copy of the manufacturer’s warranty: Engine and Transmission. The engines used in MasterCraft damage caused by use of any non-MasterCraft trailer;...
Page 93
5.1. Liability Limitation: Exclusion of Consequential Damages. This Limited Warranty is for the benefit of the owner and MasterCraft, and shall not create or evi- dence any right in any third party. THE REPAIR OR RE- PLACEMENT OF DEFECTIVE COMPONENT PARTS AS PROVIDED UNDER THIS LIMITED WARRANTY IS THE EXCLUSIVE REMEDY OF THE CONSUMER.
Page 94
MasterCraft dealer’s service department or MasterCraft’s factory during the appropri- ate warranty period will be repaired or replaced, at MasterCraft’s sole option, without charge to the owner for parts and labor. This provision is subject to the following terms and conditions: MasterCraft shall be obligated only to repair or replace those items that prove defective, in MasterCraft’s sole...
For the first purchase of a specific MasterCraft boat, the boat must be registered. You should be aware that under federal law, com- pletion of the registration process is a requirement and should be completed as follows: 1. Dealer must complete the warranty registration at date of sale.
s e rv i c e lo g As Needed Date Date Date Date Replace raw water impeller Replace ballast impeller(s) Add/change oil filter Every 50 Hours Date Date Date Date Lubricate starter gear and shaft Change engine oil and filter Check all safety equipment Every 100 Hours Date Date Date Date Replace impeller Engine tune-up Change transmission fluid Check engine mounts Check prop shaft coupling alignment Inspect exhaust flaps Lubricate steering system Lubricate shift and throttle system Check/replace bllast pump impeller Inspect complete fuel system Change fuel filter ’...
Need help?
Do you have a question about the prostar 197, X-7 and is the answer not in the manual?
Questions and answers