Download Print this page
Motorola TalkAbout T9500 User Manual

Motorola TalkAbout T9500 User Manual

Motorola two-way radio user's guide
Hide thumbs Also See for TalkAbout T9500:

Advertisement

Quick Links

®
Two-Way Radio
User’s Guide
T9500 / T9550 / T9650
KEM PK14190 70
For More Information
For further information, you may call Motorola at 1-800-638-5119 (U.S.
and Canada), or e-mail us at giantintl@callcenter.com or visit us on the
Internet at www.motorola.com.
Safety and General Information
Important Information on Safe and Efficient Operation
Read This Information Before Using Your Radio.
The information provided in this document supersedes the general safety
information in user guides published prior to December 1, 2002.
Transmit and Receive Procedure
Your two-way radio contains a transmitter and a receiver. To control your
exposure and ensure compliance with the general population/
uncontrolled environment exposure limits, always adhere to the
following procedure:
• Transmit no more than 50% of the time.
• To receive calls, release the PTT button.
• To transmit (talk), press the Push to Talk (PTT) button.
Transmitting 50% of the time, or less, is important because the radio
generates measurable RF energy exposure only when transmitting (in
terms of measuring standards compliance).
Exposure to Radio Frequency Energy
Your Motorola two-way radio complies with the following RF energy
exposure standards and guidelines:
• United States Federal Communications Commission, Code of Federal
Regulations; 47CFR part 2 sub-part J.
• American National Standards Institute (ANSI)/Institute of Electrical and
Electronic Engineers (IEEE) C95. 1-1992.
• Institute of Electrical and Electronics Engineers (IEEE) C95.1-1999 Edition.
• International Commission on Non-Ionizing Radiation Protection (ICNIRP)
1998.
• Ministry of Health (Canada) Safety Code 6. Limits of Human Exposure to
Radiofrequency Electromagnetic Fields in the Frequency Range from 3
KHz to 300 GHz, 1999.
• Australian Communications Authority Radiocommunications
(Electromagnetic Radiation—Human Exposure) Standard, 2003.
• ANATEL ANNEX to Resolution No. 303 of July 2, 2002 “Regulation of
limitation of exposure to electrical, magnetic and electromagnetic fields
in the radio frequency range between 9 KHz and 300GHz” and
“Attachment to resolution #303 from July 2, 2002”.
To ensure optimal radio performance and make sure human exposure to
radio frequency electromagnetic energy is within the guidelines set forth
in the above standards, always adhere to the following procedures.
Portable Radio Operation and EME Exposure
Antenna Care
Use only the supplied or an approved replacement antenna.
Unauthorized antennas, modifications, or attachments could damage the
radio and may violate FCC regulations.
Do NOT hold the antenna when the radio is “IN USE.” Holding the
antenna affects its effective range.
Body-Worn Operation
To maintain compliances with FCC/Health Canada RF exposure
guidelines if you wear a radio on your body when transmitting always
place the radio in a Motorola-supplied or approved clip holder, holster,
case or body harness for this product. Use of non-Motorola-approved
accessories may exceed FCC/Health Canada RF exposure guidelines.
If you do not use one of the Motorola-supplied or approved body-worn
accessories and are not using the radio held in the normal use position,
ensure the radio and its antenna are at least 1 inch (2.5 cm) from your
body when transmitting.
Data Operation
If applicable, when using any data feature of the radio with or without an
accessory cable, position the radio and its antenna at least one inch
(2.5 cm) from the body.
Approved Accessories
For a list of approved Motorola accessories, visit our Web site at
www.motorola.com.
Electromagnetic Interference/Compatibility
Note: Nearly every electronic device is susceptible to electromagnetic
interference (EMI) if inadequately shielded, designed or otherwise
configured for electromagnetic compatibility. This device complies with
Part 15 of the FCC Rules. Operation is subject to the following two
conditions:
1. This device may not cause harmful interference; and
2. This device must accept any interference received, including
interference that may cause undesired operation.
Facilities
To avoid electromagnetic interference and/or compatibility conflicts, turn
off your radio in any facility where posted notices instruct you to do so.
Hospitals or health care facilities may be using equipment that is
sensitive to external RF energy.
Aircraft
When instructed to do so, turn off your radio when onboard an aircraft. Any
use of a radio must be in accordance with applicable regulations per
airline crew instructions.
Medical Devices – Pacemakers
The Advanced Medical Technology Association recommends that a
minimum separation of 6 inches (15 cm) be maintained between a
handheld wireless radio and a pacemaker. These recommendations are
consistent with the independent research by and recommendations of
the U.S. Food and Drug Administration.
People with pacemakers should:
• ALWAYS keep the radio more than 6 inches (15 cm) from their
pacemaker when the radio is turned ON.
• Not carry the radio in the breast pocket.
• Use the ear opposite the pacemaker to minimize the potential for
interference.
• Turn the radio OFF immediately if there is any reason to suspect that
interference is taking place.
Medical Devices – Hearing Aids
Some digital wireless radios may interfere with some hearing aids. In the
event of such interference, you may want to consult your hearing aid
manufacturer to discuss alternatives.
Medical Devices – Other
If you use any other personal medical device, consult the manufacturer
of your device to determine if it is adequately shielded from RF energy.
Your physician may be able to assist you in obtaining this information.
Safety and General Use While Driving
Check the laws and regulations regarding the use of radios in the area
where you drive, and always obey them. If you do use your radio while
driving, please:
• Give full attention to driving and to the road.
• Use hands-free operation, if available.
• Pull off the road and park before making or answering a call if driving
conditions so require.
The use of a two-way radio while engaged in activities requiring
concentration may cause distraction or otherwise impair your ability to
safely participate in such activities. Always use technology safely.
Do not place a portable radio in the area over an air bag or in the air bag
deployment area. Air bags inflate with great force. If a portable radio is
placed in the air bag deployment area and the air bag inflates, the radio
may be propelled with great force and cause serious injury to occupants
of the vehicle.
Potentially Explosive Atmospheres
Turn off your radio prior to entering any area with a potentially explosive
atmosphere. Only radio types that are especially qualified should be used
in such areas as “Intrinsically Safe.” Do not remove, install or charge
batteries in such areas. Sparks in a potentially explosive atmosphere can
cause an explosion or fire resulting in bodily injury or even death.
Note: The areas with potentially explosive atmospheres referred to
above include fueling areas such as below decks on boats, fuel or
chemical transfer or storage facilities, areas where the air contains
chemicals or particles (such as grain, dust or metal powders) and any
other area where you would normally be advised to turn off your vehicle
engine. Areas with potentially explosive atmospheres are often—but not
always—posted.
Blasting Caps and Areas
To avoid possible interference with blasting operations, turn off your
radio when you are near electrical blasting caps, in a blasting area, or in
areas posted “Turn off two-way radios.” Obey all signs and instructions.
Operational Cautions
Antennas
D D o o n n o o t t u u s s e e a a n n y y p p o o r r t t a a b b l l e e r r a a d d i i o o t t h h a a t t h h a a s s a a d d a a m m a a g g e e d d a a n n t t e e n n n n a a . . If a damaged
antenna comes into contact with your skin, a minor burn can result.
Batteries
All batteries can cause property damage and/or bodily injury such as
burns if a conductive material—like jewelry, keys or beaded chains—
touch exposed terminals. The conductive material may complete an
electrical circuit (short circuit) and become quite hot. Exercise care in
handling any charged battery, particularly when placing it inside a
pocket, purse or other container with metal objects.
Exercise care when removing NiMH or AA batteries. Do not use sharp or
conductive tools to remove either of these batteries.
Battery Charger Safety Instructions:
Save these Instructions
1. Do not expose the charger to rain or snow.
2. Do not operate or disassemble the charger if it has received a sharp
blow, or has been dropped or damaged in any way.
3. Never alter the AC cord or plug provided with the unit. If the plug will
not fit the outlet, have the proper outlet installed by a qualified
electrician. An improper condition can result in a risk of electric shock.
4. To reduce the risk of damage to the cord or plug, pull the plug rather
than the cord when disconnecting the charger from the AC receptacle.
5. To reduce the risk of electric shock, unplug the charger from the outlet
before attempting any maintenance or cleaning.
6. Use of an attachment not recommended or sold by Motorola may result
in a risk of fire, electric shock or personal injury.
7. Make sure the cord is located so it will not be stepped on, tripped over
or subjected to damage or stress.
8. An extension cord should not be used unless absolutely necessary. Use
of an improper extension cord could result in a risk of a fire and/or
electric shock. If an extension cord must be used, make sure that:
• The pins on the plug of the extension cord are the same number, size and
shape as those on the plug of the charger.
• The extension cord is properly wired and in good electrical condition.
• The extension cord size is 18 AWG for lengths up to 100 feet, and 16 AWG
for lengths up to 150 feet.
9. The supply cord of the AC adaptor cannot be replaced. If the cord is
damaged, call customer service at 1-800-638-5119 (U.S. and Canada).
FCC Licensing Information
Your Motorola radio operate s on General Mobile Radio Service (GMRS)
frequencies and is subject to the Rules and Regulations of the Federal
Communications Commission (FCC). The FCC requires that all operators
using GMRS frequencies obtain a radio license before operating their
equipment. To obtain the FCC forms, please request Form 605 and 159,
which includes all of the forms and instructions you will need.
If you wish to have the document faxed or mailed, or if you have
questions, please use the following contact information:
For a fax:
For mail service:
If you have
Contact the
Call the FCC
questions about
Fax-0n-Demand
Forms Hotline
the FCC License:
system
Call the FCC
1-202-418-0177
1-800-418-FORM
1-888-CALL-FCC
(3676)
(225-5322)
You may also visit the FCC’s Web site at www.fcc.gov.
Changes or modifications not expressly approved by Motorola may void
the user’s authority granted by the FCC to operate this radio and should
not be made. To comply with FCC requirements, transmitter adjustments
should be made only by or under the supervision of a person certified as
technically qualified to perform transmitter maintenance and repairs in
the private land mobile and fixed services as certified by an organization
representative of the user of those services. Replacement of any
transmitter component (crystal, semiconductor, etc.) not authorized by
the FCC equipment authorization for this radio could violate FCC rules.
Note: Use of this radio outside the country where it was intended to be
distributed is subject to government regulations and may be prohibited.
Control Buttons
Use
to:
Use
to:
• Turn radio on/off
• Select Menu options
• Increase or decrease volume
• Exit the Menu (when
pressed while in last
Menu)
• Lock and unlock the
LED Indicator
keypad (when held
down and not in a
Menu)
Use Push to Talk
to:
Accessory Jack
• Talk
• Save a setting
Hi
• Boost the
radio’s power
Microphone
Lo
Use
to:
Use Monitor
to:
• Transmit call tone
• Monitor the selected
is on other channels
• Scan to see if anyone
channel for activity
Speaker
Use
and
to:
• Scroll through menus
• Turn weather on/off
Display Screen Guide
Numbers for
Channel, Call Tone
Numbers for
Codes
ON
OFF
- On/Off for each feature
- Battery Meter
- Vibrate
- Channel Power Indicator
- Scan
- Lock
- Talk Confirmation Tone
- Call Tone, Keypad Tone
QT
(Roger Beep)
- Weather Alert
iVOX
- Noise Filtering
- Hands-Free Use
Without Accessories
VOX
- Hands-Free Use
With Accessories
Getting Started
Installing the Batteries
Each radio uses 1 NiMH rechargeable battery pack or 3 AA alkaline
batteries and beeps when the batteries are low.
Installing NiMH Rechargeable Battery Pack
1. Turn the radio off.
2. With the back of the radio facing you, lift the battery cover latch up and
remove the cover.
3. Remove the battery pack from the clear plastic bag (Do not
disassemble or unwrap the battery pack).
4. Insert the NiMH battery pack with the diagram facing you. (The ribbon
should be underneath the battery pack and should wrap around the
right side of the pack for easy removal.)
5. Reposition the battery cover and press down to secure.
Installing the Three AA Alkaline Batteries
1. Turn the radio off.
2. With the back of the radio facing you, lift the battery cover latch up
and remove the cover.
3. Insert the three AA alkaline batteries with + and - polarity as
shown inside the battery compartment. (The ribbon should be
underneath the AA alkaline batteries and should wrap around the
right side of the batteries.)
4. Reposition the battery cover and press down to secure.
Radio Battery Meter
The radio battery icon shows the battery charge level, from full
to
empty
. When the radio has one segment left, the radio chirps
periodically or after releasing
(Low Battery Alert).
Removing the NiMH Battery Pack
1. Turn the radio off.
2. With the back of the radio facing you, lift the battery latch up to release
the battery cover and remove the cover.
3. Pull the ribbon towards you. Carefully and slowly, lift the ribbon to
remove the NiMH battery pack.
4. Reposition the battery cover and press down to secure.
Removing the Three AA Batteries
1. Turn the radio off.
2. With the back of the radio facing you, lift the battery latch up to
release the battery cover and remove the cover.
3. Pull the ribbon towards you. Carefully and slowly, lift the ribbon to
remove the AA alkaline batteries.
4. Reposition the battery cover and press down to secure.
Notes
• Exercise care when removing NiMH or AA batteries. Do not use
sharp or conductive tools to remove either of these batteries.
• Remove the batteries before storing your radio for extended periods
of time. Batteries corrode over time and may cause permanent
damage to your radio.
Using the Battery Charger
The battery charger provides drop-in charging convenience for NiMH
batteries and can be placed on any flat surface, such as a desk or
workbench. Charge the NiMH battery overnight (at least 16 hours) before
using it for the first time. After the initial charge, an empty battery is fully
charged within 14 hours.
1. Follow the steps above to install a NiMH Battery Pack.
2. Plug the AC power supply cord into the jack on the desk stand.
3. Plug the AC power supply into a standard wall outlet.
4. With a radio facing forward, slide it into one of the charging pockets.
Using the Car Charger (Optional accessory)
1. Plug DC cord into car’s 13.8V DC outlet or cigarette lighter socket.
2. Snap charger to rear of radio over charging contacts. Charger fits in
one direction only.
3. An empty battery is fully charged in 14 hours.
Notes
• The red light will glow continuously to indicate the radio is correctly
connected and charging. The light will remain red after the battery
pack is fully charged.
• When moving between hot and cold temperatures, do not charge the
battery until the battery temperature acclimates (usually about 20
minutes).
• For optimal battery life, remove the radio from the charger within 16
hours. Do not store the radio while connected to the charger.
• Turn radio off while charging.
Attaching and Removing the Belt Clip
1. Attach belt clip to pocket or belt strap.
2. Align the belt clip post with the hole in the back of the radio.
3. Gently push until the clip clicks in place.
To Remove
1. Push down on the release tab at the top of the belt clip to release
the catch.
2. Pull the belt clip away from the back of the radio.
Turning Your Radio On and Off
Turn
clockwise to turn the radio on and counterclockwise to turn
the radio off.
1. In the ON position, the radio chirps and briefly shows all feature icons
available on the radio.
2. The display screen then shows the current channel, code and all
features that are enabled.
Setting the Volume
Press and hold
for three seconds while rotating
until you
reach a comfortable listening level.
1. Rotate
clockwise to increase the volume.
2. Rotate
counterclockwise to decrease the volume.
Do not hold the radio close to your ear. If the volume is set to an
uncomfortable level, it could hurt your ear.
Talking and Listening
To communicate, all radios in your group must be set to the same channel
and Interference Eliminator Code.
1. To talk, press and hold
.
2. When you are finished talking, release
.
For maximum clarity, hold the radio two to three inches away from your
mouth and speak directly into the microphone. Do not cover the
microphone while talking.
Talk Range
Your radio is designed to maximize performance and improve transmission
range. Do not use the radios closer than five feet apart.
Power Boost
To boost your radio’s power up to high power, press the top portion of the
button when talking. If you know your party is close by, you can
conserve your battery’s energy by pushing the lower part of the
button to use less power.
N N o o t t e e : : If you are on an FRS only channel (see channels and frequencies
chart) the radio will only use low power when either portion of the
is pressed.
Monitor Button
Pressing and holding
for three seconds allows you to listen to the
volume level of the radio when you are not receiving. This allows you to
adjust the volume, if necessary. You can also press
to check for
activity on the current channel before you talk.
Push to Talk
Timeout Timer
To prevent accidental transmissions and save battery life, the radio emits
a continuous warning tone and stops transmitting if you press
for 60
continuous seconds.
Menu Options
Selecting the Channel
Your radio has 22 channels. Channels 8-14 are FRS low power only and
all other channels are GMRS. (See the "Channels and Frequencies" table
on overleaf for details.)
When you press the bottom portion of the
all channels are low
power
. If you press the top portion of the
to boost the
power GMRS channels will be high power
.
Note: When on FRS only channel top or bottom press of
will only
be lower power
.
1. With the radio on, press
. The current channel flashes.
2. Press
or
and select an unused or quiet channel.
3. Press
to save the channel setting or
to continue set up.
Selecting The Interference Eliminator Code
Interference Eliminator Codes help minimize interference by blocking
transmissions from unknown sources. Your radio has 121 Interference
Eliminator Codes. Codes 1 – 38 are the standard analog codes that
appear on other FRS/GMRS radios. Codes 39 – 121 are additional digital
codes added for superior interference protection. 0 is the off position, no
analog or digital codes are enabled.
To set the code for a channel:
1. Press
until the code starts to flash.
2. Press
or
to select the code.
3. Press
to save the code setting or
to continue set up.
You can set a different code for each channel using this procedure. An
extended press of
or
allows you to scroll through the
Interference Code rapidly so you can quickly reach the code you want.
Note: You must set the Interference Eliminator Code to 0 on a radio that
uses Interference Eliminator Codes to communicate with radios that do
not have Interference Eliminator Codes. Select 0 for “no tone, no code”
and OFF will flash on your radio’s display.
Setting and Transmitting Call Tones
Your radio can transmit different call tones to other radios in your group
so you can alert them that you want to talk. You have 10 call tones from
which to choose.
To set a call tone:
1. With the radio on, press
three times until the current call tone
setting (0 - 10) flashes and
appears.
2. Press
or
to change and hear the call tone.
3. Press
to set the new call tone or
to continue set up.
To transmit your call tone to other radios set to the same channel and
Interference Eliminator Code as your radio, press
.
Note: Setting the call to 0 disables the call tone feature.
Hands-Free Use Without Accessories (iVOX)
You can use the iVOX feature to transmit hands-free without the need for
any headset accessories. Once iVOX is turned on, the radio detects your
voice and transmits when you speak into the internal microphone.
1. Press
until iVOX appears on the display. The current setting
On/Off will flash.
2. Press
or
to select On or Off.
3. Press
to set or
to continue set up.
Hands-Free Use With Accessories (VOX)
You can transmit hands-free more reliably with the use of optional
headset accessories. Once VOX is turned on, the radio detects your
voice and transmits when you speak.
Many accessories (sold separately) are available for your radio. For more
information, visit our Web site at www.motorola.com or
shop.giantintl.com.
1. Turn the radio off and plug the VOX accessory into the accessory port.
2. Turn the radio on. VOX shows on the display.
3. Adjust the volume appropriately by rotating
. Lower the volume
before placing the accessory on your head or in your ear.
4. To turn off, simply remove accessory.
Note: There is a short delay between the time you start talking and when
the radio transmits. There is a short delay before the transmission is
completed.
Setting the Sensitivity Level When in VOX or iVOX Mode
Adjusting the radio’s sensitivity level helps minimize the possibility of
unintended noises triggering a transmission and helps the radio pick up
soft voices.
1. Press
until VOX/iVOX and the level setting (1-3) appear on
the display.
2. Press
or
to select the sensitivity level.
3. Press
to set or
to continue set up.
3 = High Sensitivity for quiet environments
2 = Medium Sensitivity for most environments
1 = Low Sensitivity for noisy environments
Note: When you connect a headset, the radio is automatically set to the
last chosen sensitivity level.
Continued on back
T9500 / T9550 / T9650

Advertisement

loading

Summary of Contents for Motorola TalkAbout T9500

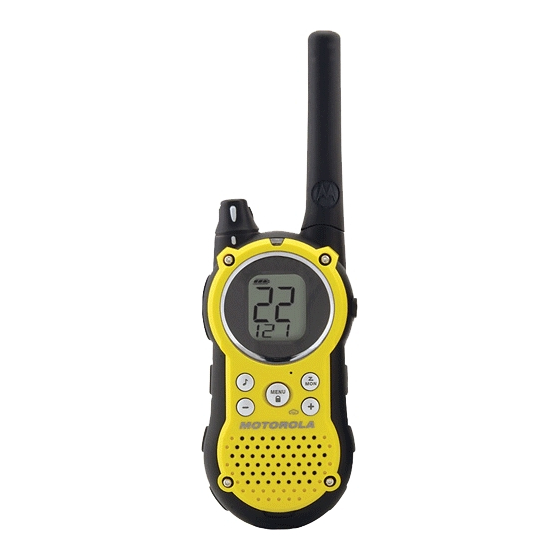
  • Page 1 ® KEM PK14190 70 iVOX Read This Information Before Using Your Radio.

This manual is also suitable for:

Talkabout t9550Talkabout t9650