
Related Manuals for Hello Kitty KT2051P


Summary of Contents for Hello Kitty KT2051P
- Page 1 AM/FM DUAL ALARM CLOCK RADIO WITH DIGITAL TUNING USER MANUAL KT2051P THIS IS NOT A TOY ! CAUTION: Electrically Operated Product – Please use care when plugging AC adapter into AC outlet.
-
Page 2: Important Safety Instructions
WARNING TO PREVENT FIRE OR SHOCK HAZARD, DO NOT USE THIS PLUG WITH AN EXTENSION CORD, RECEPTACLE OR OTHER OUTLET UNLESS THE BLADES CAN BE FULLY INSERTED TO PREVENT BLADE EXPOSURE. TO PREVENT FIRE OR SHOCK HAZARD, DO NOT EXPOSE THIS APPLIANCE TO RAIN OR MOISTURE. - Page 3 WARNING This is an alarm clock radio, not a toy! To avoid risk of fire, burns, personal injury and electric shock it should not be played with or placed where small children can reach it. COMPLIANCE WITH FCC REGULATION This device complies with Part 15 of the FCC Rules. Operation is subject to the following two conditions: (1) this device may not cause harmful interference, and (2) this device must accept any interference received, including interference...
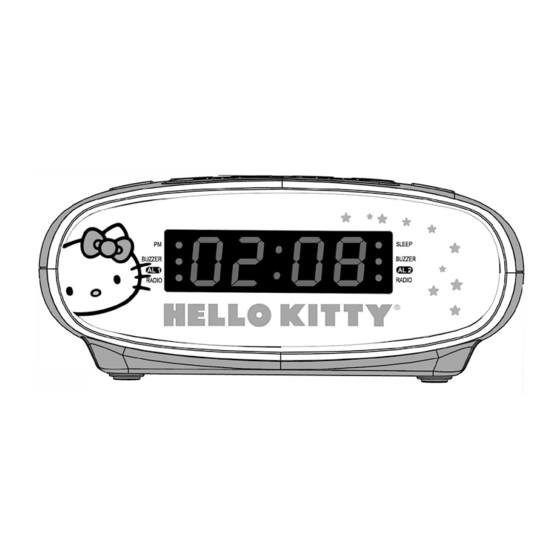
- Page 4 FUNCTIONS AND CONTROLS SNOOZE / SLEEP 10 AUX IN JACK 11 BACKUP BATTERY SOURCE / COMPARTMENT (2 X DC 1.5V “AAA” BATTERIES) VOLUME - / ALARM 2 (AL 2) 12 PM INDICATOR VOLUME + / ALARM 1 (AL 1) 13 BUZZER ALARM 1 INDICATOR MINUTE / TUNE - 14 RADIO ALARM 1 INDICATOR HOUR / TUNE +...
- Page 5 OPERATING INSTRUCTIONS POWER REQUIREMENTS This unit operates on a 120V AC adapter. Plug the AC adapter (included) into a household outlet AC source. This unit is equipped with a battery back-up system, requiring two DC 1.5V “AAA” type batteries (not included). Insert the battery in the BATTERY COMPARTMENT, making certain that the positive and negative (+ and -) sides are properly aligned.
-
Page 6: Setting Alarms
SETTING ALARMS In standby mode, tap the ALARM 1 or ALARM 2 button once to check the alarm time and wake up option (Buzzer, Radio, Alarm off). 1. Press and hold the ALARM 1 or ALARM 2 button for 2 seconds when the alarm time is showing. -
Page 7: Auxiliary Input
LISTENING TO THE RADIO Notes: Ensure that the FM wire antenna is completely tangle free and extended to have the best FM reception. The AM band uses an internal, directional antenna. Rotate the entire radio for best AM reception. 1. - Page 8 Notes: If you connect this unit to the Line-Out Jack of your external device, then you only need to adjust the volume control of this unit. If you connect this unit to the Headphone Jack of your external device, you may need to adjust both the volume control of your external device and the volume control of this unit to find the most desirable volume setting.
- Page 9 90 DAY LIMITED WARRANTY AND SERVICE VALID IN THE U.S.A. ONLY SPECTRA MERCHANDISING INTERNATIONAL, INC. warrants this unit to be free from defective materials or factory workmanship for a period of 90 days from the date of original customer purchase and provided the product is utilized within the U.S.A.
- Page 10 It is recommended that you contact SPECTRA first at 1-800-777-5331 or by email at custserv@spectraintl.com for updated information on the unit requiring service. In some cases the model you have may be discontinued, and SPECTRA reserves the right to offer alternative options for repair or replacement. SPECTRA MERCHANDISING INTERNATIONAL, INC.
Need help?
Do you have a question about the KT2051P and is the answer not in the manual?
Questions and answers