
Related Manuals for Jensen JSBW-750

Summary of Contents for Jensen JSBW-750
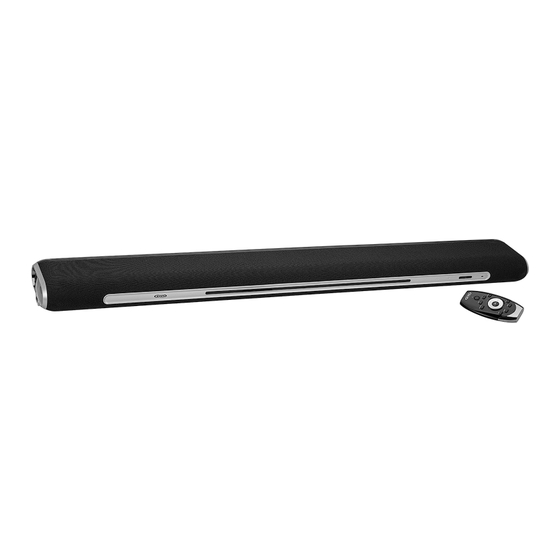
- Page 1 WALL MOUNTABLE 2.1 CHANNEL BLUETOOTH SOUNDBAR SPEAKER WITH BUILT-IN SUBWOOFER USER MANUAL JSBW-750 PLEASE READ THIS USER MANUAL COMPLETELY BEFORE OPERATING THIS UNIT AND RETAIN THIS BOOKLET FOR FUTURE REFERENCE.
-
Page 2: Important Safety Instructions
WARNING TO PREVENT FIRE OR SHOCK HAZARD, DO NOT USE THIS PLUG WITH AN EXTENSION CORD, RECEPTACLE OR OTHER OUTLET UNLESS THE BLADES CAN BE FULLY INSERTED TO PREVENT BLADE EXPOSURE. TO PREVENT FIRE OR SHOCK HAZARD, DO NOT EXPOSE THIS APPLIANCE TO RAIN OR MOISTURE. The Caution Marking is located at the bottom of the apparatus. - Page 3 16. Do not overload wall outlet. Use only power source as indicated. 17. Use replacement part as specified by the manufacturer. 18. The product may be mounted to a wall only if recommended by the manufacturer. 19. Upon completion of any service or repairs to this product, ask the service technician to perform safety checks.
-
Page 4: Compliance With Fcc Regulations
COMPLIANCE WITH FCC REGULATIONS FCC ID OG5MW1481 This device complies with Part 15 of the FCC Rules. Operation is subject to the following two conditions: (1) This device may not cause harmful interference, and (2) This device must accept any interference received, including interference that may cause undesired operation. - Page 5 The serial number of this product is found on its bottom cover. You should note the serial number of this unit in the space provided as a permanent record of your purchase to aid in identification in the event of theft of loss. Model Number : JSBW-750 Serial Number :...
-
Page 6: Location Of Controls
LOCATION OF CONTROLS MID-HIGH RANGE SPEAKERS RCA LINE-IN JACKS WOOFER SPEAKERS RCA COAXIAL JACK REMOTE CONTROL SENSOR 10 AUX-IN JACK - (volume down) 11 OPTICAL–IN JACK + (volume up) 12 MAIN POWER ON/OFF SWITCH STANDBY/MODE BUTTON 13 POWER CORD STATUS INDICATOR 14 USB JACK (for 1A USB charging) RED = STANDBY BLUE = BLUETOOTH MODE... -
Page 7: Remote Control
REMOTE CONTROL MOVIE COAX MUTE OPTICAL PAIR AUX/RCA MUSIC Remove the protective tab to activate remote The Remote Control has a pre-installed lithium CR2032 battery. Remove the protective tab to activate the remote control Battery Installation 1. Use a screwdriver to remove the screw (#A). 2. -
Page 8: Battery Warning
BATTERY WARNING 1. Be sure that the batteries are installed correctly. Wrong polarity may damage the unit. 2. Use only the size and type of batteries specified. 3. If the unit is not to be used for an extended period of time, remove the batteries. Old or leaking batteries can cause damage to the unit and may void the warranty. -
Page 9: Connecting The Power
• Set the MAIN POWER ON/OFF SWITCH (#12) to the OFF position if you want to turn off the JSBW-750 completely. Note : When the JSBW-750 is sitting idle, and no input signals are being received for 60 minutes, the unit will automatically switch to Standby mode. -
Page 10: Bluetooth Operation
BLUETOOTH OPERATION Pairing a Bluetooth enabled device with the JSBW-750. 1. Turn on the JSBW-750 and select BT mode. The STATUS INDICATOR (#7) will light up Blue and begin flashing. The JSBW-750 will automatically go into Pairing/Discoverable mode. 3. Turn on the Bluetooth function for the device you want to link to, and enable the search or scan function to find the JSBW-750. - Page 11 4. Press the “▲” / “ ” BUTTON (#12/10) on remote control or tap the “+”/ “-” BUTTON (#5/4) on the main unit to adjust the audio level. NOTE : If no sound is heard from the JSBW-750, and the status indicator light is rapidly flashing, Make sure the audio (digital output) setting of your source player (e.g.
-
Page 12: Usb Charging Port
Power Saver Mode If the JSBW-750 is sitting idle, and no input signals are being received for 60 minutes, the unit will automatically switch to Standby mode to save energy. NOTE: Please note that a low volume setting from the audio source may be recognized as “no audio signal”: this will affect the capability of signal detection from the device... -
Page 13: Wall Mounting
NOTE : At ON mode, press and hold the Play/Pause BUTTON (#5) on the JSBW-750 remote control for about 10 seconds to exchange the L/R channels after this soundbar is mounted on a wall, the status indicator will flash twice when the L/R channels are exchanged. -
Page 14: Troubleshooting Guide
• If the cabinet becomes dusty wipe it with a soft dry dust cloth. Do not use any wax or polish sprays on the cabinet. • If the front panel becomes dirty or smudged with fingerprints it may be cleaned with a soft cloth slightly dampened with a mild soap and water solution. - Page 15 SPECTRA GREEN NOTICE At Spectra, environmental and social responsibility is a core value of our business. We are dedicated to continuous implementation of responsible initiatives with an aim to conserve and maintain the environment through responsible recycling. Please visit us at http://www.spectraintl.com/green.htm for more information on Spectra’s green initiatives or to find a recycler in your area.
- Page 16 This warranty gives you specific legal rights, and you may also have other rights which vary from state to state. TO OBTAIN SERVICE please remove all batteries (if any) and pack the unit carefully and send it freight prepaid to SPECTRA at the address shown below. IF THE UNIT IS RETURNED WITHIN THE WARRANTY PERIOD shown above, please include a proof of purchase (dated cash register receipt) so that we may establish your eligibility for warranty service and repair of the unit without cost.
Need help?
Do you have a question about the JSBW-750 and is the answer not in the manual?
Questions and answers