Advertisement
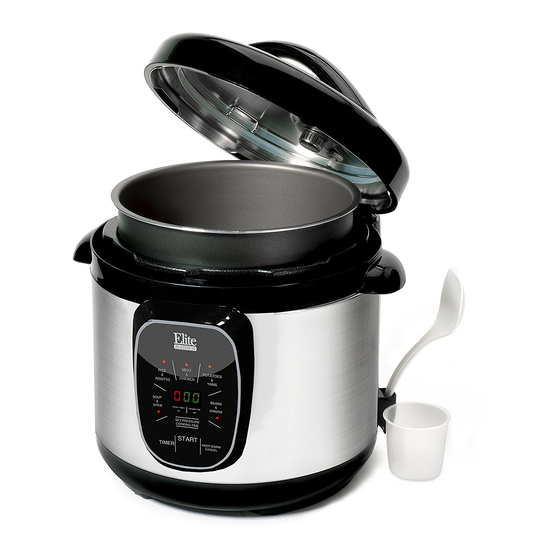
8 Qt. Digital
Pressure Cooker
8Qt. Digital Olla a Presión
Model EPC-807
INSTRUCTION MANUAL
Before operating your new appliance,
please read all instructions carefully and keep for future reference
IMPORTANT SAFEGUARDS
IMPORTANT SAFEGUARDS
When using pressure cookers, basic safety precautions should always be followed:
1.
Read all instructions before operation.
2.
Do not operate while unattended.
3.
Do not touch hot surfaces. Use handles or knobs.
4.
Close supervision is necessary when the pressure cooker is used near children.
5.
DO NOT allow children to operate under any circumstance.
6.
Do not place the pressure cooker in a heated oven.
7.
Extreme caution must be used when moving a pressure cooker containing hot liquids.
8.
Do not use pressure cooker for other than intended use.
9.
Never immerse product in water or other liquids.
10. This appliance cooks under pressure. Improper use may result in scalding injury.
11. Make certain unit is properly closed before operating. See Operating Instructions.
12. Do not fill the unit over 2/3 full. When cooking foods that expand during cooking such as rice or
dried vegetables, do not fill the unit over 1/2 full. Over filling may cause a risk of clogging the
vent pipe and developing excess pressure. Failure to follow this procedure can result in injury
to person(s) and/or damage to the unit.
13. Be aware that certain foods, such as applesauce, cranberries, pearl barley, oatmeal or other
cereals, split peas, noodles, macaroni, rhubarb, or spaghetti can foam, froth, and sputter, and
clog the pressure release device (steam vent). These foods should not be cooked in a pressure
cooker.
14. When the normal operating pressure is reached, turn the heat down so all the liquid which
creates the steam does not evaporate.
15. Always check the pressure release devices for clogging before use.
16. Do not open the pressure cooker until the unit has cooled and all internal pressure has been
released. If the handles are difficult to push apart, this indicates that the cooker is still
pressurized – do not force it open. Any pressure in the cooker can be hazardous. See
Operating Instructions.
17. Do not use this pressure cooker for pressure frying with oil.
18. DO NOT place the product near flammable materials or use in a humid environment.
19. DO NOT damage the Seal Belt and DO NOT replace it with anything other than the replacement
belt designated for this unit.
20. DO NOT tamper with the Steel Ring in the Lid (2) with any tools or external forces. If the Steel
Ring is damaged (2), please stop using immediately and replace the Lid.
21. Clean the Filter (20) regularly to keep the cooker clean.
22. NEVER use additional weight on the Pressure Limiting Valve (3) or replace the Pressure Limiting
Valve (3) with anything not intended for use with this unit.
23. The surface of contact between the Inner Pot (8) and the Electronic Heater (18) should always
be clean. DO NOT use the Inner Pot with other heating sources. DO NOT replace the Inner Pot
with a container other than what is recommended by the manufacturer.
24. The Inner Pot consists of a non-stick layer surface. To avoid scratching the non-stick surface,
please use wooden or plastic utensils.
25. Food should not be kept warm for more than 24 hours in order to maintain the freshness of the
food. The pressure cooker should not be used for more than 6 hours continuously. Serious
Injury and/or damage may occur if any safeguards are ignored.
1
Advertisement
Table of Contents

Related Manuals for Elite EPC-807


Summary of Contents for Elite EPC-807
- Page 1 8Qt. Digital Olla a Presión be clean. DO NOT use the Inner Pot with other heating sources. DO NOT replace the Inner Pot Model EPC-807 with a container other than what is recommended by the manufacturer. 24. The Inner Pot consists of a non-stick layer surface. To avoid scratching the non-stick surface, please use wooden or plastic utensils.
-
Page 2: About Your Pressure Cooker
Your Elite Pressure Cooker seals exchange or repair. The Pressure Discharging Device has activated. This is a safeguard to in steam to cook hotter and faster while maintaining important nutrients for healthier meals. -
Page 3: Parts And Features
PARTS & FEATURES BEFORE FIRST USE Working Maximum Keep Warm Preset Timer Pressure Pressure Temperature 0~70kPa 12 PSI 90kPa 140ºF ~ 175 ºF 1~9 Hours Remove packaging materials such as cardboard, plastics or Styrofoam and discard appropriately. Clean all the parts by wiping with a soft damp cloth or sponge and dry thoroughly. LID ASSEMBLY: How to open the lid: When the lid (2) of the cooker is at the Closed position (Figure 1), hold the Handle (1) and turn it clockwise until you reach the Opened-Lid position... -
Page 4: Preparing Your Pressure Cooker
PREPARING YOUR PRESSURE COOKER (cont.) BEFORE FIRST USE (cont.) How to install the lid: Hold the Lid (2) with both hands at the Closed Lid position and pull it Be certain the inner receptacle, where the Electronic Heater is upwards in a slanted position which leads to a height of 10cm between the Lid and the upper located, is clean before inserting the inner pot. - Page 5 OPERATING INSTRUCTIONS OPERATING INSTRUCTIONS (cont.) When cooking has completed, the pressure cooker will beep 3-times and automatically go to HOW TO USE THE Keep Warm. 10) The Keep Warm indicator light will begin to flash/flicker. This means the Pressure Cooker is There are five Menu Buttons programmed for your pressure cooker.
- Page 6 OPERATING INSTRUCTIONS (cont.) OPERATING INSTRUCTIONS (cont.) 10) When the unit has pressurized, it will begin to pressure-cook the food. The programmed time will begin to count down until it reaches zero. NOTES & TIPS #6: 11) When cooking is complete, the pressure cooker will beep 3-times and automatically go to Keep •...
- Page 7 OPERATING INSTRUCTIONS (cont.) OPERATING INSTRUCTIONS (cont.) • Wash jars thoroughly in hot water according to manufacturer’s instructions. • Prepare food and fill mason jars and seal according to manufacturer’s instructions. HOW TO USE THE FUNCTION: Always make sure there is 1-inch of headspace in the jars. Food can be prepared at an earlier time and kept warm inside the pressure cooker using the Keep o Use a thin utensil to release any trapped air between the food and the jar by pressing food Warm function.
-
Page 8: Cleaning And Maintenance
FAQ (FREQUENTLY ASKED QUESTIONS) CLEANING & MAINTENANCE Always make sure the Pressure Cooker is unplugged, depressurized and completely Is the Airtight/Exhaust Valve Knob on the top of the lid supposed to be loose? cooled down before dismantling. - If you are not cooking or using the unit, the Valve Knob will be loose. It will turn 360 Use a non-abrasive sponge or damp wash cloth to clean the exterior of the outer body (9) and the exterior surface of the pressure cooker. -
Page 9: Cooking Time Chart
FAQ (FREQUENTLY ASKED QUESTIONS) cont. COOKING TIME CHART Steam is being released around the rim of the lid during the pressurizing sequence. Courtesy of www.healthfoods.com Please note that all the below information is for your reference only and can be adjusted according to the user’s How do I fix this? preference. - Page 10 Vegetables Dried Beans and Other Legumes • • Always cook with at least 1-2 cups of liquid. Place beans or legumes in pressure cooker. Add 3 cups of water for each cup of beans or • legumes. Add 1-2 additional minutes to cooking time when preparing frozen vegetables. •...
- Page 11 Recipes included in this manual are courtesy of www.recipezaar.com and www.fastcooking.ca. 2 tablespoons olive oil Please visit the Peggy Under Pressure Blog for recipes and instructions featuring the Elite Platinum Pressure 2 lbs boneless sirloin steaks, cut into strips Cookers. www.peggyunderpressure.com salt &...
- Page 12 RECIPES RECIPES When cooking is complete, follow instructions to reduce pressure. In pressure cooker, combine water, soy sauce, onion, garlic, bay leaves, sherry wine, black Lift lid. Stir chicken mixture, then transfer just the chicken to serving platter, and cover to retain pepper and molasses.
- Page 13 RECIPES RECIPES Lock the lid in place and press the SOUP & STEW button. When cooking is complete, use the SPARE RIBS Quick release method and remove the lid. Serve in bowls, passing the garnishes separately. SERVES 6 -8 TRADITIONAL MEAT LOAF SERVES 4 Ingredients 1 cup brown sugar...
- Page 14 RECIPES RECIPES Directions: 1/2 teaspoon thyme 1/4 lb mushrooms, cleaned and sliced In a small bowl combine all the sauce ingredients. Heat the oil in the pressure cooker until very 1/2 teaspoon basil hot, add as many ribs at a time as will comfortably fit, and brown well. Pour off all fat, and then stir in the sauce.
- Page 15 RECIPES RECIPES SPICED APPLE CRUNCH PEARS STEWED IN RED WINE SERVES 3 SERVES 4 Ingredients A most elegant dessert when served with raspberry sauce. A fine ending to a special dinner. 1 cup dry bread crumbs (unseasoned) 1 lemon (juice and rind) 3 apples, sliced 1/4 cup sugar 1/4 cup butter, melted 2 cups water...
- Page 16 LIMITED WARRANTY* ONE (1) YEAR RETURN INSTRUCTIONS WARRANTY IS ONLY VALID WITH A DATED PROOF OF PURCHASE RETURNS: A. Any return of defective merchandise to the manufacturer must be processed 1. Your small kitchen appliance is built with precision, inspected and tested before accordingly by first contacting customer service (contact information shown below) to leaving our factory.
-
Page 17: Guardar Estas Instrucciones
IMPORTANTES MEDIDAS SE SEGURIDAD ACERCA DE SU OLLA A PRESION La olla a presión esta controlada digital y automáticamente y utiliza la última tecnología. Combina las NO coloque el producto cerca de materiales inflamables o utilizarlo en ambiente húmedo. El funciones y contra los saldos de las debilidades de los diferentes fogones de cocina como una olla a importe de los alimentos y el agua, que se pondrán en el Inner Pot deben estar estrictamente presión, el arroz y cocina de cocina de braising. - Page 18 PARTS & FEATURES ANTE DE UTILIZARLA Presión Mantenga Preestablecido Presión Máxima Caliente de Temporizador Temperatura 0~70kPa 12 PSI 90kPa 140ºF ~ 175 ºF 1~9 Horas Retire los materiales de embalaje, tales como cartón, plástico o espuma de poliestireno y desechar apropiadamente. Limpie limpiar todas las piezas con un trapo suave y húmedo o una esponja y secar completamente.
- Page 19 ANTE DE UTILIZARLA (cont.) COMO UTILIZAR LA OLLA PRESION (cont.) 4. Cierre la tapa. a) Asegúrese de que el sello de caucho anillo (21) está equipado adecuadamente en la parte interior de la tapa (2). b) Ajustar el sello de caucho anillo (21) en el interior de la tapa (2) para asegurarse de que está equipado uniformemente en la pista.
- Page 20 COMO UTILIZAR LA OLLA PRESION (cont.) COMO UTILIZAR LA OLLA PRESION (cont.) • Si el temporizador Preset no está activado, el sistema de calefacción ciclo se iniciará inmediatamente después de uno de los botones en el menú que se elija. 8.
-
Page 21: Limpieza Y Mantenimiento
• Cocine los mariscos en la cocina (también llamada cesta de vapor y añadir por lo menos LIMPIEZA Y MANTENIMIENTO ¾ de taza de liquido .Agregue grasa ligeramente para cocinar peces. Aproximadamente tiempo de Type of Mariscos Liberacion de presion Siempre asegúrese de que la olla a presión está... - Page 22 Rapido Release Sopa de Lentejas 8-10 Natural Release Kale, toscamente picada Lentejas rojas 120-12 Natural Release Rapido Release Okra, small pods Frijoles Lima Natural Release Rapido Release Cebollas Papas, 11/2-inch chunks Rapido Release Granos Antes de cocinar, remojar los frijoles en cuatro veces su volumen de agua tibia, o por lo menos Papas pequeñas completas Rapido Release cuatro horas antes de cocinar o durante la noche.
- Page 23 GARANTÍA LIMITADA * UN (1) AÑO INSTRUCCIONES DE DEVOLUCIÓN GARANTIA ES VALIDA CON UNA PRUEBA DE COMPRA FECHADA 1. Su aparato de cocina está construido con precisión, inspeccionados y probados antes DEVOLUCIONES: de salir de nuestra fábrica. A. Cualquier devolución de mercancía defectuosa al fabricante deben ser procesados apropiadamente contactando primero al servicio al cliente (información de contacto se 2.