Table of Contents
Advertisement
Advertisement
Table of Contents

Related Manuals for Blanco BM32CX


Summary of Contents for Blanco BM32CX
- Page 1 Instruction Manual for Convection Microwave BM32CX...
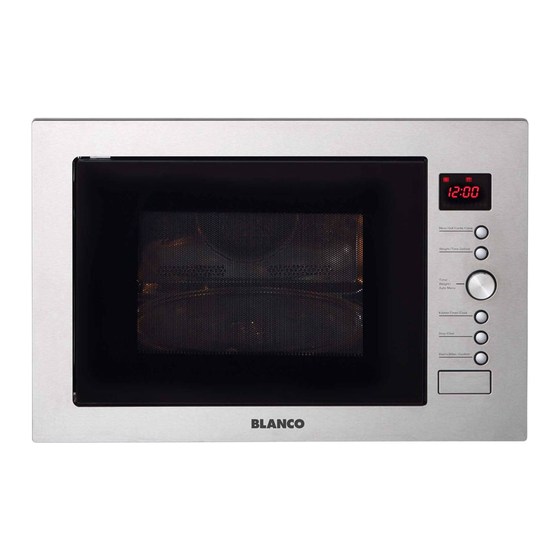
- Page 2 You will find that the clean lines and modern look of your Blanco microwave blends in perfectly with your kitchen décor. It is easy to use and performs to a high standard.
- Page 3 Read these instructions carefully before using your microwave oven, and keep it carefully. If you follow the instructions, your oven will provide you with many years of good service.
-
Page 4: Table Of Contents
TABLE OF CONTENTS 1\ PRECAUTIONS………………………………………………………………3 2\ SAFETY INSTRUCTIONS ………………………………………………….4 - WARNING ………………………………………………………………….4 - 5 - TO REDUCE THE RISK OF INJURY TO PERSONS……………………..6 - UTENSILS.....................7 -8 3\ SETTING UP YOUR OVEN………………………………………………..8 4\TURNTABLE INSTALLATIONS…………..…………………...…………..9 5\ INSTALLATION AND CO NNECTION……………………………….…..9 - INSTALLATION INSTRUCTIONS………….…………………………….…10 - INSTALLING THE MICROWAVE ………….……………………………….11 6\ OPERATION INSTRUCTIONS……………………………………....15 7\ TROUBLE SHOOTING …………………………………………………..22... -
Page 5: Precautions
If the apparatus is not maintained in a good state of cleanliness, its surface could be degraded and affect the lifespan of the apparatus and lead to a dangerous situation. Spec i f i cat i o n s BM32CX Model: Rated Voltage: 240V~50Hz... -
Page 6: Safety Instructions
2\SA FETY INSTRUCTIONS WA RNING To reduce the risk of fire, electric shock, injury to persons or exposure to excessive microwave oven energy when using your appliance, follow basic precautions, including the following: 1. Warning: Liquids and other foods must 14. - Page 7 23. Microwave heating of beverages can result in delayed eruptive boiling, therefore care must be taken when handling the container. 24.The appliance is not intended for use by persons (including children) with reduced physical , sensory or mental capabilities, or lack of experience and knowledge, unless they have been given supervision or instruction concerning use of the appliance by a person responsible for their safety.
-
Page 8: Warning
To Reduce the Risk of Injury to Persons Grounding Installation DA NGER 2)The extension cord must be a grounding- type 3-wire cord. Electric Shock Hazard 3)The long cord should be arranged so that Touching some of the internal components it will not drape over the counter top or can cause serious personal injury or death. -
Page 9: Utensils
UTENSIL S See the instructions on "Materials you can use in microwave oven or to be avoided in microwave oven." There may be certain non-metallic utensils that are not CAUTION safe to use for microwaving. If in doubt, you can test the Personal Injury Hazard utensil in question following the procedure below. -
Page 10: Setting Up Your Oven
Mat erials to b e avoided in microw av e oven Ut ensils Rem ark s Aluminum tray May cause arcing. Transfer food into microwave-safe dish. May cause arcing. Transfer food into microwave-safe dish. Food carton with metal handle Metal or metal- Metal shields the food from microwave energy. -
Page 11: Turntable Installations
4\TURNTABLE INSTALLATION a. Never place the glass tray upside down. The glass Hub (underside) tray should never be restricted. b. Both glass tray and turntable ring assembly must always be used during cooking. Glass tray c. All food and containers of food are always placed on the glass tray for cooking. -
Page 12: Installation Instructions
Installation Instructions Please Read the Manual Carefully Before Installation SCREW TRIM-KIT PLASTIC COVER Please Note Electrical connection The oven is fitted with a plug and must be only connected to a properly installed earthed socket. In accordance with the appropriate regulations, the socket must only be installed and the connecting cable must only be replaced by a qualified electrician. -
Page 13: Installing The Microwave
Installing The Microwave It is advisable to physically measure the actual product dimensions before cutting out for installation. Recommended Dimensions: Outside (exterior) 388H x 595W x 480Dmm Cavity (interior) 230H x 340W x 350Dmm Cut- out (proud mount) 380H x 560W x 550Dmm To Build In This Unit To A Cabinet The built-in cabinet shall not have a rear wall behind the appliance. - Page 14 To Underbench This Unit Please see the following diagrams and the ventilation requirements when under benching this unit. Please note that if these instructions are not followed the warranty will be null and void.
- Page 16 Do not trap or kink the power cord. Make sure that the oven is installed in the center of the cabinet. Trim-kit plastic cover Screw Installation Hole 2. Open the door; fix the oven to the cabinet with SCREW at the INSTALLATION HOLE of TRIM KIT.
-
Page 17: Operation Instructions
6\OPERATION INSTRUCTION This microwave oven uses modern electronic control to adjust cooking parameters to meet your needs better for cooking. 1.Clock Setting 1) In waiting state, press " KITCHEN TIMER/CLOCK" twice, "00:00" displays. Hour figures flash. 2) Turn " " to adjust the hour figures, the input time should be within 0--23. 3) Press "... - Page 18 3. Co mb i nat i o n Co o k i n g 1) Press the "MICROWAVE/GRILL /COMB I./CONVE. " key once, and "P100" display. 2) Press " MICROWAVE/GRILL /COMB I./CONVE." for times or turn " " to select the combination function.
- Page 19 Note: a. Cooking time cannot be input until the preheating temperature arrives. If the temperature arrives, door must be opened to input the cooking time. b. If the time not input in 5 minutes, the oven will stop preheating. The buzzer sound five times and turn back to waiting states.
- Page 20 6.Mu l t i -St ag e Co o k i n g Two stages can be maximumly set. If one stages is defrosting, it should be put in the first stage. The buzzer will ring once after each stage and the next stage will begin. Note: Auto menu and preheating cannot be set as one of the multi-stage.
- Page 21 8. Sp eedy Co o k i n g 1) In waiting state, press "STA RT/+30SEC./CONFIRM" key to cook with 100% power level for 30 seconds. Each press on the same key can increase 30 seconds. The maximum cooking time is 95 minutes. 2) In waiting state, turn "...
- Page 22 Auto menu Chart Menu Weight(g) Power Display 100% VEGETABLE FISH 100% MEAT 50(with cold water 450g) 100(with cold water 800g) PASTA 150(with cold water 1200g) 1(approx.230g) (approx.460g) 100% POTATO (approx.690g) 200ml 100% 400ml SOUP 600ml 100%Micro/Conve. ROAST 1000 1000 to 220 CHICKEN 1200 1200...
- Page 23 10. Defrost by W.T. 1) Press "WEIGHT/TIME DEFROST" pad once, the oven will display "dEF1",. 2) Turn " " to select the weight of food. At the same time, "g" will lights, The weight should be 100-2000g. 3) Press "STA RT/+30SEC./CONFIRM" key to start defrosting. 11.
-
Page 24: Trouble Shooting
7\TROUBLE SHOOTING It is forbidden to run the unit without any food inside. It is very dangerous. According to Waste of Electrical and Electronic Equipment (WEEE) directive, WEEE should be separately collected and treated. If at any time in future you need to dispose of this product please do NOT dispose of this product with household waste. - Page 25 We appreciate your feedback. Please review our products on www. blanco- australia.com...
Need help?
Do you have a question about the BM32CX and is the answer not in the manual?
Questions and answers