Table of Contents
Advertisement
Advertisement
Table of Contents
Troubleshooting

Subscribe to Our Youtube Channel
Related Manuals for Wacom DTU-1141


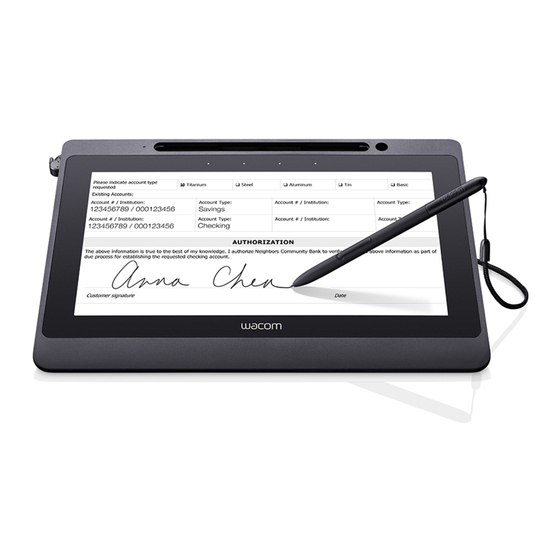
Summary of Contents for Wacom DTU-1141
- Page 1 Contents Contents Index USER’S MANUAL Interactive Pen Display Model: DTU-1141 and DTU-1031X Interactive Pen Display Installation Using the pen Using and customizing the Radial Menu Customizing the ExpressKeys Application-specific settings Troubleshooting Technical support options Contents Index...
-
Page 2: Contents Index
Wacom reserves the right to revise this publication without obligation to provide notification of such changes. Wacom does its best to provide current and accurate information in this manual. However, Wacom reserves the right to change any specifications and product configurations at its discretion, without prior notice and without obligation to include such changes in this manual. -
Page 3: Table Of Contents
Interactive pen display Contents Index CONTENTS ABOUT THE MANUAL Application-specific settings Navigating the manual Creating an application-specific setting Changing application-specific settings YOUR INTERACTIVE PEN DISPLAY Removing application-specific settings Pen display features Front view TROUBLESHOOTING Rear view Testing the interactive pen display Pen display incline Testing your pen Pen features... -
Page 4: About The Manual
For information on how best to use pen display features within a specific application, see the instructions in that application’s manuals. Wacom’s philosophy is to continually improve all of its products. As a result, engineering changes and improvements are made from time to time. Therefore, some changes, modifications, and improvements may not be covered in this document. -
Page 5: Navigating The Manual
Interactive pen display Contents Index NAVIGATING THE MANUAL Use the navigation controls to move through the manual: Go to front page. Go to table of contents. Contents Go to index. Index Go back to previous view. Page back, or page forward. ®... -
Page 6: Your Interactive Pen Display
YOUR INTERACTIVE PEN DISPLAY This manual describes the installation of interactive pen display DTU-1141 or DTU-1031X. The Wacom Control Panel enables you to customize your pen and pen display settings. To learn more, see customizing. Pen display features Pen display incline... -
Page 7: Front View
Gently press the pen into the compartment. Take care not to damage the pen nib. Note: The DTU-1141 pen has a side switch, and the DTU-1031X pen does not. The DTU-1141 pen can be used with the DTU-1031X. To obtain a DTU-1141 pen, please contact your Wacom representative. -
Page 8: Rear View
Index REAR VIEW The features of your DTU-1141 are illustrated below and listed in the Pen Display Features box. You can connect a security cable to the Security slot to prevent theft. The pen can be secured to the pen display through the pen tether holes with the pen tether provided (see Tether). -
Page 9: Pen Display Incline
You may want to place the pen display flat on your desk while you work. However, the leg stand on the back allows you to adjust your pen display to a different angle for working and viewing. Both the DTU-1031X and the DTU-1141 have a single leg stand. The diagram shows the leg stand for the DTU-1141. -
Page 10: Pen Features
Note: The DTU-1141 pen has a side switch, and the DTU- 1031X pen does not. The DTU-1141 pen can be used with the DTU-1031X. To obtain a DTU-1141 pen, please contact your Wacom representative. -
Page 11: Installation
Macintosh. OS X, v10.7 or greater. Available USB port, and CD-ROM drive. Note: Wacom recommends that you use both USB connectors to ensure adequate power for the pen display. However, your system may operate satisfactorily with just one USB connector attached to your computer. -
Page 12: Step 1: Pen Display Installation
4. If you do not use the provided CD for Wacom tablet driver installation, for example if you download the Wacom driver from the Wacom website, DisplayLink or MCT will not install. You will need to download the DisplayLink driver, or the MCT driver, and install it separately. -
Page 13: Step 2: Pen Tablet Installation
11. To change the brightness of the pen display, adjust the Brightness setting in the Wacom Control Panel (see Customizing). Note: Windows: If you are using the pen display as a secondary display, you may first need to enable the pen display in your display properties Control Panel. -
Page 14: Adding Other Display Devices
Interactive pen display Contents Index ADDING OTHER DISPLAY DEVICES You can connect another display device to your computer’s VGA or DVI connector for use with the pen display. When working with more than one monitor, the pen display will map to the monitors based on how your system is configured. -
Page 15: Working With The Interactive Pen Display
Interactive pen display Contents Index WORKING WITH THE INTERACTIVE PEN DISPLAY As you work with the pen display you can rest your hand lightly on the display screen, just as if it were a sheet of paper. Because the pen display surface will be a little higher than your desk, consider adjusting the height of your desk or chair to assure comfortable use of the device. -
Page 16: Using The Pen
Interactive pen display Contents Index USING THE PEN The pen is cordless, battery-free, and senses the amount of pressure you apply to the tip. Holding the pen Positioning Clicking Dragging Using the pen switch Working with pressure sensitivity Working with multiple monitors HOLDING THE PEN Hold the pen like you would a normal pen or pencil. -
Page 17: Clicking
Interactive pen display Contents Index CLICKING Tap the display screen once with the pen tip, or touch the pen to the display screen with enough pressure to register a click. Windows tip: To make navigating with the pen easier, configure Windows to select when the pen is over an icon and to launch the icon with a single click. -
Page 18: Using The Pen Switch
Wacom Control Panel. See customizing. Note: The DTU-1141 pen has a side switch, and the DTU-1031X pen does not. The DTU-1141 pen can be used with the DTU-1031X. To obtain a DTU-1141 pen, please contact your Wacom representative. -
Page 19: Using The Expresskeys
Please note that there are no ExpressKeys on the DTU-1031X. Default settings are shown by ExpressKey numbers, which are numbered 1 through 4 from left to right and shown in Front view. Use the Wacom Control Panel to set other functions for the ExpressKeys (see Customizing). ExpressKey Number Function... -
Page 20: Customizing
After mastering the basics of using your pen on the interactive pen display, you may want to customize the way your product works. This chapter describes how to use the Wacom Control Panel to adjust your pen display and pen settings. -
Page 21: Control Panel Overview
Contents Index CONTROL PANEL OVERVIEW Use the Wacom Control Panel to customize the pen display. When you open the Control Panel, an icon for the pen is displayed in the T list and the appropriate tabs are displayed. To customize the pen and pen display, make your changes to the tab controls. Experiment with different settings to find what works best for you. -
Page 22: Interactive Pen Display
Interactive pen display Contents Index Control panel lists and tabs: The Wacom Control Panel T , and A lists allow you to ABLET PPLICATION select the pen display or tablet, tool, or application for which you want to change settings. -
Page 23: Calibrating And Adjusting The Pen Display
The calibration setting applies to all applications. 1. Open the Wacom Control Panel. If more than one pen display is installed on your system, select the unit you are working with from the T list. -
Page 24: Customizing The Pen
CUSTOMIZING THE PEN To customize your pen, first open the Wacom Control Panel using the pen. The pen will be selected in the list and the appropriate tabs will be displayed. Select a tab and choose from the available options. -
Page 25: Advanced Tip Pressure Settings
Interactive pen display Contents Index ADVANCED TIP PRESSURE SETTINGS To customize tip pressure settings, select the P and click on the D ... button. The options within the ETAILS dialog box enable you to change the tip pressure sensitivity and click threshold settings ETAILS independently. -
Page 26: Customizing Pen Mode And Options
Choose Right or Left for right-handed or left-handed orientation. • On the DTU-1031X, use the Brightness Adjustment slider to set your preferred brightness for the screen. • On the DTU-1141, adjust the brightness with the brightness control in the DisplayLink control panel. Contents Index... -
Page 27: Customizing The Expresskeys
Interactive pen display Contents Index CUSTOMIZING THE EXPRESSKEYS To customize the ExpressKeys on the DTU-1141 select the E tab. Each key can be customized XPRESS to perform a Display Toggle, modifier, keystroke, or other function. Please note that there are no ExpressKeys on the DTU-1031X.. -
Page 28: Function Settings
Interactive pen display Contents Index FUNCTION SETTINGS The following options are available for pen or Radial Menu settings. Not all options are available for all controls or pen display models. FUNCTION NAME DESCRIPTION LICKS • Simulates a primary mouse button click. LICK •... -
Page 29: Interactive Pen Display
Interactive pen display Contents Index FUNCTION NAME DESCRIPTION Enables you to simulate modifier keys such as S , or C for Windows, or ODIFIER HIFT , and for Macintosh). Many applications use SHIFT OPTION COMMAND CONTROL modifier keys to constrain the size or placement of objects. Choose one or more modifier key options. -
Page 30: Interactive Pen Display
When selected, your product can be used either as a pen display (the screen cursor is positioned at the pen tip location) or as a standard Wacom tablet (the screen cursor can be moved across the entire desktop or additional displays). See working with Display Toggle. -
Page 31: Interactive Pen Display
Interactive pen display Contents Index FUNCTION NAME DESCRIPTION Toggles between pen mode mouse mode. When first setting the pen switch to OGGLE ..., the M dialog box is displayed and you can adjust the OGGLE OUSE mouse acceleration and speed. Sets the screen cursor tracking speed when in mouse mode. -
Page 32: Using And Customizing The Radial Menu
Interactive pen display Contents Index USING AND CUSTOMIZING THE RADIAL MENU To display the Radial Menu, set the pen switch or ExpressKey to the R function (this is the ADIAL default for ExpressKey 1). Whenever you press the switch or ExpressKey, the Radial Menu is displayed at the screen cursor position. -
Page 33: Working With Display Toggle
For example, your product can be used as a pen display where the screen cursor is positioned at the pen tip location, or toggled for use as a standard Wacom tablet where the screen cursor can be moved across the entire desktop or additional displays. -
Page 34: Application-Specific Settings
Interactive pen display Contents Index APPLICATION-SPECIFIC SETTINGS You can customize your pen for use with a particular application. For example, you may prefer a firm pen tip pressure setting in one application and a soft pressure setting in another. The A list enables PPLICATION you to add an individual application to the list and then customize your settings for that application. -
Page 35: Creating An Application-Specific Setting
Interactive pen display Contents Index CREATING AN APPLICATION-SPECIFIC SETTING To create an application-specific setting, first choose the pen display and pen for which you want to create an application-specific setting. Then click on the A list’s [ + ] button to display the A PPLICATION dialog box. -
Page 36: Changing Application-Specific Settings
Interactive pen display Contents Index CHANGING APPLICATION-SPECIFIC SETTINGS To change pen settings for a specific application, select P and the application and then customize the tab settings. REMOVING APPLICATION-SPECIFIC SETTINGS To remove an application-specific setting: 1. In the T list, select the P . -
Page 37: Troubleshooting
See obtaining driver downloads. 5. If you have tried the suggestions in this guide and still cannot resolve the problem, contact Wacom for Technical Support. See the technical support options for information on where to obtain support for your region. -
Page 38: Testing The Interactive Pen Display
Make sure that your computer is turned on. The LED will light blue when the proper video signal is received. • Make sure that the Wacom tablet and DisplayLink or MCT drivers are installed properly. • Make sure the USB cable is firmly connected to the pen display and computer. -
Page 39: Testing Your Pen
[ – ] button. After the pen has been removed, place it back onto the display screen surface and the pen will be re-added to the T list with its default settings. Open the Wacom Control Panel and click on the A button. In the dialog box that appears, click on the BOUT ... -
Page 40: Display Troubleshooting
Verify that the USB cable is connected to the pen display, and that the pen display is connected to your computer. • Verify that the Wacom tablet driver and DisplayLink or MCT driver were installed correctly. You can also download and install the DisplayLink driver from www.DisplayLink.com,... -
Page 41: Pen Tablet Troubleshooting
If a USB port is not available on your computer you will need to add a an available USB port. USB hub or USB card. However, Wacom recommends using USB ports on your computer instead of a USB hub whenever possible. -
Page 42: Interactive Pen Display
(0.2 inch) of the pen display active area. Do this without pressing down on the pen tip. In the Wacom Control Panel, verify that the switch is set to the proper function you are expecting to occur for the application and tool you are using. -
Page 43: Interactive Pen Display
Interactive pen display Contents Index When using the pen display on Set the pen switch to , then press the switch to cycle ISPLAY OGGLE a multiple monitor system, you between pen control for the pen display and your other displays. cannot use the pen to control You can also use your pen to control the other monitors in mouse the other monitor(s). -
Page 44: Windows-Specific Problems
Interactive pen display Contents Index WINDOWS-SPECIFIC PROBLEMS You suspect the pen display Use the Wacom tablet Preference File Utility to work with your preferences may be preferences. corrupted, or want to make Close any open applications. certain that all settings are at Windows 8: From the Windows 8 Start screen, click the W their factory defaults. -
Page 45: Macintosh-Specific Problems
ROFILER ARDWARE ONTENTS A Wacom USB pen display model should be listed. If a pen display model is not listed, check the pen display USB cable connection or try plugging the pen display into a different USB port. If this does not help, contact Wacom for Technical Support. -
Page 46: Interactive Pen Display
YSTEM REFERENCES handwriting recognition. 4. Test the Ink function using your Wacom pen display and pen. If this procedure does not resolve your problem with Ink, contact Apple Support for further assistance. Wacom is not the software manufacturer for Ink and we are limited in our abilities to support a third party software application. -
Page 47: Technical Support Options
Support or Customer Care area of the web site for your region, Updated drivers, when available, can be obtained from the Support page of the Wacom website for your region, http://link.wacom.com/r/support. If you have an Internet connection, you can download the latest software drivers from the Wacom web site for your region. See obtaining driver downloads. -
Page 48: Obtaining Driver Downloads
Wacom software driver (when available) from the Internet. Updated drivers, when available, can be obtained from the Support page of the Wacom website for your region, http://link.wacom.com/r/support. -
Page 49: Appendix
Interactive pen display Contents Index APPENDIX This section contains tips on caring for your interactive pen display, instructions on how to uninstall the software, information on other Windows options for use on your pen display, and parts and accessories. Caring for the interactive pen display Replacing the pen tip Using an alternate mount or stand Uninstalling the interactive pen display... -
Page 50: Replacing The Pen Tip
When the nib gets too short or develops a sharp edge, replace it with one of the extra nibs that came with the pen. Clasp the old nib with a Wacom nib Slide the end of the new nib straight extraction tool, pair of tweezers, into the barrel of the pen. -
Page 51: Using An Alternate Mount Or Stand
VESA mounting holes. Note: Wacom strongly recommends using the provided screws for attachment to an alternate arm or stand. However, if other mounting screws are used, they must match the provided screws in width, pitch and length, to avoid damage to the pen display or physical injury. -
Page 52: Uninstalling The Interactive Pen Display
Index UNINSTALLING THE INTERACTIVE PEN DISPLAY Follow the appropriate procedure below to remove the Wacom driver software and the pen display from your system, or to remove the DisplayLink software from your system. Important: If you remove the Wacom driver software from your system, your Wacom interactive pen display will no longer operate with full tablet functionality, but will continue to function as a mouse device. -
Page 53: Managing Preferences
Interactive pen display Contents Index MANAGING PREFERENCES Use the Wacom tablet preferences utility to manage your pen display preferences for a single or multiple users. Close any open applications. Windows 8: From the Windows 8 Start screen, click the W tile. -
Page 54: Installing Multiple Tablets
USB ports. When the new pen display or tablet is found, it is automatically initialized. To remove one of multiple tablets from the driver, in the Wacom Control Panel select the pen display or tablet icon to be deleted and click on the [ – ] button next to the T list. -
Page 55: Pen And Digital Ink Capabilities In Windows
Wacom pen. To activate Windows Ink, click the Use Windows Ink checkbox on the Calibrate tab of the Wacom Control Panel. -
Page 56: About The Windows Tablet Pc Input Panel
3. Customize the Input Panel settings for the way you like to work. To learn more about using your Wacom pen in Microsoft Windows and Office 2007 or later, study the documentation that came with your system and Microsoft Office applications. Be sure to take advantage of the Windows training tools available from Microsoft. -
Page 57: Product Information
CD. The warranty period may be determined by regional requirements. The warranty period for your pen display is described on the Support page of the Wacom web site for your region. You may also contact Wacom Customer Care for your region. -
Page 58: Glossary
Click force. The amount of force you must apply to the tip of your pen for a click to occur. Double-click assist. A function of the Wacom Control Panel that makes it easier to double-click by setting the size of the double-click distance. -
Page 59: Interactive Pen Display
Screen cursor. The pointer on the display screen. Screen cursors come in different shapes (such as an I- beam, arrow, or box), depending on which application you are running. Side switch. The switch or button on the side of the DTU-1141 pen that can be used to execute various product functions. -
Page 60: Index
Interactive pen display Contents Index INDEX Application-specific settings Installation changing for display portion creating for pen tablet portion removing USB cable Button functions Installing Calibrating, pen display multiple pen displays Care, for pen display multiple tablets Cleaning LCD monitor installation, for pen display Macintosh-specific problems, troubleshooting pen display Manual... -
Page 61: Interactive Pen Display
Interactive pen display Contents Index LCD monitor installation pen tablet installation rear view 8, 9 testing uninstalling USB cable installation working with Pen tablet, troubleshooting Pen tip, replacing Positioning, with pen Preferences, managing Pressure sensitivity, working with Product information Radial Menu customizing using Rear view, pen display...
Need help?
Do you have a question about the DTU-1141 and is the answer not in the manual?
Questions and answers