
Related Manuals for RSF Woodburning Fireplaces CHAMELEON2


Summary of Contents for RSF Woodburning Fireplaces CHAMELEON2
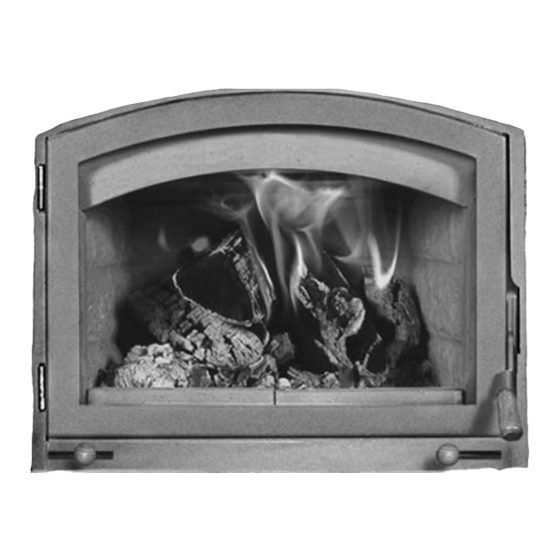
- Page 1 Owner's Manual Residential Factory Built Fireplace Operation • Maintenance • Installation CHAMELEON2 Keep these instructions for future use. RSF-IIC2_2010-05...
-
Page 2: Table Of Contents
We have designed your new CHAMELEON2 to be easy to install, operate and maintain. It is in your best interest to become familiar with it. Study your manual to be sure that the installation is correct, then follow the guidelines for operation and maintenance. -
Page 3: Safety First
Use only firelogs that have been evaluated for fireplace use. In Canada, they should meet the requirements of ULC/ORD-C127-M1990. Refer to the firelog warnings and caution markings prior to use. CHAMELEON2 Owner's Manual RSF Woodburning Fireplaces... -
Page 4: General Specifications
This fireplace has been specially designed to combine high efficiency with the elegance of a wood burning fire. Most often you will take advantage of the high efficiency and the control possible with your new CHAMELEON2 wood burning fireplace. If you would like to enjoy the sight and sound of an open fireplace, or simply have less heat output in a warmer weather you may want to install the optional CHAMELEON2 firescreen (FO-FSC2). -
Page 5: Unit Dimensions And Clearances
Refer to Table 1 (G) 35 3/8" Non-combustible hearth extension for minimum depth and spark guard () (refer to Table1 of hearth extension (I) and text for particulars) Figure 1 Unit Dimensions and Clearances CHAMELEON2 Owner's Manual RSF Woodburning Fireplaces... - Page 6 Refer to the "Installation: Mantel" section for particulars. CHAMELEON2 Owner's Manual RSF Woodburning Fireplaces...
-
Page 7: Operation
Fast burning fires (lots of air) go through much more wood than slow burning fires. To get the most out of your CHAMELEON2 fireplace, adequately adjust the combustion air control lever at the appropriate time. If the fire seems to be burning too quickly, turn the air down. -
Page 8: First Fires
• Make sure you have adequate chimney height for your system. Refer to the Chimney section of this booklet and make sure to take altitude, and number of elbows into consideration. CHAMELEON2 Owner's Manual RSF Woodburning Fireplaces... -
Page 9: Maintenance
PAINT You can touch up the face of the CHAMELEON2 with Stove Bright Metallic Black high temperature paint which is available at most fireplaces dealers. Follow the directions outlined on the spray can. DO NOT attempt to paint the fireplace while it is still warm. -
Page 10: Door Adjustment
Repeat this procedure along all sides of the door. The most important factor for controlling the burning rate of the CHAMELEON2 is a good seal on the door gasket. If the door gasket is worn or damaged to the point where the seal is not adequate as described above, then remove and replace the gasket. -
Page 11: Location
LOCATION Your CHAMELEON2 fireplace may be installed in many different ways (see Figure 4) without any special floor reinforcement. We recommend that you take the time to plan your entire installation (fireplace, chimney, and options) before beginning the actual installation (refer to Figure 5 and Figure 6). - Page 12 Storm Collar in the Attic Radiation Shield Ceiling Hearth Extension and Beneath Hearth Extension (refer to text for particulars) Electrical Knock-out Outside Air Inlet (refer to text for particulars) Figure 5 Louvered CHAMELEON2 General Installation CHAMELEON2 Owner's Manual RSF Woodburning Fireplaces...
- Page 13 Intake Grill part of the Intake Duct Option FO-CID Hearth Extension and Beneath Hearth Extension (refer to text for particulars) Electrical Knock-out Outside Air Inlet (refer to text for particulars) Figure 6 Clean Face CHAMELEON2 General Installation CHAMELEON2 Owner's Manual RSF Woodburning Fireplaces...
-
Page 14: Ceiling Clearance
This fireplace is certified for use with 7" ICC Model EXCEL chimney only. Please refer to Table 1 (D-E) for the minimum and maximum chimney heights permitted with the CHAMELEON2 fireplace. We recommend that the minimum height be increased by approximately 1' for every 2000' elevation above sea level. -
Page 15: Chimney Installation
If the chimney is enclosed to the roof: • In USA : use a vented flashing; • In Canada : use a vented flashing, or a roof radiation shield with a regular flashing. CHAMELEON2 Owner's Manual RSF Woodburning Fireplaces... -
Page 16: Offset Chimney
Insulated Wall shield Radiation Shield (30° or 45°) Figure 9 Offset Chimney Installation Example Figure 10 Offset Chimney Through a Wall Example CHAMELEON2 Owner's Manual RSF Woodburning Fireplaces... -
Page 17: Chase Enclosure
The uppermost part Masonry Adaptor FO-FDM7 of the EXCEL chimney - where it enters the masonry chimney - must be a minimum of 12" from the ceiling. Figure 12 Connection to a Masonry Chimney CHAMELEON2 Owner's Manual RSF Woodburning Fireplaces... -
Page 18: Framing
The enclosure walls can be framed with any suitable materials (2x4 or 2x6 studs, plywood, gypsum board, etc.). Because of the high heat output potential of the CHAMELEON2, combustible materials must NOT go closer to the fireplace than the standoffs, top, back and sides. -
Page 19: Hearth Extension
(see Figure 1). There is no minimum thickness required for the hearth extension. BENEATH HEARTH EXTENSION If the CHAMELEON2 is installed on a non-combustible floor, NONE of the cement board and the spark guard specified below is required. Install the spark guard provided (5" x 36" piece of... -
Page 20: Facing Installation
To install the female hinges on the door, remove the 2 top and 2 bottom screws on the left side of the door. These four screws are not required for the CHAMELEON2. Use the two Allen key screws provided to install the female hinges on the door. - Page 21 9. Finally, install the 2 front refractory bricks (11.6.T on the left and 11.7.T on the right) and the refractory plug (11.10.T). These refractory have been designed specifically for the CHAMELEON2 and no modifications are required to ensure a proper fit.
- Page 22 11.4.T 11.5.T Step 7 Step 8 11.9.T 11.8.T 11.3.T 11.1.T 11.4.T 11.6.T 11.6.T 11.7.T 11.10.T 11.2.T 11.5.T 11.7.T Step 9 11.10.T Figure 15 Refractory Bricks Installation CHAMELEON2 Owner's Manual RSF Woodburning Fireplaces...
-
Page 23: Listing Label
LISTING LABEL CHAMELEON2 Owner's Manual RSF Woodburning Fireplaces... -
Page 24: Complete Options List
FO-FDM7 Masonry Chimney Adapter 7" FO-FSC2 Chameleon2 Firescreen FO-HD Heat Dump Kit FO-KF-4 Chameleon2 Rock Retainer Kit for Clean Facing FO-KF-5 Chameleon2 Rock Retainer Kit for Classic Facing FO-TZDB Topaz/Chameleon Door - Black FO-TZDC Topaz/Chameleon Door – Cathedral (black) FO-TZDG Topaz/Chameleon Door –... -
Page 25: Configured Options List
FO-CID Gravity Vent Kit FO-V2 (1) Inline Fan FO-CIF Chameleon2 Firescreen FO-FSC2 Heat Dump Kit FO-HD Chameleon2 Rock Retainer Kit for Clean FO-KF-4 Facing Gravity Vent Kit FO-V2 (1) Chameleon Ash Pan Kit FO-CAP Blower (internal fan) FO-FDHB8 Louvered CHAMELEON2... -
Page 26: Replacement Parts
REPLACEMENT PARTS CHAMELEON2 Owner's Manual RSF Woodburning Fireplaces... -
Page 27: Limited Warranty
30 years, subject to the following conditions: During the first year RSF Woodburning Fireplaces will repair or replace, at our option, any parts which upon examination by an authorized RSF Woodburning Fireplaces representative, are found to be defective, except the parts listed in the EXCLUSIONS portion of this warranty.
Need help?
Do you have a question about the CHAMELEON2 and is the answer not in the manual?
Questions and answers