Table of Contents
Advertisement
CAUTION!
Please read this entire manual before
you install or use your new room heater.
Failure to follow instructions may result in
property damage, bodily injury, or even
Improper Installation Could Void Your
Warranty!
SAFETY NOTICE:
If this heater is not properly installed,
a house fi re may result. For your
safety, follow the installation instruc-
tions. Never use make-shift compro-
mises during the installation of this
heater. Contact local building or
fi re offi cials about permits, restric-
tions and installation requirements
in your area.
"U.S. ENVIRONMENTAL PROTECTION AGENCY Certifi ed to comply with 2015 particulate
emission standards for single burn rate heaters. Not approved for sale after May 15, 2020.
This single burn rate wood heater is not approved for use with a fl ue damper."
THIS MANUAL WILL HELP YOU TO OBTAIN EFFICIENT, DEPENDABLE SERVICE FROM THE HEATER, AND
ENABLE YOU TO ORDER REPAIR PARTS CORRECTLY. KEEP IN A SAFE PLACE FOR FUTURE REFERENCE.
French version is available for download from the United States Stove Company website: http://www.
usstove.com/La version française est disponible pour téléchargement à partir du site United States Stove
UNITED STATES STOVE COMPANY
227 Industrial Park Road
P.O. Box 151
South Pittsburg, TN 37380
(800) 750-2723
Owners Manual
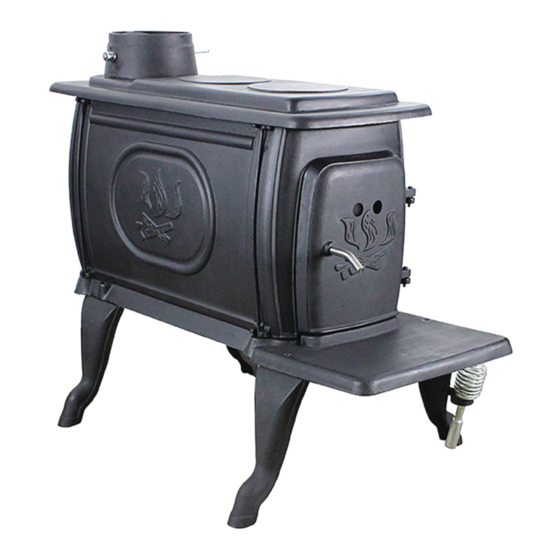
Logwood 1269E
death.
WASHINGTON STATE APPROVED
DO NOT USE THIS HEATER IN A MOBILE HOME
SAVE THESE INSTRUCTIONS.
Company: http:/www.usstove.com/
For use with Solid Fuel, Conforms to UL STD 1482
CONFORMS TO
UL 1482-11
&
CERTIFIED TO
CAN/ULC S627
852430-1903E
Advertisement
Table of Contents

Related Manuals for US Stove Company 1269E

Summary of Contents for US Stove Company 1269E
- Page 1 Owners Manual Logwood 1269E CAUTION! Please read this entire manual before you install or use your new room heater. Failure to follow instructions may result in property damage, bodily injury, or even death. Improper Installation Could Void Your Warranty! SAFETY NOTICE: If this heater is not properly installed, a house fi...
- Page 2 140 lbs This manual describes the installation and operation of the United States Stove Company Model 1269E woodheater. This heater meets the 2015 U.S. Environmental Protection Agency's crib wood emission limits for woodheaters sold after May 15, 2015. Under specifi c EPA test conditions burning Douglas Fir dimensional lumber this heater has been shown to deliver heat at a rate of 24,433 Btu/hr.”...
-
Page 3: Tools And Materials Needed
DO NOT BURN: 1. Residential or commercial garbage; 2. Lawn clippings or yard waste; 3. Materials containing rubber, including tires; 4. Materials containing plastic; 5. Waste petroleum products, paints or paint thinners, or asphalt products; 6. Materials containing asbestos; 7. Construction or demolition debris; 8. -
Page 4: Ash Removal And Disposal
Operational Tips For The Best Performance Of Your Heater BUILDING A FIRE The top down method of fi re building is recommended for this appliance. After making sure that the stove air intake controls are fully open (completely pull-out towards you), Place the largest pieces of wood on the bottom, laid in parallel and close together. - Page 5 CHIMNEY Take into account the chimney’s location to insure it is not too close to neighbors or in a valley which may cause unhealthy or nuisance conditions. EFFICIENCY Effi ciencies can be based on either the lower heating value (LHV) or the higher heating value (HHV) of the fuel.
-
Page 6: Safety Rules
Safety Rules SAFETY NOTICE: If this heater is not properly installed, a house fi re may result. For your safety, follow the installation directions. Contact local building or fi re offi cials about restrictions and installation inspection requirements in your area. READ THESE RULES AND THE INSTRUCTIONS CAREFULLY: 1. -
Page 7: Required Tools
ASSEMBLY INSTRUCTIONS NOTICE: United States Stove Company grants no warranty, stated or implied, for the installation or maintenance of your wood stove and assumes no responsibility of any incidental or consequential damages. REQUIRED TOOLS 6. Attach the front legs to hearth with two (2) 1/4-20 •... -
Page 8: Installation
Installation MINIMUM CLEARANCE TO COMBUSTIBLE WALLS US, CANADA 16.5” 419mm HEATER/FLOOR PROTECTOR LOCATION (Dimensions are required for non-protected surfaces. See chart for dimensions for pro- tected surfaces.) Place the heater on solid masonry or solid concrete. When the heater is used on a combustible fl oor, use an Underwriters Listed fl... - Page 9 4. The chimney connection should be as short as possible, and the heater must have its own fl ue. Do not connect this unit to a chimney fl ue serving other appliances. 5. Use three sheet metal screws in each stove pipe and or elbow joint to fi rmly hold the pipe together. Seal around the screws 6.
-
Page 10: Chimney Connection
Operation Of The Heater 1. Burn wood or wood products only. The wood should be well FLUE CONNECTION-NON-COMBUSTIBLE WALL seasons prior to use for maximum effi ciency. 2. Provide air into the room for combustion. 3. Do Not touch the heater after fi ring until it has cooled. NONCOMBUSTIBLE WALL 4. - Page 11 CONNECTION OF CHIMNEY CONNECTOR TO A MASONRY CHIMNEY THROUGH A COMBUSTIBLE WALL Figure 8 shows how to connect the chimney connector of a heater to a masonry chimney through a combustible wall. There are fi ve allowable ways that a chimney connector can be connected to a masonry chimney by passing through a combustible wall.
- Page 12 PART A, FIGURE 8 MINIMUM CHIMNEY CLEARANCE TO (FIGURE 8 CONTINUED ON NEXT PAGE) BRICK AND COMBUSTIBLES IS 2 IN. MINIMUM CLEARANCES 12 IN. OF BRICK ALL AROUND CHIMNEY CONNECTOR TO HEATER FIRE CLAY LINER MINIMUM 12 IN. (5/8" MIN. WALL THICKNESS) TO COMBUSTIBLES MASONRY CHIMNEY CONSTRUCTED TO...
- Page 13 the wall pass-through system to the inner face of the chimney fl ue, but not beyond. It does not have to be fastened in place so long as it cannot accidently be pulled out of the chimney or shoved into the chimney fl...
-
Page 14: Service Hints
CAUTION! CAUTION! USE WOOD OR WOOD-LIKE MATERIALS NEVER USE GASOLINE, GASOLINE-TYPE ONLY. DO NOT USE COAL OR LANTERN FUEL, KEROSENE, CHARCOAL CHARCOAL. COAL OR CHARCOAL WILL LIGHTER FLUID, OR SIMILAR DESTROY THE FIREBOX. DO NOT USE LIQUIDS TO START OR "FRESHEN UP" A DRIED LUMBER OR TREATED WOOD. -
Page 15: Testing Your Wood
WOODSTOVE UTILIZATION Your heating unit was designed to burn wood only; no other materials should be burned. Waste and other fl ammable materials should not be burned in your stove. Any type of wood may be used in your stove, but specifi... -
Page 16: The First Fires
THE FIRST FIRES The fresh paint on your stove needs to be cured to preserve its quality. Once the fuel charge is properly ignited, only burn small fi res in your stove for the fi rst four hours of operation. Never open the air control more than necessary to achieve a medium burn rate. -
Page 17: Ash Disposal
We strongly recommend that you install a magnetic thermometer on your smoke exhaust pipe, approxi- mately 18” above the stove. This thermometer will indicate the temperature of your gas exhaust fumes within the smoke exhaust system. The ideal temperature for these gases is somewhere between 275°F and 500°F. Below these temperatures, the build-up of creosote is promoted. -
Page 18: Parts Diagram
PARTS DIAGRAM PART NO. DESCRIPTION QTY. 892508 Bottom Channel 892510 Baffl e 86802 Bent Tube Right 892516 Tube Weldment 89972 Latch 88228 Kao Wool 40309 Flue Collar 40304 Main Top 40398 Flue Baffl e (to be fi xed) 40299 Main Side 40300 Hearth Extension 40297-1... -
Page 19: Warranty Information
WARRANTY INFORMATION Limited Warranty The operation of this wood heater in a manner inconsistent with the owner’s manual will void your warranty and is also against federal regulations. United States Stove Company warrants to the original purchaser its products against premature failure of any component due to workmanship, quality, or materials as follows: TIME PERIOD: .. - Page 20 NOTES -20-...
- Page 21 NOTES -21-...
-
Page 22: How To Order Repair Parts
HOW TO ORDER REPAIR PARTS THIS MANUAL WILL HELP YOU OBTAIN EFFICIENT, DEPENDABLE SERVICE FROM THE HEATER, AND ENABLE YOU TO ORDER REPAIR PARTS CORRECTLY. KEEP IN A SAFE PLACE FOR FUTURE REFERENCE. WHEN WRITING, ALWAYS GIVE THE FULL MODEL NUMBER WHICH IS ON THE NAMEPLATE ATTACHED TO THE BACK OF THE HEATER. - Page 23 WARRANTY INFORMATION CARD Name__________________________________________ Telephone #: (_____)_____________ City____________________________________________ State_______ Zip_________________ Email Address __________________________________________________________________ Model # of Unit________________________________ Serial #___________________________ Fuel Type: □ Wood □Coal □Pellet □Gas □Other _________________________ Place of Purchase (Retailer)______________________________________________________ City____________________________________________ State_______ Zip_________________ If internet purchase, please list website address___________________________________ Date of Purchase _______________________________________________________________ Reason for Purchase: □Alternative Heat...
- Page 24 Fold Here Fold Here Fold Here PLACE STAMP HERE United States Stove Company 227 Industrial Park Rd. P.O. Box 151 South Pittsburg, TN 37380...
Need help?
Do you have a question about the 1269E and is the answer not in the manual?
Questions and answers