Table of Contents
Advertisement
Quick Links
Advertisement
Table of Contents

Subscribe to Our Youtube Channel
Related Manuals for Orkli SPT 2-320

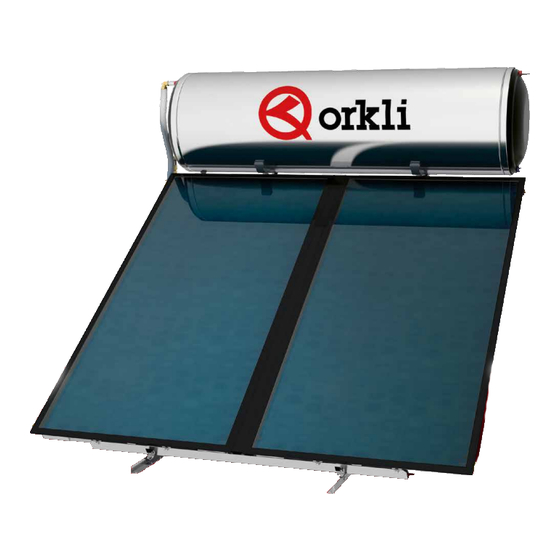
Summary of Contents for Orkli SPT 2-320
- Page 1 TECHNICAL MANUAL Solar water heaters Installation, maintenance & use instructions...
-
Page 3: Table Of Contents
CONTENTS GENERAL INFORMATION ............................4 DOMESTIC HOT WATER CONSUMPTION ....................... 4 SOLAR WATER HEATER OPERATION - WATER HEATING ..................4 ORKLI SOLAR WATER HEATERS ..........................5 PACKAGING ................................6 LABELING ................................... 7 WATER STORAGE TANK SPECIFICATIONS ......................8 COLLECTOR SPECIFICATIONS ..........................9 ORKLI 160lt/2m LAYOUT ............................ -
Page 4: General Information
GENERAL INFORMATION In the present manual you will find all necessary instructions with regard to the installation, operation and maintenance of the product. The company is active in the Solar Energy with high-tech equipment, ultra-modern facilities and certified products of high quality. Our experience and know-how support our co operations, before and after sales, both in Europe and internationally. -
Page 5: Orkli Solar Water Heaters
Certified RELIABILITY - HARMONY - AESTHETICS ORKLI Solar Systems constitute an ecological proposal and an effective energy solution, combining high output, autonomy, aesthetics, facility in the installation and money saving. They are made of excellent materials according to international specifications and have all the certifications and tests that confirm their quality. -
Page 6: Packaging
PACKAGING PRODUCT RANGE ORKLI thermosiphonic systems are available in the following models: DESCRIPTION Boiler MODEL Collector(s) 160lt tank, 2.0m collector ORKLI SPT 1-160 Support base, fittings & Accessories 320lt tank, 2 x 2.0m collectors ORKLI SPT 2-320 Palette Each model packaging contains all the necessary equipment:... -
Page 7: Labeling
LABELING ORKLI solar water heaters are identified by two stickers, one of them on the tank and the other on the collector. On these stickers all the details of the system are written. The information provided on the stickers are important for the future identification of the system. -
Page 8: Water Storage Tank Specifications
WATER STORAGE TANK SPECIFICATIONS STEEL - ENAMEL Cylinder: 2.5mm thickness cold rolled steel with a double internal layer of enamel, baked at 860°C according to DIN 4753. The water storage tanks are checked individually upon exit from the enameling unit, assuring the top quality of the enamel. -
Page 9: Collector Specifications
SOLAR WATER HEATERS COLLECTOR SPECIFICATIONS Solar Keymark Certified External one piece aluminium trough of high aesthetics, shaped by deep drawing method in 400 tn capacity press, made of naval aluminium alloy, rich in magnesium. Robust construction for perfect tightness. High density, eco-friendly thermal insulation achieved with a 60mm thick layer of prepressed rockwool with a covering of black glass fabric for the minimization of thermal losses. - Page 10 YEARLY ENERGY OUTPUT (kWh/m ATHENS - GREECE DAVOS - SWITZERLAND WÜRZBURG - GERMANY STOCKHOLM - SWEDEN Normal absorber design with louvers Air turbulence increases heat loss Complete area technology The uniform area prevents heat loss FLAT SURFACE INCLINED SURFACE SUPPORT BASE One type of supporting base system, made of 2.5mm thick galvanised steel, for installation...
-
Page 11: Orkli 160Lt/2M
SOLAR WATER HEATERS ORKLI 160lt/2m LAYOUΤ ORKLI SPT 1-160 ITEM Nr. PART ΝΑΜΕ DIMΕΝSIONS QTY. FLAT SURFACE Beam L (Laminate section 60 x 2.5mm) 2060 x 60mm Beam L (Laminate section 60 x 2.5mm) 2250 x 60mm Beam L (Laminate section 60 x 2.5mm) 1190 x 60mm Beam L (Laminate section 60 x 2.5mm) -
Page 12: Orkli 320Lt/4M
ORKLI 320lt/4m LAYOUΤ ORKLI SPT 2-320 ITEM Nr. PART ΝΑΜΕ DIMΕΝSIONS QTY. FLAT SURFACE Beam L (Laminate section 60 x 2.5mm) 2060 x 60mm Beam L (Laminate section 60 x 2.5mm) 2250 x 60mm Beam L (Laminate section 60 x 2.5mm) 1190 x 60mm Beam L (Laminate section 60 x 2.5mm) -
Page 13: General Installation Rules
SOLAR WATER HEATERS GENERAL INSTALLATION RULES ATTENTION! Installation must be in compliance with local & national rules concerning water and electrical installations (plumbing, electricity, hygiene, urban and others). The solar system’s packaging must be removed at the site of installation in order to protect the device from shocks during its transportation, making sure that the collectors are not supported on their pipe joints. -
Page 14: Installation Position
Piping: the routing of the piping and cabling must be agreed upon between the installer and the client, so as to ensure the proper installation of the solar system in compliance with local rules concerning water and electrical installations. Make sure that the tubes connecting the storage tank with the collector and the piping to/from the water heater are insulated in such a way that they can withstand temperatures covering the range of: -30°C to 120°C. -
Page 15: General Prevention Measures
SOLAR WATER HEATERS GENERAL PREVENTION MEASURES Please respect the instructions related to accidents prevention and the safety rules during the installation of the solar thermal systems as well as the piping. Please keep the work place clear and free of objects obstructing the execution of works. Do not let children, pets and other people to come in contact with the tools or close to the working place. -
Page 16: Support Base Parts
SUPPORT BASE PARTS For 2.0m collectors For 4.0m collector (2 x 2.0m The company preserves the right to change all specifications of the products and their accessories without prior notice... -
Page 17: Support Base Assembly On A Flat Surface
SOLAR WATER HEATERS SUPPORT BASE ASSEMBLY ON A FLAT SURFACE Screw parts 1 to part 2, using the M8 screws and nuts included in the packaging. Place the vertical part 3 to the above parts Screw part 4 to the rest parts of the frame and tighten all screws. - Page 18 In case of two collectors, first place the left one to the bottom part 5 lifting the upper part 5. Place the screws with the support washers of the collector (4 for each collector) without tightening them. Place the Ø22 mechanically tightened unions at the edges of the collector.
- Page 19 SOLAR WATER HEATERS STEP 11 STEP 13-14 STEP 17 STEP 9 STEP 15 Place the other end at the bottom right socket of the collector using the Ø22x DN16 INOX corner fitting*, having firstly passed the tube through the insulation tube. Tighten all unions in the system as well as all the screws on the base.
-
Page 20: Support Base Assembly On An Inclined Surface
SUPPORT BASE ASSEMBLY ΟΝ ΑΝ INCLINED SURFACE ATTENTION! After the installation check that the collectors surface has a tilt angle to the horizontal position of geographical latitude ±5°. Screw part 1 to part 2, using the M8 screws and nuts included in the packaging. Repeat for the second pair. Place part 4 between the two Π... - Page 21 SOLAR WATER HEATERS In case of two collectors, first place the left one to the bottom part 5 lifting the upper part 5. Place the screws with the support washers of the collector (4 for each collector) without tightening them. Place the Ø22 mechanically tightened unions at the edges of the collector.
- Page 22 STEP 11 STEP 13-14 STEP 17 STEP 9 STEP 15 Place the other end at the bottom right socket of the collector using the Ø22x DN16 INOX corner fitting*, having firstly passed the tube through the insulation tube. Tighten all unions in the system as well as all the screws on the base.
-
Page 23: Hydraulic Connection
SOLAR WATER HEATERS HYDRAULIC CONNECTION CONNECTING THE SYSTEM WITH THE COLD AND HOT WATER MAINS The “COLD WATER INLET” and “HOT WATER OUTLET” sockets colored blue and red respectively are located on the side of the water storage tank. ATTENTION! The connections to the hot and cold water pipes should be made with union nuts and not by soldering. -
Page 24: Electrical Connection
ELECTRICAL CONNECTION (OPTIONAL) DESCRIPTION OF ELECTRICAL COMPONENTS (heating element - thermostat - accessories) ELECTRICAL DIAGRAM - General rules The electrical installation of the solar water heater should be carried out by a qualified electrician and in accordance with the national regulations in force and the rules and conditions that apply to the building where the installation is taking place. -
Page 25: System Installation On A Tiled Roof With The Water Storage Tank Under The Roof (Natural Circulation Operation)
SOLAR WATER HEATERS Drawing 1 ELECTRICAL COMPONENTS (Heating Element - Thermostat) Thermostat HEATING THERMOSTAT AUTOMATIC ELEMENT AUXILIARY THERMOELECTRIC FUSE This is tripped when the water storage tank’s internal temperature exceeds Temperature 95°C and shuts down the thermostat, to Regulator (40-80°C) protect the appliance form overheating. -
Page 26: Possible Problems - Solutions
POSSIBLE PROBLEMS - SOLUTIONS THE SOLAR WATER STORAGE TANK DOES NOT SUPPLY A SATISFACTORY AMOUNT OF HOT WATER BY SOLAR POWER In this case follow these steps: Take the weather conditions into consideration. Check the building’s piping and taps for the possibility of slow leakage. -
Page 27: Service - Maintenance
SOLAR WATER HEATERS SERVICE - MAINTENANCE Your solar water heater should be serviced every two years by an authorized representative or a company technician. These periodic checks are necessary for the solar water heater’s warranty to apply. The inspection concerns the whole system and more specifically: Flange Insulation - seals... -
Page 28: Post Installation Instructions
POST INSTALLATION INSTRUCTIONS Before using the system make a final check. Open all the valves and check for any kind of leakage. Repeat the inspection after 30 minutes. Check if the system is filled with water and antifreeze fluid according to the company’s instructions. -
Page 29: Check List
SOLAR WATER HEATERS CHECK LIST INSTRUCTIONS FOR THE INSTALLER After the installation is complete, the installer, with the help of the check list below has to check all of the points which are noted and mark in the relevant column with a √. LIST CHECK COLLECTORS AND EXTERNAL PIPING... - Page 30 NOTES The company preserves the right to change all specifications of the products and their accessories without prior notice...
- Page 32 www.orkli.es...
Need help?
Do you have a question about the SPT 2-320 and is the answer not in the manual?
Questions and answers