Table of Contents
Advertisement
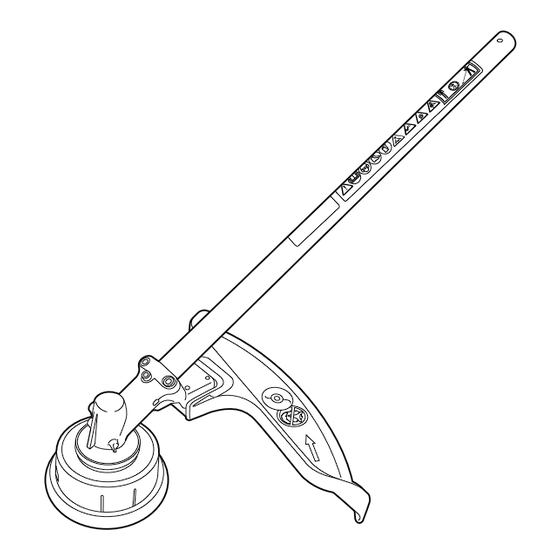
Trimmer/Brush Cutter Attachment
SSST
Instruction Manual
For Safe Use of Trimmer/Brush Cutter
Attachment
● Be sure to read this manual and the powerhead
(separately sold) manual to have a good understanding
of the contents before handling the brush cutter.
● If there is no powerhead manual, you can purchase
one from your servicing dealer.
● Keep this manual and the powerhead manual in a
readily accessible location.
Copyright (C) 2015 NIKKARI Co., Ltd. All Rights Reserved
Click to Save As
Contents
Important Information ······················ 2
1. Safety ····································· 4
1.1 Warnings ······································· 4
1.2 General Precautions ························ 6
1.3 Safety Devices and Protective Guard ······ 11
1.4 Protective Equipment ····················· 12
1.5 Noise ·········································· 12
1.6 Vibration ······································ 12
2. Outline ···································13
2.2 Specification ································ 13
2.3 Attached Material ································ 14
2.4 Option (to be separately sold) ················ 14
2.5 Position of Model and Serial No. ······· 15
2.6 Replaceable Items ························· 15
3. Installation ··································16
3.1 Installation Method ························ 16
3.3 Installation of Cutting-line Head ········ 20
4. Operation ·······························21
4.1 Transporting method ······················ 21
4.2 Objects to be cut ··························· 22
4.3 Pre-operation Check ······················ 23
4.4 Start and Stop ······························ 24
4.5 Precautions for Operation ··············· 24
4.6 Cutting Operation ·························· 26
4.7 Releasing Cutting Line ··················· 28
4.8 Actions after Operation ··················· 28
5. Maintenance ···························29
5.1 Daily ··········································· 30
5.2 Every 20 Hours ····························· 30
5.3 As Necessary ······························· 31
6. Storing ···································34
7. Waste Disposal ························35
Steel Blade (Option) ·················36
9. Troubleshooting ·······················38
10. Servicing ································39
11. Technical data ························40
How to Contact Honda ···················41
Distributor's Limited Warranty ··········42
PRODUCT REGISTRATION ············43
Advertisement
Table of Contents

Subscribe to Our Youtube Channel
Related Manuals for NIKKARI SSST

Summary of Contents for NIKKARI SSST
-
Page 1: Table Of Contents
11. Technical data ························40 one from your servicing dealer. How to Contact Honda ···················41 ● Keep this manual and the powerhead manual in a Distributor's Limited Warranty ··········42 readily accessible location. PRODUCT REGISTRATION ············43 Copyright (C) 2015 NIKKARI Co., Ltd. All Rights Reserved... -
Page 2: Important Information
Important Information Intended Purpose This product (hereinafter referred to as an attachment) is designed to be attached to an approved powerhead (to be purchased separately) for cutting grass, weeds and brush. (Refer to page 16 for approved powerheads.) Do not use the trimmer/brush cutter for any other purpose or in any other way. Powerhead (Separately sold) Optional Attachments Trimmer/Brush Cutter... - Page 3 Important Cautions for Safe Work ● NIKKARI Co., Ltd. (hereinafter referred to as NIKKARI) cannot foresee all the risks in handling the trimmer/brush cutter. Therefore, also give consideration to general safety measures not stated in this manual and powerhead manual to prevent injuries when handling the trimmer/brush cutter.
-
Page 4: Safety
1. Safety California Proposition 65 This product contains or emits chemicals known to the State of California to cause cancer, birth defects, or other reproductive harm. 1.1 Warnings For appropriate use of the trimmer/brush cutter, follow the instructions in this manual. Warning labels are attached to places where there are potential risks. -
Page 5: Warning Labels
1.1.2 Warning Labels Cautions for Handling (a) This trimmer/brush cutter is provided with warning labels to indicate important cautions. Understand the meanings of the warning labels thoroughly to work in a safe environment. (b) Do not operate the trimmer/brush cutter until you have a good understanding of the meanings of the warning labels. -
Page 6: General Precautions
1.2 General Precautions 1.2.1 Overall Precautions When handling the trimmer/brush cutter, follow the precautions of the powerhead manual in addition to the following precautions. Do not use for cutting branches etc. Do not use the trimmer/brush cutter when tired, ill, or after consuming alcohol, drugs, or medication. - Page 7 1.2.2 Precautions for Clothing Wear a hard hat when using or transporting the trimmer/brush cutter. Wear appropriate personal protective equipment when using the trimmer/brush cutter. For details about protective clothing refer to “1.4 Protective Equipment”. Wear goggles meeting the requirements of ANSI Z87.1 when using the trimmer/ brush cutter.
- Page 8 Note ● If the edge of the optional blade is blunt or damaged, do not operate the trimmer/brush cutter. Otherwise, it could cause damage to the engine and machine due to overloading. 1.2.4 Precautions at Start-up trimmer/brush cutter must only be started and operated by one person. * Operation by more than one person increases the likelihood of mishandling and resulting injury.
- Page 9 Exhaust contains carbon monoxide, a clear, odorless gas that can injure or kill you. Only use in well ventilated locations. Always keep the trimmer/brush cutter head at or below waist height. * Using the trimmer/brush cutter with the head higher than waist height increases the risk of mishandling or loss of balance, potentially resulting in serious injury or death.
- Page 10 1.2.7 Precautions for Transporting Before transporting the trimmer/brush cutter, stop the engine, and ensure the cutting head or blade has stopped. For grass cutting steel blade (option), install the transportation guard (option). Note ● When transporting the trimmer/brush cutter, install it to a harness or keep it balanced by holding the shaft tube.
-
Page 11: Safety Devices And Protective Guard
1.3 Safety Devices and Protective Guard 1.3.1 Safety Devices (Stop Devices) To stop the trimmer/brush cutter in case of an abnormality, use the stop device on the powerhead and stop the operation of the cutting head or blade. Refer to the powerhead manual for details. 1.3.2 Safety Devices (Quick Release) In case of an abnormality, the trimmer/brush cutter can be released from the harness by using the quick release device. -
Page 12: Protective Equipment
1.4 Protective Equipment When using the trimmer/brush cutter for cutting, it is recommended to wear the following protective equipment. (a) Hard hat Hard hat (b) Working wear (long sleeve jackets and full- Goggles length pants of heavy material) Ear protection Face shield (c) Protective shoes (sturdy boots with nonslip sole) (Steel-toed safety boots are recommended.) -
Page 13: Outline
2. Outline 2.1 Name of Parts and Their Functions The trimmer/brush cutter is a device with the attachment installed to the powerhead (separately sold). The following is the structure of the attachment and name and function of each part. Note ●... -
Page 14: Attached Material
2.3 Attached Material The following are attached materials. For the powerhead, refer to the powerhead manual. Instruction manual Cutting-line head Blade holder (this book) Grass debris shield Plate Fixed screw (4 pcs.) 2.4 Option (to be separately sold) Note ● For part numbers, contact your servicing dealer. ●... -
Page 15: Position Of Model And Serial No
2.5 Position of Model and Serial No. Check the model code of your attachment on the nameplate attached to the machine shaft. Record serial No. (See “10. Servicing”). You will need this model code and serial No. when ordering parts, and when making technical or warranty inquiries. -
Page 16: Installation
3. Installation 3.1 Installation Method Before installing or removing any attachment or part, stop the engine and, if attached, let the cutting blade come to a complete stop. * If the engine starts during the work, hands or fingers could be severed by the moving parts, or cutting head or blade. 3.1.1 Combination with Powerhead Do not install any unapproved powerhead to the attachment. - Page 17 3.1.2 Connecting Loosen the knob bolt [1] of powerhead connections. Align the boss (protrusion) [2] at the end of the pipe with the slit of the joint case [3], and insert it to the label [4] position. Make sure that the positioning knob [5] is lowered to the locked position as shown, and then tighten the knob bolt [1] of the powerhead connections.
- Page 18 3.1.3 Removing Loosen the knob bolt [1] of powerhead connections. Lift the positioning knob [5], and turn it 90°, either clockwise or counterclockwise. Pull out the shaft tube [6]. If the shaft tube is hard to remove, hold it so that the attachment is parallel to the pipe of the powerhead, and then pull it out.
-
Page 19: Installation Of Grass Debris Shield
3.2 Installation of Grass Debris Shield Follow the procedure below to install the grass debris shield. If the blades are provided, remove the blades before performing this work. Note ● If a grass cutting steel blade is installed, a different grass debris shield is required (included in blade kit). However, the installation procedure is the same. -
Page 20: Installation Of Cutting-Line Head
3.3 Installation of Cutting-line Head Use the cutting-line head (flexible nonmetallic line) recommended by the manufacturer. Do not use wire-rope, etc. * If it is cut, it could be a dangerous projectile, resulting in serious injury. Thoroughly read “1.2 General Precautions” before installing the cutting-line head. Install the cutting-line head and other parts as follows: Set the start/stop switch to OFF (O side) to stop the engine. -
Page 21: Operation
4. Operation 4.1 Transporting method When transporting the trimmer/brush cutter, wear appropriate clothes and personal protective equipment. * Otherwise, it could cause injury. Before transporting the trimmer/brush cutter, stop the engine, and ensure the cutting head or blade has stopped. For grass cutting steel blade (option), install the transportation guard (option). -
Page 22: Objects To Be Cut
<When hand-carrying the trimmer/ When hand-carrying the trimmer/brush cutter brush cutter> Install it to the harness or use the shaft tube to maintain balance. <When transporting by truck, etc.> (1) Remove the attachment from the powerhead. (2) Put the trimmer/brush cutter on the back of the truck, and secure it. -
Page 23: Pre-Operation Check
4.3 Pre-operation Check Make sure that the trimmer/brush cutter is operated normally or there is not any part missing or damaged before starting the operation. Before operating the trimmer/brush cutter, check the following. (a) If any part is damaged or worn out, replace before using. Contact your service dealer for a replacement part. -
Page 24: Ssst 4.4 Start And Stop
4.4 Start and Stop The trimmer/brush cutter is operated by the powerhead. Refer to the powerhead manual. 4.4.1 Start trimmer/brush cutter must only be started and operated by one person. * Operation by more than one person increases the likelihood of mishandling and resulting injury. - Page 25 ■ Check the Trimmer/Brush Cutter ● Make sure that the grass debris shield is securely installed in the appropriate position before starting the operation. ● For grass cutting steel blade (option), make sure that it is sharp and not damaged. Replace if necessary. A dull grass cutting steel blade (option) is more likely to snag and bounce back unexpectedly.
-
Page 26: Cutting Operation
4.6 Cutting Operation Do not allow children or animals to enter the working range of the trimmer/ brush cutter within 50 ft (15 m). trimmer/brush cutter must only be started and operated by one person. * Operation by more than one person increases the likelihood of mishandling and resulting injury. - Page 27 ■ Operating Method ● Before starting cutting operation increase the throttle to full speed. Operating the cutter at lower speeds reduces the tension of the nylon cutting line, resulting in lowered cutting effi ciency. ● While swinging your body from side to side, cut the grasses from the right side to left side.
-
Page 28: Releasing Cutting Line
4.7 Releasing Cutting Line Note ● Take care when removing the cutting line. The cutting line could have been cut into pieces, and they could scatter when removing the cutting line. When cutting line becomes shortened, run the engine at full throttle (approx. 8,000 rpm). -
Page 29: Maintenance
5. Maintenance Do not perform any maintenance or repair other than those described in the instruction manual. Other maintenance or repairs should be performed by your servicing dealer. Before performing maintenance, repair or cleaning, stop the engine and remove the attachment from the powerhead. * If the engine starts during the work, hands or fingers could be severed by the moving parts or cutting head or blade, resulting in serious injury or death. -
Page 30: Daily
5.1 Daily 5.1.1 Inspection of Cutting Head or Blade and Grass Debris Shield Check the following. ● The cutting-line head or grass cutting steel blade (option) are not broken, chipped or bent. ● The grass cutting steel blade (option) is sharp and not rounded. ●... -
Page 31: As Necessary
5.3 As Necessary 5.3.1 Replacement of Cutting Line Set the start/stop switch to OFF (O side) to stop the engine. Put on gloves. Press retaining pawls [1] (at 2 places) inward and remove cover [2]. Remove spool [3]. When cutting line on the spool is almost exhausted. (1) Remove remaining line from spool. - Page 32 Wind the line firmly into groove of the spool in the winding direction for the line LH. Note ● Carefully wind the cutting line evenly, taking care not to wind irregularly. When the line [4] is wound to the end hook both line ends into respective notch [5] of spool for retaining tentatively the line while leaving line...
- Page 33 Fit cover and housing together. (1) Align eyelets of cover with recesses of housing. (2) Press pawls of housing into respective window [6] of cover until the pawls are firmly fitted into the windows. Note ● If they are loosely fitted and the cutting head is turned, the cover inside the components can fly off which is dangerous.
-
Page 34: Storing
6. Storing When storing the attachment with the hook of the pipe cap attached to the pipe, etc., do not pull or swing the attachment. Wear gloves when handling the cutting head or blade during the replacement, etc. * Otherwise, hands or fingers could be severed by the cutting head or blade. When storing the blade attachment, install the transportation guard (option) on the grass cutting steel blade (option) and place it out of the reach of children. -
Page 35: Waste Disposal
Insert the hanging hook [5] of the pipe cap [4] into the hole of the shaft tube [3]. Insert the pipe cap [4] into the shaft tube [3]. Put on gloves. Clean the attachment. Wipe off the dirt or stain with a cloth, etc. Store the trimmer/brush cutter in the following place. -
Page 36: Installation Of Grass Cutting
8. Installation of Grass Cutting Steel Blade (Option) The following shows the installation procedure for the grass cutting steel blade (option). Make sure that required parts are all installed properly before attaching the grass cutting steel blade (option). Note ● Grass cutting steel blades, blade caps, nut covers and nuts are separately sold. For purchasing, contact your servicing dealer. - Page 37 Remove foreign objects such as grasses and stones gathered in [*] part (as shown in the below figure) of the gear case [5]. Remove the foreign objects. * If the product is used without removing the foreign objects, it could cause a serious injury or damage of the gear case.
-
Page 38: Troubleshooting
9. Troubleshooting In case of failure, follow the table below. When troubleshooting, stop the engine and then remove the attachment from the powerhead. * If the engine starts during the work, hands or fingers could be severed by the moving parts or cutting head or blade. Situation Possible Cause Correction Output is not enough. Throttle cable adjustment is Refer to the powerhead manual. -
Page 39: Servicing
10. Servicing For repair, handling method or cleaning, contact your servicing dealer. ■ When Requesting Repair If there is any problem, try finding the cause and take measures according to “9. Troubleshooting”. If it does not solve the trouble, contact your servicing dealer. ■ Contact for Repair Contact your servicing dealer for repair. Record serial No. (See “2.5 Position of Model and Serial No.”) in the space below. You will need this model code and serial No. -
Page 40: Technical Data
11. Technical data Model SSST Powerhead UMC425A UMC435A Handle LOOP LOOP Mass lb (kg) 3.1 (1.4) (without cutting attachment , guard and powerhead) Length in (mm) 28.5 (725) (without cutting attachment , and powerhead) φ16.5 (420) Cutting diameter in (mm) (Cutting-line head) -
Page 41: How To Contact Honda
How to Contact Honda Honda Power Equipment dealership personnel are trained professionals. They should be able to answer any question you may have. If you encounter a problem that your dealer does not solve to your satisfaction, please discuss it with the dealership’s management. The Service Manager or General Manager can help. -
Page 42: Distributor's Limited Warranty
To Obtain Warranty Service: You must, at your expense, take the Nikkari attachment and proof of purchase to any Honda Power Equipment dealer in the United States, Puerto Rico, or the U.S. Virgin Islands who is authorized to sell and/or service that product, during the dealer’s normal business hours. To locate a dealer near you, visit our web site at http://PowerEquipment.Honda.com and click on Find a Dealer. -
Page 43: Product Registration
PRODUCT REGISTRATION Thank you for choosing Honda. To ensure you receive important service information in the event of a product update or recall, please register your trimmer/brush cutter within 30 days of purchase. From time to time, American Honda conducts sales promotion that require you to register your trimmer/ brush cutter within 30 days of purchase. - Page 44 1. Go to www.PowerEquipment.Honda.com to register your unit. 2. Click on Product Registration. 3. Complete the required information and click Submit. It's that simple! NO POSTAGE Product Registration NECESSARY IF MAILED IN THE UNITED STATES BUSINESS REPLY MAIL FIRST-CLASS MAIL PERMIT NO.
Need help?
Do you have a question about the SSST and is the answer not in the manual?
Questions and answers