
Related Manuals for SaniServ DF200

Summary of Contents for SaniServ DF200
- Page 1 SaniServ ® An AFFINIS GROUP Company “Reliability from the team that Serves the Best” DF200 Soft Serve Dispenser Operation Manual SaniServ P.O. Box 1089 Mooresville, Indiana 46158...
- Page 2 SaniServ warrants to the original purchaser that its equipment, as originally supplied, is free from defects in materials and workmanship, and will perform adequately under normal use and service. SaniServ will replace or repair any part or parts found to be defective in material or workmanship for a period of 90 days (1 year for compressor) from the date of original installation, subject to the following limitations;...
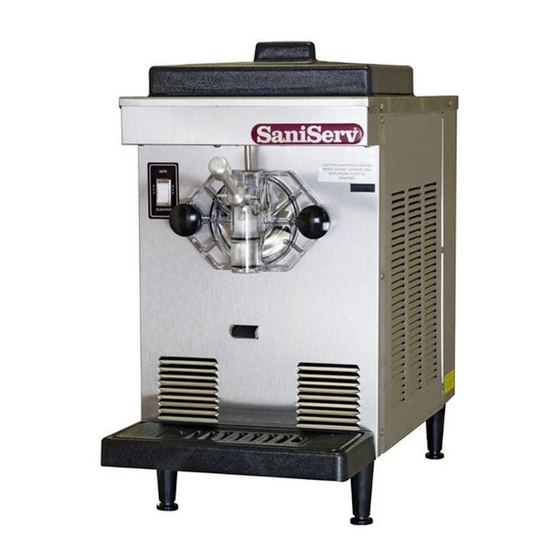
- Page 3 IMPORTANT This machine was designed to produce softserve ice cream and yogurt only. Do NOT attempt to operate this machine with shake or slush type product mix. Damage to the machine may occur and warranty will be void. SPECIFICATIONS Width 14.0 Inches (mm) (356)
-
Page 4: Table Of Contents
Table of Contents Introduction..................................1 Installation ..................................1 Disassembly and Cleaning ..............................2 Assembly and Lubrication ..............................5 Sanitizing ................................... 8 Operation................................... 8 Helpful Hints ..................................9 Mechanical Consistency Control System ........................10 Routine Maintenance............................... 11 Troubleshooting................................13 Exploded View................................. 15 Wiring Diagram................................ -
Page 5: Introduction
Introduction This manual provides a general system description of the SaniServ Soft Serve Dispensers. It has been prepared to assist in the training of personnel on the proper installation, operation, and maintenance of the machines. Read and fully understand the instructions in this manual before attempting to install, operate, or perform routine maintenance on the machines. -
Page 6: Disassembly And Cleaning
Disassembly & Cleaning CONSULT YOUR LOCAL HEALTH AGENCY FOR CLEANING AND SANITIZING REQUIREMENTS. This unit does not come presanitized from the factory. Before serving product, the dispenser must be disassembled, cleaned, lubricated, and sanitized. These instructions are general guidelines only. Cleaning and sanitizing procedures must conform to local health agency requirements. -
Page 7: Fig. 5 Front Plate Assembly
6. Remove the carburetor tube (Fig. 7) from the mix 4. Set the control switch to the “CLEANOUT” position and agitate for approximately 1 - 2 minutes and then pan. Disassemble and clean in the following manner: drain the water by opening the spigot. After the unit is a. -
Page 8: Fig. 9 Scraper Blade Removal
Dasher Front Scraper Blade Drip Tray View Insert Support Drip Tray Blade Support Fig. 9a Scraper Blade Removal Drip Tray Support Remains Attached to Scraper Blade Machine Dasher Front View Fig. 11 Support Drip Tray Assembly 10. Use the small diameter brush to clean all holes and ports in the parts. -
Page 9: Assembly And Lubrication
Assembly & Lubrication Use only food approved lubricants. Sanigel (SaniServ part number 188490) is recommended and is available from your local authorized SaniServ dealer or distributor. Lubrication must be performed daily. 1. Lubricate and assemble the dasher assembly in the d. -
Page 10: Fig. 15 Dasher Installation
e. Insert the dasher assembly into the freezing cylinder as far as possible (Fig. 15) being careful not to damage the scraper blades. Damage will occur to the scraper blades and the dispenser will not operate properly if the scraper blades are installed facing in a clockwise direction (Fig. -
Page 11: Fig. 19 Front Plate Assembly
Spigot Plunger Spigot Plunger O-rings Front Plate O-ring DO NOT LUBRICATE Inlet Hole Spigot Handle Faspin O-ring Front Plate Fig. 22 Carburetor Tube Assembly Front Plate Knobs Fig. 19 Carburetor Front Plate Assembly Tube e. Align the front plate to the freezing cylinder, place Carburetor Tube O-ring the square pocket on the back side of the front plate... -
Page 12: Sanitizing
Sanitizing Prior to operation, the machine must be sanitized. The unit must have already been cleaned and lubricated. Note: Sanitize immediately before use, not several hours before or the previous evening. 6. Set the control switch to the “OFF” position and 1. -
Page 13: Helpful Hints
Helpful Hints Front Plate: This component is the plastic device from Winter Storage: To protect the unit during seasonal which the product is dispensed. It is designed and shut-down, it is important that the dispenser be stored manufactured for strength and durability. However, in the proper manner. -
Page 14: Mechanical Consistency Control System
5. Install the right side panel, and the machine is ready Consistency Control System for continuous operation. Adjustments to the consistency control should only be made by a serviceman trained on SaniServ Rotation equipment . DO NOT attempt to make repairs on the machine. -
Page 15: Routine Maintenance
Routine Maintenance (Owner-Operator) WARNING DISCONNECT THE MACHINE FROM ITS POWER SOURCE(S) BEFORE PERFORMING ANY ROUTINE MAINTENANCE. PERSONAL INJURY OR DAMAGE TO THE MACHINE COULD RESULT IF THIS PRACTICE IS NOT OBSERVED. Daily: Inspect the machine for signs of product leaks past seals and gaskets. -
Page 16: Fig. 33 Torque Spring Adjustment Mechanism
Routine Maintenance (Trained Service Technician) WARNING HAZARDOUS MOVING PARTS Semiannually: It is advisable to clean and lubricate the idler arms (Fig. 33) to ensure their smooth operation. Use the following procedures: 1. Make certain that ALL power to the dispenser is off. 2. -
Page 17: Troubleshooting
. Who to contact for If you do not have a local service and parts provider, contact your SaniServ Dealer/Distributor. Visit service and www.saniserv.com to locate a Distributor (Sales Section) or a Service Agent (Technical Support Section). - Page 18 Trouble Shooting Glossary Ambient Temperature. The temperature of the air in the immediate vicinity of the operating machine. High ambi- ent temperature can reduce the capacity with an air-cooled condenser. Carbtube. Flow control device that allows product and air to be blended together. The air added to the product is labeled as over-run.
- Page 19 Trouble Shooting Glossary Rear Seal. This part is stationary during operation and must not move. When installed and lubed properly, seals mix in cylinder. When installed and lubed improperly, it causes main shafted bearing failure. Rerun. The reuse of previously frozen product after it has melted to a liquid. Rerun is obtained when emptying a freezer for periodic cleaning.
-
Page 20: Exploded View
Exploded View PAGE 16... -
Page 21: Wiring Diagram
Wiring Diagram PAGE 17... -
Page 22: Service Record
Service Record Date Service Performed Serviceman’s Signature SERVICE RECORD... - Page 23 This Page Intentionally Blank...
- Page 24 SaniServ ® An AFFINIS GROUP Company 451 E. County Line Road P.O. Box 1089 Mooresville, Indiana 46158-5089 We are on the web... www.saniserv.com Proudly made in the U.S.A. Technical Publication Publ. No. 80856 Updated 4/06...
Need help?
Do you have a question about the DF200 and is the answer not in the manual?
Questions and answers