Table of Contents
Advertisement
Quick Links
Advertisement
Table of Contents

Related Manuals for UBISLATE 7C+

Summary of Contents for UBISLATE 7C+
-
Page 1: User Manual
UBISLATE 7C+ USER MANUAL... -
Page 2: Table Of Contents
Contents Getting ready to use the device •What’s inside the box? •Product Appearance Technical Specifications Quick Start Guide •Charging the Battery •Power on •Power saves mode and Lock Screen •Power off •Orientation Sensor Setting •Using the Touch Screen •Using MicroSD Cards •Using the UbiSlate7C+ as a phone •Inserting a SIM card The Status Bar &... -
Page 3: Getting Ready To Use The Device
Getting r e a d y to use the device What’s inside the box? Check your product box for the following items: A: Mobile Internet Device B: AC Adapter C: Quick Start Guide D: Warranty Card The use of non-approved hardware accessory items or unapproved software may cause damage to the product or malfunctions not covered by the manufactures warranty. -
Page 4: Technical Specifications
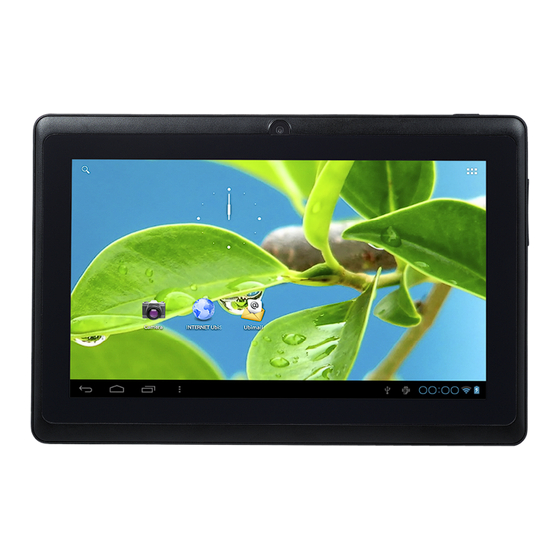
Technical Specifications LCD Display 7" TFT Capacitive Multi-touch LCD – 800 x 480 pixels OS Processor Android 4.0.4 Memory Cortex A8; 1Ghz 512MB RAM Storage 4GB on board, expandable to 32GB via Micro SD PC Interface Micro USB Power 3.7V Li-Polymer rechargeable battery External speakers, 3.5mm headset jack Audio GPU w/ HD video supported... -
Page 5: Power Off
Power off Press and hold “ ” button for 3 seconds. A menu will appear confirming that you would like to power off. Choose your desired option by tapping the corresponding item on the screen or Tap Cancel to exit to previous operation. -
Page 6: Using The Touch Screen
Using the Touch screen Your device comes with a responsive touch screen which works as follows: •Tap: To activate an on-screen item (e.g., application icons, buttons, menu items, and the letter/symbols of the on-screen keyboard), simply tap them with your fingertip or compatible stylus. -
Page 7: Using The Ubislate7C+ As A Phone
Using the Ubislate7C+ as a phone Your Ubislate7C+ i s also a phone which works on quad band GSM 850/900/1800/1900Mhz frequency spectrums. You can speak either through speakerphone o r headset connections. You must insert your valid GSM SIM card into the SIM card slot while the device i s powered off in order for i t to function correctly. -
Page 8: Shortcut Menu
The status bar is located on the bottom of the desktop. Home Page - Tap to return to the desktop. Back - Tap to return to the last screen Recent Apps - Tap here for a list of recently opened applications. Volume - Tap here to decrease the volume of audio output Volume +... -
Page 9: The Ubisurfer Browser
Tap or slide the box at end of the Wi-Fi bar to the right to turn on Wi-Fi or do the reverse to turn it off. Go to Wi-Fi settings to select the appropriate Wi-Fi network from the list of Wi-Fi networks and follow the instructions to enter the password assigned by the Wi-Fi network provider. -
Page 10: Ubisurfer Dual Browser Comparison Chart
UbiSurfer Dual Browser Comparison Chart Features UbiSurfer Browser Android Browser Email √ (Online) √ (Local) Web Surfing √ √ Web Acceleration √ Instant Messenger √ √ Social Networking √ √ Online Banking √ √ News/Weather/Sports √ √ Graphics √ √ Attachments √... -
Page 11: Apk Installation
APK Installation This device supports third party Application Program .APK files. There are hundreds of thousands of applications (programs) that can be downloaded from the internet. Some are free and some cost money. Download the APK file from the internet and copy it into the device directly or store it inside a Micro SD card and insert it into the device. -
Page 12: File Manager
In video mode, tap on to start a recording and Tap on to stop recording. You may exit the Camera interface by pressing the back button to return to the application menu. File Manager From the application menu, tap “File Manager” to enter the list of files saved on the device including the file you just recorded and saved using Voice Recorder or pictures or videos from Camera. -
Page 13: Music
MUSIC - Go to application menu, tap on “MUSIC" to enter the music playback interface. Only music files that are stored inside the device will be shown in the file list. You can classify the music file list by: RECENT, ALBUMS, ARTISTS, SONGS, PLAYLISTS or GENRES by selecting the appropriate option. Tap the song for 1 second, the option menu will pop up.You can select Play, Add to playlist, and Shop for Artist, Delete or Search. -
Page 14: Super Hd Player
Super-HD Player: Go to application menu, tap on “Super-HD Player " to enter the Super-HD Player interface and it will show how many image and/or video files are available inside the device. Tap on video, it will show the list of the video files in a small icon. Tap the file that you want to view to start playback. -
Page 15: Set Language
Set Language From the application menu, tap on “Settings" and select “Language & input" from the list. Tap on “Language" and you can see a list of compatible languages. Tap on the language that you want and it will be set instantly. I n the same area, you can also set the language of the keyboard that you would like to use when you need to input language on screen. - Page 16 button beyond the click, as you risk damaging it. -Plug in a charger, keep it charged at least 20minutes and try again. -Execute a hard reset of the unit (using a pin through the reset hole) •If the powering on process does not complete, reset the unit and try again. •At very low battery charge, the Wi-Fi module may stop working before the device.
-
Page 17: Safely Disposing Of The Device
•Never leave this product exposed to a humid environment or rain as the water can cause permanent damage to the hardware inside. •Never clean the device with any chemicals or detergents which could cause permanent damages to the device surface. •It is recommended n o t to use the headset continuously at high volume.
Need help?
Do you have a question about the 7C+ and is the answer not in the manual?
Questions and answers