
Related Manuals for Smart Living Steam Mop Plus


Summary of Contents for Smart Living Steam Mop Plus
- Page 1 Instruction Manual Please read these instructions fully before using this product Smart Living Smart Living Smart Living Smart Living Smart Living Smart Living Smart Living Smart Living Smart Living Steam Mop With all new design enhancements...
-
Page 3: Table Of Contents
Contents SAFETY INSTRUCTION 2-3 Safety Instruction GETTING STARTED 4 Parts and Features 5-6 Assembly OPERATION 7-8 Using your Steam Mop 9 Using your Carpet Glider CARE AND STORAGE 10 Care and Cleaning 10 Storage TROUBLE SHOOTING 11 Trouble Shooting REPLACEMENT PARTS 12 Replacement Parts Ordering TECHNICAL PARAMETER 12 Technical Parameter... - Page 4 BASIC SAFETY PRECAUTIONS SHOULD ALWAYS BE FOLLOWED WHEN USING THE STEAM MOP. READ ALL INSTRUCTIONS BEFORE USAGE. Use only as described in this manual. Use only manufacturer’s recommended accessories. Do not use outdoors. Do not leave the appliance unattended when plugged in. Always unplug the power cord from the electrical outlet when not in use and before servicing.
- Page 5 Never use the steam mop without a microfiber pad attached. Do not add cleaning solutions, scented perfumes, oils or any other chemicals to the water used in this appliance as this may damage the unit or make it unsafe for use. If you live in a hard water area, we recommend using distilled water in your steam mop.
-
Page 6: Parts And Features
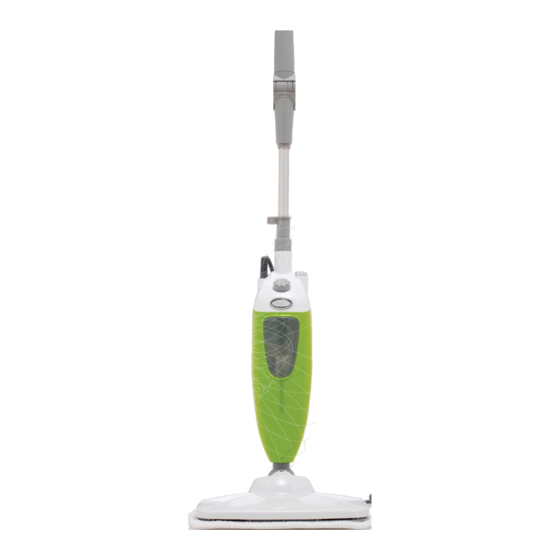
Parts and Features The Smart Living Steam Mop is designed to clean surfaces that will withstand high heat and moisture. Do not use on unsealed wood surfaces (especially wooden antique furniture), unglazed ceramic tile, painted surfaces or surfaces that have been treated with wax, oils, varnishes, or shellac. -
Page 7: Assembly
Assembly When assembling your steam mop, there may be a little water in the water tank. This is because we test all our steam mops 100% before you buy them, so you get a quality steam mop. fig. 1 fig. 2 Remove all the parts from the package. - Page 8 Your fig. 4 microfiber cleaning pads should be replaced every 3 months to maximize cleaning performance fig. 5 fig. 3 Place the microfiber cleaning pad on the floor with quick fastener strips facing up. Simply press the steam mop onto the pad to attach.(fig.3) Remove the water tank cap by turning it counter-clockwise to the unlocked position.
-
Page 9: Operation
Operation When you use your steam mop for the first time or if you have not used the unit in a while, it may take a minute or two for the water to travel through the pump and into the heater to create steam. - Page 10 Clean under furniture and tight areas, using the FOLDINg HANDLE! fig. 5 Clean under furniture and tight areas using the folding handle benefit. Press the handle release button and apply slight pressure to bend the handle. The folding joint will lock at a perfect, maximizing angle. (fig.5) Press the release button again and pull up to straighten.
-
Page 11: Carpet Glider
Carpet glider The steam mop is versatile! The carpet glider transforms your steam mop in no time. Now you can freshen and deodorize your carpets and area rugs with the power of steam. fig. 6 fig. 7 Set the carpet glider on the carpet with the smooth side down. Place the mop head, with a pad attached, on top of the carpet glider. -
Page 12: Care And Cleaning
Care and Cleaning fig. 1 fig. 5 fig. 2 fig. 6 fig. 3 fig. 4 When you have finished using the steam mop, press the steam button to stop the unit from steaming. The LED light will blink blue. Unplug the cord from the outlet (fig.1) and place the mop into the upright position and let the unit cool 3-5 minutes. -
Page 13: Trouble Shooting
Trouble Shooting PROBLEM POSSIBLE REASONS & SOLUTIONS The Steam Mop The steam mop should be securely plugged into an electrical outlet only. will not turn on. Is the LED light on? If not, check your fuse or breaker. Steam Mop will Is there water in the water tank? If not, add water to your steam mop following instructions. -
Page 14: Replacement Parts
Replacement Parts ORDERING REPLACEMENT PARTS To order additional parts and accessories, feel free to contact us by visiting www.oceansales.com. PART PART # Microfiber Pads 2. Filling Flask & Funnel 3. Carpet glider Technical Parameter Model 7623-1 Voltage 220 – 240V ~ Frequency 50Hz Power... -
Page 15: After Sales Returns Form - Guarantee Slip
After Sales Returns Form – guarantee Slip If Your Appliance Requires Attention First, check the operating instructions supplied to make sure the failure is not due to a problem you can rectify yourself. If the appliance is still under warranty, contact the retailer, their details will appear on your receipt. - Page 16 MADE IN CHINA...
Need help?
Do you have a question about the Steam Mop Plus and is the answer not in the manual?
Questions and answers
after pressing the blinking blue button still no steam
There may be several reasons why the Smart Living Steam Mop Plus is not producing steam after pressing the blinking blue button:
1. No Water in the Tank – Ensure there is water in the tank. The mop needs water to create steam.
2. Hard Water Build-up – If hard water has been used, sediment may have built up, blocking steam flow. Cleaning with a mixture of water and white vinegar may help.
3. Unit Needs Resetting – Unplug the mop, try a different steam setting or outlet, then plug it back in.
4. Heating Delay – It may take a few seconds for the mop to heat the water and produce steam.
5. Dirty or Wet Cleaning Pad – A soaked or dirty pad may affect steam output. Replace with a dry, clean pad.
6. Air in the Pump System – If the mop has not been used for a while, wait a minute or two for water to travel through the pump into the heater.
If these steps do not resolve the issue, additional troubleshooting may be required.
This answer is automatically generated
My new mop does not work blue light flashing tried other outlets and pressing blue button but nothing happens.
The blue light on the Smart Living Steam Mop Plus is flashing because the steam function needs to be activated. To fix it, press the steam button. If the issue persists, unplug the unit and try a different steam setting or outlet to reset the mop.
This answer is automatically generated
blue light doesn't stop blinking
The blue light on the Smart Living Steam Mop Plus continuously blinks, and the steam does not start, indicating a possible issue with the unit. Common causes could include a lack of water in the tank, a clogged steam nozzle, or an electrical malfunction. To troubleshoot, try refilling the water tank, checking for blockages, and unplugging the unit for a few minutes before restarting. If the issue persists, it may require further technical support or warranty assistance.
This answer is automatically generated
There is water in the tank, and plugged in, but light keeps blinking and wont turn solid blue and does not start to steam.
How much water in my smart living jr
The front end of the mop head lifts off the floor about 3/8 of an inch. This makes it hard to clean the floor. Is there a adjustmen for this?