Table of Contents
Advertisement
BLACKBOX RECORDER
User Manual
V 2.2 rev 0
Date: October 2011
Congratulations on your purchase of the JoeCo BlackBox Recorder. This
document will lead you through the basics of how to set up and use the
product. The BlackBox Recorder (BBR) has been designed to be as simple as
possible to set up and operate. Consequently you will find that this user
manual is not a long document and can be read from cover to cover in a
short while. However, we strongly recommend that you do read it just in
case there are some aspects of the product that are not immediately
obvious.
This manual covers all variants of the BlackBox Recorder: BBR1U; BBR1B;
BBR1D and BBR1A and should be read in conjunction with the Quick Start
guide.
More information is available in the LOGIN area of the JoeCo Website
www.joeco.co.uk
. Visitors can gain immediate access to more detailed
information whilst EndUsers once approved are eligible for software
upgrades and other downloads.
If you need information in a hurry register as a Visitor and upgrade to an
EndUser later on.
© JoeCo Limited 2009, 2010, 2011. E&OE. All rights reserved. All trademarks and names are
recognised as the property of their respective owners
BLACKBOX RECORDER - User Manual v2.2
Page | 1
Advertisement
Table of Contents

Related Manuals for JoeCo blackbox bbr1u


Summary of Contents for JoeCo blackbox bbr1u
-
Page 1: Blackbox Recorder
If you need information in a hurry register as a Visitor and upgrade to an EndUser later on. © JoeCo Limited 2009, 2010, 2011. E&OE. All rights reserved. All trademarks and names are recognised as the property of their respective owners BLACKBOX RECORDER - User Manual v2.2... -
Page 2: Table Of Contents
Using a PS2 keyboard ..................... 34 Troubleshooting ..................... 36 Safe’n’Sound Record Recovery ................37 Summary Of Alert Messages ................38 JoeCo Conditions of Use ..................40 Software Licence Agreement ................. 42 Warranty Information .................... 45 Product Returns ..................... 47 Product and End User Registration ................ 48 Page | 2 BLACKBOX RECORDER - User Manual v2.2... -
Page 3: Important Safety Information
Important Safety Information WARNING - Read the following before proceeding : Read instructions: Retain these safety and operating instructions for future reference. Adhere to all warnings printed here and on the equipment. Follow the operating instructions printed in this User Guide. Do not remove covers: Operate the equipment with its covers correctly fitted. -
Page 4: Copyright Warning
Copyright Warning JoeCo’s recorder products are designed to enable you to record and reproduce material to which you own the copyright, or material which the copyright owner has granted you permission to record and/or reproduce. -
Page 5: Opening The Box
Opening the box Box Contents Inside the box you will find the following: BlackBox Recorder Power Supply User Manual Quick Start Guide 3 x Input /Output (i/o) cables (only included with the unbalanced BBR1U, otherwise available separately) The BlackBox Recorder is not a standard multitrack recorder nor is it a digital audio workstation (DAW). -
Page 6: Controls And Interfaces
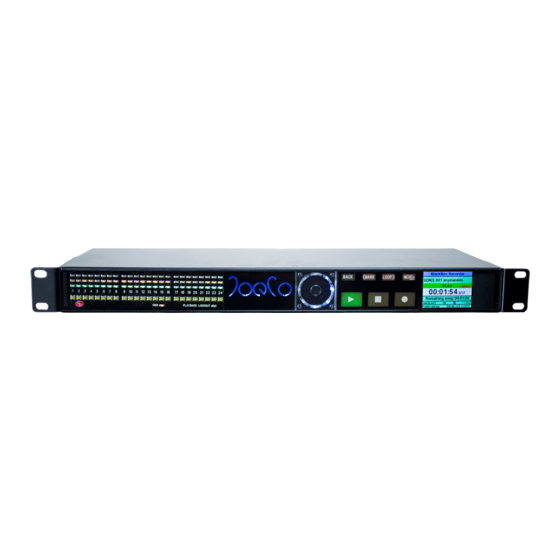
Lockout which can prevent you from accidentally entering playback during the performance. To the right of the JoeCo logo is the control wheel which has a number of functions explained later. Then we have the main Transport controls [PLAY, STOP, RECORD] with the four other control buttons above [L-R: BACK, MARK, LOOP, MENU]. -
Page 7: Rear Panel
The rest of the rear panel is fairly self explanatory we hope and is explained in greater detail later in this manual. There are more technical details on the JoeCo website (www.joeco.co.uk) should you require them. BLACKBOX RECORDER - User Manual v2.2... -
Page 8: Installation
Installation Deciding where to install In a live situation, it depends on whether the live engineer wants to be able to see the BBR interface or not and whether you intend to utilise the Virtual Sound Check facility. The analogue cable looms supplied with the standard unbalanced unit are 3m long so if you’re planning on mounting the unit in a rack close to your console then that will be the deciding factor. - Page 9 external effects (such as you might want to insert into a channel on the console) into the signal chain. As the BBR has used up the insert points on the console, these allow you to still insert effects such as compressors into some channels.
-
Page 10: Deciding On A Disk Drive
USB2 can carry up to 480Mbits/s of data and for recording 24 tracks of 96kHz/24bit the maximum data rate we need is less than 60MBits/s so there’s normally plenty of headroom. JoeCo has already tested numerous USB2 drives from Western Digital, Glyph, Seagate, Verbatim, Samsung, Buffalo and others and found them to work well. -
Page 11: Power Connection
Power connection The BBR1 is supplied with its own power supply which plugs into the dc inlet at the rear right of the unit (or left if you’re looking at the rear as you read this). Although the unit can accept a suitable dc input between 7.5V and 15V it should always be used with the power supply provided. -
Page 12: Normal Operation
Normal operation Whenever you power up the BBR it first checks the date against its internal real-time clock. If it’s the first time the BBR has been powered up today, it will create a folder on the drive named \YYYY-MM-DD.bbr and make this the current folder where YYYY is the year, MM is the month and DD is the date. -
Page 13: Playback
At the end of a recording the BBR will have to do some housekeeping such as closing the files and writing file headers to the disk to keep it in prime condition. The DISK LED and the STOP button will flash until the BBR has finished writing to the disk. - Page 14 If the BBR is set to “PLAYBACK LOCKOUT” and you want to disable it temporarily to perform a Virtual Sound Check, press the MENU button to enter the MENU and PLAYBACK LOCKOUT is the first item on the list. Press MENU again and it will remove the tick () mark against PLAYBACK LOCKOUT.
-
Page 15: File Names
Recent Songs list is stored on the disk itself so the list will change if you use a different disk. File Names By default, the BBR will name the audio files it creates as follows: nnn-tt.WAV Where nnn is the song number (between 001 and 999) and tt is the track number (between 01 and 24). -
Page 16: Renaming Tracks
where “Song Name” is the new name that you typed. This will rename all the tracks [01 - 24] of this song in this folder with this new Song Name. [Note: It is important for the BlackBox to keep the nnn-tt prefix so that it knows which audio files belong together as a Song and which track is to be played out of which output. -
Page 17: Virtual Sound Checking
existing Song and then use them as a template. Select the Song which has appropriately named track as if for Playback (see above). Enter the Track Arm MENU. Select “Load from Current Song”. All Songs that you record subsequently will inherit these Track names. The track names will be stored in the Flash memory so you should be able to use them time after time. - Page 18 MARK and LOOP operations Pressing the MARK button during either during the Recording or during Playback will place Markers in the Song File itself. Multiple Markers can be set within a Song. The Markers are indicated on the Transport Function Bar Having set some Markers, the LOOP button will create a playback Loop and continually playback the MARKED section of the Song.
-
Page 19: Monitoring
Monitoring It is possible to monitor a summing mix, a rough mix or individual pairs of tracks on the BBR via the headphone output. The summing mix “ALL” will place every odd numbered track on the left channel and every even numbered track on the right channel. -
Page 20: Summary Of Combined Controls
Summary of Combined Controls Transport Mode Press/Hold Wheel Function < or > Headphone monitor volume BACK < or > Headphone monitor solo channel Any (PFL toggle BACK Swap between volume and solo mode) channel select Any (PFL toggle MARK Exit solo and return to mix setting mode) In STOP STOP... -
Page 21: Using The Menu
To enter the menu, press the MENU button in the Control section of the front panel. Setting up adjustable parameters This list may not be exhaustive as JoeCo is constantly improving its products and may have added features to the software since this document was BLACKBOX RECORDER - User Manual v2.2... - Page 22 authored. However, this will give you a good idea of the basics and you can always get the most up to date information from the website. The currently selected Menu item is highlighted in Yellow. When a Menu item to be adjusted is selected, the display changes to yellow text on a red background.
- Page 23 Song Select... This loads the Song Select Menu allowing you to select Songs for playback. The options are: Recent Songs... Provides a list of the most recently played Songs – useful if you’re on tour and want to use the same songs in each venue for sound checking Select Song Folder...
- Page 24 FAQs on the JoeCo website. Timestamp Broadcast WAV files include a timecode stamp which marks the time of the first sample of the file and helps re-sync the files in the post production process.
- Page 25 controller. The BBR can also respond to Sony 9-pin Machine Control (also known as SONY PII) protocol commands for transport controls and track arming/disarming. The ring of the LTC/F.sw TRS jack socket can accept a momentary footswitch which will emulate pressing the record button (starting a new recording or marking a new song).
- Page 26 the output connections. This mode is not power safe. Line-In Mon can also be set to Off so that the input signal is not echoed to the output at all. i/o level (0VU): Only available on Analogue i/o. The two settings are LOW and PRO as described earlier in this document (Page 8).
- Page 27 Adjusting the real-time clock The real-time clock is used to create folders on the drive with a logical name so that you can find your recording again later. It’s also used to timestamp your recordings when no other reference (such as Linear Time Code) is available, so it’s a good idea to make sure that the clock is set correctly.
-
Page 28: Disk Manage
Ctrl key on a keyboard whilst pressing the following letter will allow you to change that field. Most hotkeys can be used during a Recording Next (^p): will prename the next Song that you record Reuse next songname will use the same song name for each subsequent recording Folder (^f): Displays the current folder’s name and allows you to rename it. -
Page 29: Software Updates
Software updates It should be noted that JoeCo may release software upgrades from time to time, either to add features or to cure bugs that have been found in the software – though we have endeavoured to remove all that we’ve found. - Page 30 Download the new update file from the JoeCo website directly into the root folder of a USB2 hard drive or a FAT32 formatted memory stick (note memory sticks or Pen drives are often formatted with FAT16 which will not work).
- Page 31 Licence... This allows you to licence certain chargeable options more details of which are available on the JoeCo website. You will need to advise JoeCo of the machine key along with your payment details before JoeCo can enable any optional software. You will then receive a non-transferable enabling code for your BlackBox and can be entered into the unit using the Enter key: feature BLACKBOX RECORDER - User Manual v2.2...
-
Page 32: Linking Multiple Blackbox Recorders Together
Linking multiple BlackBox Recorders together It is possible to link multiple BlackBox Recorders together to make recordings with more than 24 channels or to make redundant copies by duplication. Typically up to four units can be linked in this way to create a maximum of a 96 channel / 96 kHz recording. - Page 33 In the SETUP | CONTROL menu, select Link Mode. Select Master for the recorder you want to act as the master controller (which will always record channels 1-24). The Slave units can be set to Slave 1-24 (creating duplicate tracks to those on the master recorder – though you will obviously have to feed this unit the same audio signals as the master recorder or you’ll be recording silence!), Slave 25-48, Slave 49-72, and Slave 73-96.
-
Page 34: Using A Ps2 Keyboard
button again will start a new song across all units simultaneously so that their start times line up in the DAW. Master/Slave Playback In order to playback synchronously, each machine must have its preroll set to ensure that the disk files can all be ready when they start. The default time will normally be ok but this can be adjusted in the Control section of the Menu (see page 25). -
Page 35: Keyboard Navigation
Direct edit from keyboard (various keys combined with ctrl key) When not editing we implement various control keys to enter text edit directly (without using menus). edit current song name ^nnT edit track name for track “nn” prename the next song before recording it rename current folder Keyboard controls during text edit select all... -
Page 36: Troubleshooting
Troubleshooting We are confident that the BlackBox Recorder will give you long and reliable performance but in case you have difficulties, here are a few things to try before you call your dealer or distributor. Problem Things to try No lights on BBR unit Check that the power supply is getting mains power and that the correct power supply is plugged correctly into the BBR1... -
Page 37: Safe'n'sound Record Recovery
Problem Things to try Some channels not audible Check the cable looms feeding into the BBR1 Check TRS jacks in console insert points Check loop through TRS jacks on BBR Sound through BBR Check the TRS jacks are plugged into the insert distorted points on console correctly and that the D-types are secured into the BBR... -
Page 38: Summary Of Alert Messages
Whilst Safe’n’Sound cannot protect against a physical hard drive failure (which are very rare nowadays), it helps protect against human error or power failure. As a background task the BBR scans the disk to calculate the remaining disk space and to find where the first free space is located on the disk. When it has found this information and correctly updated the drive it places a tick or check mark () beside the remaining disk time. - Page 39 "CAN'T FIND FOLDER"; displayed if PLAY or RECORD is pressed when the selected folder is not available "LOOP TOO SHORT"; displayed if LOOP is pressed and the loop length is too short "CHECK MASTER SIGNAL"; displayed if Slave is not receiving clock and control from Master "REMOTE CONTROLLED";...
-
Page 40: Joeco Conditions Of Use
PLEASE READ THESE CONDITIONS OF USE (THE "CONDITIONS") CAREFULLY BEFORE USING YOUR JOECO PRODUCT. BY USING YOUR JOECO PRODUCT YOU ARE AGREEING TO BE BOUND BY THESE CONDITIONS. IF YOU DO NOT AGREE WITH THESE CONDITIONS, DO NOT USE THIS PRODUCT. - Page 41 JoeCo Products must not be used for purposes that could infringe a copyright held by a third party or could, in any other way, be illegal. Any such use is entirely at the risk of the User and JoeCo and its authorised distributors and resellers have no responsibility or liability whatsoever for any claim arising from such use.
-
Page 42: Software Licence Agreement
Product under a temporary evaluation arrangement with its owner (which may be JoeCo or one of its authorised distributors or resellers), for a period determined by the owner, where the owner has... - Page 43 JoeCo software or services could lead to death, personal injury, or severe physical or environmental damage. Any such use is entirely at the risk of the user and the user must hold JoeCo harmless for any claim arising from such use.
- Page 44 Upon termination you will cease all use of the Software and destroy or return any copies of the Software to JoeCo. Sections 1, 3, 4, 5, 6, 8, 9, 10 and 11 of this Licence shall survive any such termination.
-
Page 45: Warranty Information
You acknowledge that, in agreeing to the terms of this Licence, you have not relied on any representation, undertaking or promise given or implied from anything said or written by JoeCo or by an authorised JoeCo distributor, reseller or representative prior to entering into this Licence except as expressly stated in this Licence. - Page 46 The purchaser will have the option (exercisable within thirty days of notification by JoeCo) to pay this fee and have the Product repaired and returned, or not pay this fee and have the Product returned un-repaired at their expense.
-
Page 47: Product Returns
A waiver by JoeCo of any default shall not constitute a waiver of any subsequent default. No waiver by JoeCo of any of the terms of this Warranty shall be effective unless it is expressly stated to be a waiver and is communicated to you in writing. -
Page 48: Product And End User Registration
Any Product which is returned to JoeCo or to one of its distributors or resellers without authorisation, i.e. one for which an RMA number has not been issued by JoeCo, will be returned to the purchaser at the purchaser’s expense.
Need help?
Do you have a question about the blackbox bbr1u and is the answer not in the manual?
Questions and answers