Advertisement
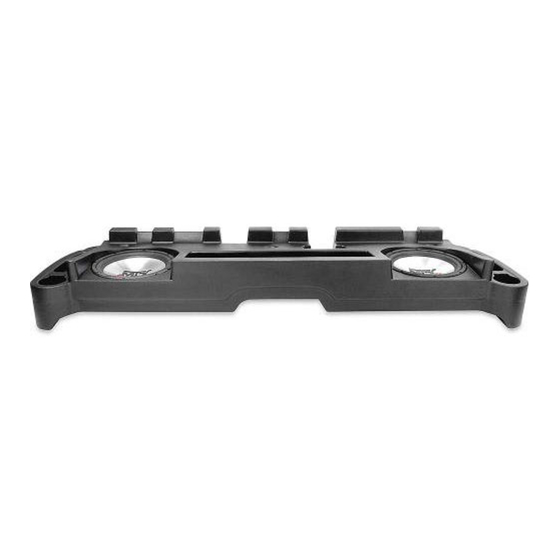
DDXP201
Enclosure Volume: 1.8 Cubic Foot, Sealed
READ ALL DIRECTIONS CAREFULLY BEFORE BEGINNING
MOUNTING LOCATION: The enclosure mounts under the rear seat of extended cab trucks, replacing the factory tool kit.
TOOLS FOR INSTALLATION:
Phillips Head Screwdriver
10mm Socket
Ratchet
11/32" Socket
INSTALLATION: Follow the steps below
1. Place gasket provided around woofer hole cutout. Connect black wire to the negative side of woofer and red to the posi-
tive side. Using screws provided install woofer into enclosure, making sure not to overtighten screws to avoid stripping.
2. Remove the carpet trim panels at the door on both passenger and driver side. Start by pulling in the middle, it's a little
easier. It also has a tab on each end, be careful, these are easily broken.
3. Remove rear panel that is above rear seat, start from one end and pry slowly from the top using panel puller. It snaps off
easily. On 2002-Newer models you will need to push down to free metal clips holding bottom of panel.
4. Remove four screws holding the rear side panels into place at the rear, you will see these when the rear panel above the
seat is removed (two screws on each side).
5. Remove seat belt bolts for the front sets they are hidden by a plastic cover, pry carefully from the bottom to expose the
bolts.
6. Remove rear side panels. Open rear vent window first and start pulling from the top rear, there is one snap here and
another at the top front. Keep pulling out toward the center of truck. At the bottom of the panel are two tabs, lift up on the
panel to free it. Pull the panel out of the truck it will still be attached to the truck at the front bottom by the seat belt (you
can remove the seat belt completely but it is not necessary). Lay it under the truck. Repeat for the other side. 2000-Newer
model year has a two part side panel. Remove top piece first by unsnapping like above. Then unsnap lower section and
remove.
7. Remove covers on the tool tray under the seat (1997-1998 model years only) and remove jack and tool kit. Remove three
10mm bolts across the back of the tool tray. Remove covers in the bottom of the cup holders (this is a piece of rubber
and will come out effortlessly on 97-98 model years) to reveal two more 10mm bolts, remove these. Remove tool tray
by pulling up on the front of the tray first. When the tray is free slide the seat belts through the slots in the back of the
tray and remove the tray from the truck (save this tray and all the hardware, if you sell or trade the truck you may want
to replace it).
1/4" Socket
T-50 Torx
6" Ratchet Extension
Panel Puller
Advertisement
Table of Contents

Subscribe to Our Youtube Channel
Related Manuals for MTX DDXP201


Summary of Contents for MTX DDXP201
- Page 1 DDXP201 Enclosure Volume: 1.8 Cubic Foot, Sealed READ ALL DIRECTIONS CAREFULLY BEFORE BEGINNING MOUNTING LOCATION: The enclosure mounts under the rear seat of extended cab trucks, replacing the factory tool kit. TOOLS FOR INSTALLATION: Phillips Head Screwdriver 1/4” Socket 10mm Socket...
- Page 2 8. Place enclosure into truck in spot previously occupied by the tool tray, woofers firing up. Make sure seat belts are in slots provided on the enclosure. Bolt enclosure into place using bolts and washers provided. Enclosure bolts go back into the same holes the factory tray used, three in the back and two in the cup holders.
Need help?
Do you have a question about the DDXP201 and is the answer not in the manual?
Questions and answers