Table of Contents
Advertisement
DEHUMIDIFIER
MODEL
MJ-E14CG-S1-IT
INSTRUCTION MANUAL
Features
Drying Inside
l
Air Filter
l
Easy Dehumidifying ·
l
Intelligent Laundry
In order to ensure correct usage, please read this
l
instruction manual carefully and retain it for future
reference.
Before accepting the Warranty at the time of
l
purchase, please make sure that the date of
purchase, place of purchase and other items are
correctly filled in the form.
Keep the Instruction Manual and Warranty in a safe
l
place.
e_mj_e14cg_s1_it.indb
1
Table of Contents
Before using the unit
Recommended Ways of Using the Unit
l
Depending on Purpose ······························ 2
Frequently Asked Questions····················· 3
Precautions ················································· 4
l
Warnings ····················································· 6
l
Tips on Dehumidifying······························· 6
l
Names and Functions of Parts·················· 7
l
Unit/Control Panel/LCD Panel
(Low Temperature/Defrost/High Humidity)
Things to Be Aware of ····························· 10
l
Before Using Your Dehumidifier ············· 10
l
Operating
Turning the Unit ON and OFF·················· 12
To turn ON/To turn OFF
Reading the humidity display/Tank full lamp
Easy Operation ········································· 13
Setting Modes ··········································· 14
LOW/MILDEW GUARD/LOW TEMP/AUTO/AIR PURIFIER
Using Louvre ············································ 16
l
Drying Inside Operation··························· 17
l
Using Timer ·············································· 18
OFF timer operation/ON timer operation
Using Child Lock ······································ 20
l
Carrying the Unit ······································ 20
l
Draining ····················································· 21
l
Continuous Drainage ······························· 22
l
Troubleshooting
Maintenance ············································· 23
l
Replacement Parts ··································· 25
l
Storage and Disposal······························· 25
l
Troubleshooting ······································· 26
l
Specifications ··········································· 28
English
Italiano
page
2013/06/22
19:36:43
Advertisement
Table of Contents

Subscribe to Our Youtube Channel
Related Manuals for Mitsubishi MJ-E14CG-S1-IT


Summary of Contents for Mitsubishi MJ-E14CG-S1-IT
-
Page 1: Table Of Contents
English DEHUMIDIFIER MODEL Italiano MJ-E14CG-S1-IT INSTRUCTION MANUAL Features Table of Contents page Drying Inside Before using the unit Air Filter Easy Dehumidifying · Recommended Ways of Using the Unit Depending on Purpose ······························ 2 Intelligent Laundry Frequently Asked Questions····················· 3 Precautions ·················································... -
Page 2: Depending On Purpose
Recommended Ways of Using the Unit Depending on Combine operating mode and swing louvre function to get optimum results. Drying Lowering room humidity Preventing mold/ laundry When you don’t When you don’t When you want to When To prevent want to hang know what set the humidity condensation... -
Page 3: Frequently Asked Questions
ng on Purpose Frequently Asked Questions Why does the dehumidifier seem to collect less water in winter? To clean mold/ condensation the air A. When the temperature and humidity are low, the amount of water collected is To keep the inside There is no need for decreased. -
Page 4: Precautions
Continuing to operate the unit may result in fire, electric shock, or malfunctions. This may result in fire and/or electric Contact your dealer or Mitsubishi Electric shock. Refer servicing to your dealer or Service Centre for consultation. Mitsubishi Electric Service Centre. - Page 5 CAUTION Do not drain water continuously Do not cover the front or side if there is a possibility that air intakes or the air outlet temperature around the hose could with cloth, curtain, etc. drop to freezing point. This results in poor ventilation and Water inside the hose may freeze and may cause heat generation/fire.
-
Page 6: Warnings
Precautions (Cont.) Tips on Dehumidifying CAUTION Drain the water tank before use After emptying the tank, transport the unit by grasping the handle firmly. Refrain from opening Losing your footing while carrying the unit may cause personal injury doors/windows during operation or damage to the floor. -
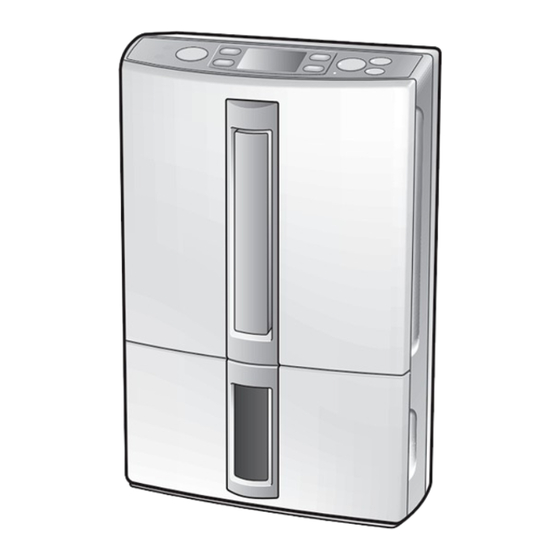
Page 7: Names And Functions Of Parts
Raise handle to transport It is impossible to remove the back panel because the two spots shown are fastened with two special Louvre screws. If the unit malfunctions, contact your Mitsubishi dealer. Side air intakes (left/right) Do not block. Sensor Do not cover. -
Page 8: Control Panel
Names and Functions of Parts (Cont.) Control Panel Lamp Mode button Swing louvre button Current mode lights. For switching from one Sets swing louvre operating mode to another. direction or locks it into Selection button position. Humidity selection Switches modes. -
Page 9: Power Button
Drying inside lamp Flashes when drying inside in progress. Drying inside button Activate/deactivates drying inside. Air purifier lamp Lights during air purifier only operation. Air purifier button Switches to air purifier only operation. Power lamp Lights when unit is ON. -
Page 10: Things To Be Aware Of
Things to Be Aware of Before Using Your De Setting the air filter Room temperature may rise 2-4°C during operation The air filter is supplied with the unit at time of The dehumidifier does not have a cooler function. purchase. Fit the air filter before using the unit. Due to heat produced during operation, the room temperature may rise 2–4°C. - Page 11 ur Dehumidifier Inserting the water Plug the power cord into tank correctly the power socket Tank Lid Tank Lid Open the front door. Open the front door. Confirm that the lid Confirm that the lid is securely attached is securely attached to the water tank.
-
Page 12: Turning The Unit On And Off
Turning the Unit ON and OFF To turn ON Press Reading the humidity display Power lamp lights. The mode is displayed. RILEVATA indicates the Example The louvre opens automatically. current humidity. Current humidity range is between 30–80%. To start dehumidifying, select the desired mode. •... -
Page 13: Easy Operation
Easy Operation The unit automatically monitors room temperature/humidity alleviating the necessity to make minor adjustments. Use EASY DEHUMIDIFYING for dehumidifying a room and INTELLIGENT LAUNDRY for drying clothes. Changes with every press Press Selected mode lamp lights. EASY DEHUMIDIFYING ... -
Page 14: Setting Modes
Setting Modes LOW, MILDEW GUARD and LOW TEMP LOW mode is for when you want to leave the dehumidifier on. MILDEW GUARD mode suppresses mildew growth. LOW TEMP mode is for preventing condensation or when the room temperature is low. Changes with every press Press ... -
Page 15: Air Purifier
AUTO AIR PURIFIER When you want to set the humidity level. To operate only the air purifier. Press Press Air purifier lamp lights. Frame appears around AUTO. The MODE button can also be used to select To return to the previous mode, press the air AUTO. -
Page 16: Using Louvre
Using Louvre (how to read the swing monitor) The louvre can be made to swing. Select from the 4 possible settings to suit the purpose. Stop swing operation WIDE With each Press press of the button Starts swing operation. UPWARD ... -
Page 17: Drying Inside Operation
Drying Inside Operation The inside of the unit can be dried to suppress mildew growth on the cooler. On days the dehumidifier is used, drying inside is recommended. Automatic operation Manual operation To activate drying inside after every use. To activate drying inside by pressing a button. Press Press while the unit is on... -
Page 18: Using Timer
Using Timer OFF timer operation The OFF timer can be set for 1 to 9 hours. Set the timer when the power is switched on. To set To cancel Switch the power on. <When you want to turn the unit off>... - Page 19 ON timer operation The ON timer can be set for 1 to 9 hours. Set the timer when the power is switched off. To set The following is an example of a display indicating AUTO dehumidifying (set to 60%), swing set to Switch the power off.
-
Page 20: Using Child Lock
Using Child Lock Carrying the Unit To lock Pull the handle out, and grasp with a firm grip Press for 3 or more seconds. The child lock indicator lights up. The child lock is switched off when the power cord is unplugged. When the child lock is activated, the other switches are inoperable. -
Page 21: Draining
Draining The unit automatically shuts down and lights the Tank full lamp when the tank (approximately 3.8 L) is full. Empty the tank. Remove the tank lid, and empty. Remove the water tank. Tank lid Open the front door. Floating element Do not remove or dismantle the float. -
Page 22: Continuous Drainage
Continuous Drainage If a drain is available, the unit can continuously drain excess water by attaching a commercially available hose (internal diameter 15 mm). The unit can be operated for extensive periods without the need to empty the water tank. CAUTION Commercially available hose (ID 15 mm) Long enough to reach the drain. -
Page 23: Maintenance
Maintenance Do not use detergents, cleaning agents for heat exchange equipment, abrasive powders, chemically treated dusters, gasoline, benzene, thinners or other solvents, as they can damage the unit or the water tank, which may result in leakage. Cleaning Once every two weeks Water tank •... - Page 24 Maintenance (Cont.) Once every three months Air filter Soak the filter in water about once every three months. For maintenance procedures see Remove the front panel and Dry the air filter. pre-filter. Front panel Pre-filter Do not hang with pegs as this may damage the filter.
-
Page 25: Replacement Parts
Air filter for replacement Type: MJPR-ECGFT Type code: 5C7 859 Empty the water tank and wipe away any remaining For these items contact your nearest Mitsubishi drops of water. Electric dealer. Clean the pre-filter. Remove grit with vacuum cleaner Store the unit. -
Page 26: Troubleshooting
Troubleshooting For the symptoms listed below, refer to the remedies listed right. Symptom Cause/Remedy Dehumidified air passes through heating coils causing it to warm The unit blows warm air (this unit is not a cooler). This is not a malfunction. Check to see if the temperature/humidity is low. - Page 27 Symptom Cause/Remedy Check to see if the unit is on a slope or uneven surface. → Move to a sturdy even surface. The operating Check to see if the pre-filter is clogged. noise is loud/ → Clean according to the maintenance procedures. reverberates Operating the unit in small rooms or in tight spaces sometimes causes the sound to reverberate.
-
Page 28: Specifications
2002/96/EC Article 10 Information for users and Annex IV. Your MITSUBISHI ELECTRIC product is designed and manufactured with high quality materials and components which can be recycled and reused. This symbol means that electrical and electronic equipment, at their end-of-life, should be disposed of separately from your household waste.
Need help?
Do you have a question about the MJ-E14CG-S1-IT and is the answer not in the manual?
Questions and answers