Advertisement
Installation Instructions
––
LUCCI Slimline Fan Remote Control
SKU# 210012
GB
Installation Instruction Manual ...................................................................................................... 2
Relay Remote Version 1.0- SKU210012– Last updated on August 21, 2013 – © Copyright 2013 – LUCCI
1 | P a g e
Advertisement
Table of Contents

Related Manuals for LUCCI 210012


Summary of Contents for LUCCI 210012
-
Page 1: Installation Instructions
Installation Instructions –– LUCCI Slimline Fan Remote Control SKU# 210012 Installation Instruction Manual ...................... 2 Relay Remote Version 1.0- SKU210012– Last updated on August 21, 2013 – © Copyright 2013 – LUCCI 1 | P a g e... -
Page 2: Installation Requirements
Installation Instructions Thank you for purchasing this quality Lucci product. To ensure correct function and safety, please read and follow all instructions carefully before using the product. Please keep instructions for future reference. Installation requirements Must be installed by a licensed electrician and in accordance to AS/NZS3000 (the latest edition). -
Page 3: Installation Directions
Installation Instructions Note: The DIP switch assembly has 4 switches which can be setup to 16 different transmitting code combinations. This is practical when there is more than 1 remote/receiver pair operating locally or in the same room. Note: To access the receiver DIP switches, remove the DIP switch cover. Fig. - Page 4 Installation Instructions Connect TO MOTOR L of control unit wire to the MOTOR (L) fan wire. Connect FOR LIGHT of control unit wire to the LIGHT (L1) fan wire. Push the connected wires up into the junction box. Lay the control unit wire on top of the control unit. Lay the control unit in the CANOPY.
- Page 5 Installation Instructions NOTE: Fan installation must be complete including assembly of blades before operating the remote control. This remote control is only suitable where the controller/receiver can be inserted inside the canopy cover safely and securely. Ceiling fans with mount bracket type shown in Fig. 4 would be suitable. ...
-
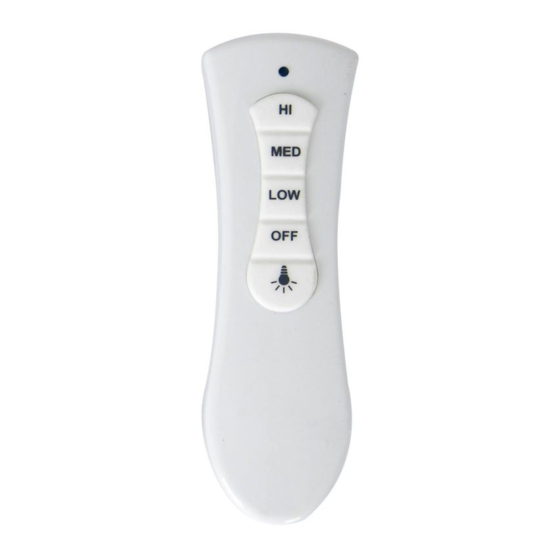
Page 6: Operating The Remote
Installation Instructions Operating the remote Before you start using the remote, take the time to read through this section and get familiar with the function of each button. Fig. 5 LED Indicator: The red LED indicator on the top of transmitter will flash when the buttons are active. HI: Press the button to set fan running speed to high. -
Page 7: Troubleshooting
Installation Instructions Trouble shooting Warning: For your safety, ensure the power is switched OFF before starting the troubleshooting procedures TROUBLE PROBABLE CAUSES SUGGESTED REMEDY Replace fuse. Turn ON circuit breaker. Turn ON Main power not restored wall switch 1.No functions operate Wall switch power to the fan Switch wall switch ON, to power the remote remote is OFF...
Need help?
Do you have a question about the 210012 and is the answer not in the manual?
Questions and answers