
Related Manuals for Tomcat mini-mag series


Summary of Contents for Tomcat mini-mag series
- Page 1 MINI-MAG Operator Manual 2009 Version 1.0 R.P.S. Corporation Phone: 1-800-450-9824 P.O. Box 241 Fax: 1-866-632-6961 Racine, Wisconsin 53401...
-
Page 2: How To Use This Manual
HOW TO USE THIS MANUAL This manual contains the following sections: The SAFETY section contains important information regarding hazard or unsafe practices of the - HOW TO USE THIS MANUAL machine. - SAFETY - OPERATIONS Levels of hazards are identified that could result - MAINTENANCE in product or personal injury, or severe injury - PARTS LIST... -
Page 5: Table Of Contents
TABLE OF CONTENTS MACHINE INFORMATION FORM PAGE 1 WARRANTY REGISTRATION FORM PAGE 2 MACHINE SPECIFICATIONS PAGE 3 COMMON WEAR PARTS PAGE 4 SAFETY MESSAGES PAGE 5 !!SAFETY PRECAUTIONS!! PAGE 6 MACHINE CONTROLS AND FEATURES PAGE 7-8 MACHINE SETUP PAGE 9 ADJUSTING &... -
Page 6: Machine Information Form
This operator and parts manual should be considered a permanent part of the unit and should remain with the unit at all times. This operator and parts manual covers all the Mini-Mag series scrubbers. You may find descriptions and features that are not on your particular model. The information and specifications included in this publication were in effect at the time of printing. -
Page 7: Warranty Registration Form
R.P.S. CORPORATION P.O. BOX 241 RACINE, WI 53401 PHONE: 800-450-9824 FAX 866-632-6961 Dealer: __________________________ Installed By: ______________________ Location: (City, State)_______________ Install Date: ______________________ Customer Information Name:________________________ Contact: _________________________ Address:_________________________ City/State:__________________Zip______ Phone Number :___________________ Fax Number: _____________________ Model Number:___________ Serial Number:______________ Hour Meter:____________ Squeegee Size:__________ Squeegee Material: Gum Linatex... -
Page 8: Machine Specifications
MACHINE SPECIFICATIONS (Brush Drive) (Traction) BODY / DIMENSIONS Tank Material: Poly (3/8” thick) Poly (3/8” thick) Chassis Construction: 1/8” Coated Steel 1/8” Coated Steel Front Wheels: (2) 9” x 2” (2) 9” x 3” Rear Casters: (2) 4” x 2” (2) 4”... -
Page 9: Common Wear Parts
COMMON WEAR PARTS BRUSH P/N F OR BRUSH P/N F OR MACHIN ES WITH MACHIN ES PRIOR SERIAL #50000 TO SERIAL #50000 & GREATER REF: CYL DOOR REF: CYL DOOR ASSEMBLY ASSEMBLY MODEL MODEL MODEL MODEL MODEL MODEL 17"-DISK 20"-DISK 23"-DISK 26"-DISK 24"-CYL... -
Page 10: Safety Messages
SAFETY MESSAGES Your safety, and the safety of others, is very important, and operating this unit safely is an important responsibility. To help you make informed decisions about safety, we have provided operating procedures and other safety information in the manual. This information informs you of potential hazards that could hurt you or others. It is not practical or possible to warn you of all the hazards associated with operating this unit. -
Page 11: Safety Precautions
!! SAFETY PRECAUTIONS!! Always use the charger provided by WARNING: Hazardous voltage. Shock, burns or WARNING: the maufacturer to charge the machine. electrocution can result. Always disconnect the It is an automatic charger, specifically designed batteries before servicing machine. to charge at the appropriate rate. If you must use a different charger, disconnect the batteries Batteries emit hydrogen gases. -
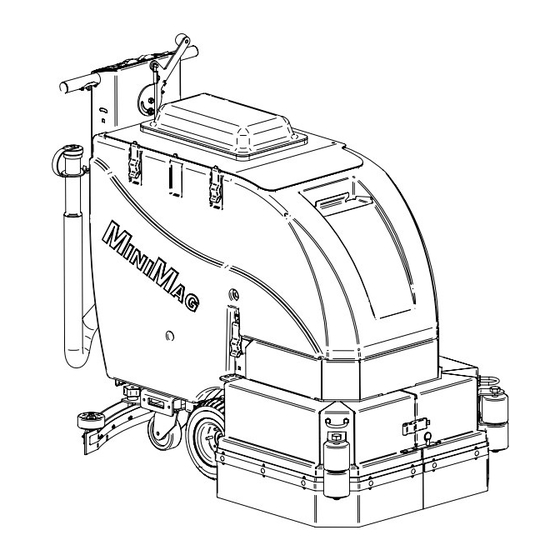
Page 12: Machine Controls And Features
MACHINE CONTROLS AND FEATURES PAGE 7... - Page 13 CONTROLS AND FUNCTIONS Turns the machine on and off. 1. MAIN POWER SWITCH: Indicates the amount of battery charge remaining. 2. BATTERY GUAGE/HOUR METER: Indicates the amount of down pressure being applied to scrubdeck. 3. SCRUBDECK DOWN PRESSURE GUAGE: Turns solution flow on. 4.
-
Page 14: Machine Setup
MACHINE SETUP ATTACHING SQUEEGEE UNCRATING MACHINE 1. Lower the squeegee mounting plate by CAREFULLY CHECK THE CRATE FOR ANY SIGNS OF rotating the lift lever clockwise. "A" DAMAGE AND THAT THE BATTERIES ARE IN THE UNIT. (SEE BELOW ) TO UNCRATE THE MACHINE, REMOVE BANDING FROM AROUND THE CRATE. -
Page 15: Adjusting & Removing Squeegee
ADJUSTING SQUEEGEE REMOVING SQUEEGEE 1. Turning adjustment knob clock-wise "A" 1. With the squeegee in the up position, (tightening) will lower tips & raise center. turn machine power off. (SEE PICTURE BELOW.) 2. Disconnect vacuum hose from squeegee "A" and loosen both knobs . -
Page 16: Installing Disk Pad Driver Or Brush
INSTALLING DISK PAD DRIVER OR BRUSH 1. Turn on machine power. 4. Select the correct pads or brushes that best meet your cleaning application. 2. Raise the scrub deck by depressing the brush Consult your local dealer for assistance. switch (O) to the up and off position and turn machine power back off. -
Page 17: Installing Cylindrical Brushes
INSTALLING CYLINDRICAL BRUSHES 1. Turn on machine power. 7. Brush driver shown misaligned. (SEE BELOW) 2. Raise the scrub deck by depressing the brush switch (O) to the up and off position and turn machine power back off. Disconnect batteries. 3. -
Page 18: Operating Hints
OPERATION PRE-CLEANING CHECK LIST OPERATING HINTS Read and understand the safety section on pages 5 and 6 Observe the amount of solution the machine is before operating the machine. dispensing on the floor and adjust to the desired flow. To increase the solution flow rate, rotate the solution 1. -
Page 19: Vacuum Only
ONE PASS SCRUBBING SCRUB ONLY BRUSH DRIVE MACHINES - (SEE BELOW) BRUSH DRIVE MACHINES - (SEE BELOW) 1. Turn on machine power switch 1. Turn on machine power switch , make sure , make sure "A" "A" the "PAD ASSIST adjustment knob is at a the "PAD ASSIST... - Page 20 ONE PASS SCRUBBING SCRUB ONLY TRACTION DRIVE MACHINES - (SEE BELOW) TRACTION DRIVE MACHINES - (SEE BELOW) 1. Turn on machine power switch 1. Turn on machine power switch , make sure "A" make sure "A" is at it's lowest setting . the speed control knob is at it's lowest setting.
-
Page 21: Adjust Solution Flow & Curtains, Draining Tanks
DRAINING SOLUTION TANK ADJUST SOLUTION FLOW To drain unwanted cleaning solution from the solution tank, 1. Turn solution valve adjustment knob "A" perform the following steps. counter- clockwise to increase solution flow, (SEE BELOW) clockwise to decrease solution flow. (SEE BELOW) 1. -
Page 22: Cleaning Recovery Tank
OPEN RECOVERY LID CLEAN "DRAIN SAVER" WITH RECOVERY LID OPEN & TANK FULLY DRAINED Release both latches on recovery tank lid. "A" Remove 2" squeegee intake hose from (SEE BELOW) "A" "Drain Saver" strainer "B" . (SEE BELOW ) 2. Rotate lid fully open. 2. -
Page 23: Tip Tank, Raise & Lower Squeegee
TIP TANK SQUEEGEE UP 1. Fully drain solution tank. 1. To raise the squeegee off the floor rotate squeege lift lever counter- clock-wise "A" 2. Fully drain recovery tank. all the way to the left. (SEE BELOW) 3. Remove squeegee. 4. -
Page 24: Machine Operation
DECK HEIGHT SOLUTION FILTER ADJUSTMENT o adjust deck height for brush clearance, 1. The solution system has a "INLINE FILTER" to filter "A" loosen jam nut on adjustment bolt turn "A", out cleaning solution prior to scrubbing. adjustment bolt clock-wise to raise deck, (SEE BELOW ) counter-clockwise to lower deck. -
Page 25: Charging Batteries
EXTERNAL BATTERY CHARGING (OPTIONAL) CAUTION: The following instructions are intended for the 24v charger supplied with the machine. Do not use any other charger with this machine. CHARGER SPECIFICATIONS OUTPUT VOLTAGE OF 24 VOLTS. OUTPUT CURRENT OF 18 AMPS MAX (OPTIONAL). INPUT VOLTAGE OF 110 VOLTS/60 HZ. -
Page 26: On-Board Battery Charger "Optional
ON-BOARD CHARGER TECHNICAL FEATURES OF THE POWERCAT CBHF1-SM CHARGER The innovative characteristics of the POWERCAT CBHF1-SM battery charger are the following: Advanced Mosfet technology with high frequency. Charging process fully controlled by microprocessor. Visualization on an LED display of the charging current, battery voltage, charging time, electric charge supplied in Ah’s and electric energy supplied in KWh’s. - Page 27 ON-BOARD CHARGER ERROR CODES If the maximum voltage admissible for a specific battery is reached (value given by the manufacturer) the error message ‘E01’ is displayed, and the process is terminated. By using an internal thermostat, the charging can be interrupted in case of excessive battery charger over-temperature.
- Page 28 BATTERY CHARGER OPERATING MANUAL GENERAL INFORMATION AND WARNING • Electronic automatic battery charger with microprocessor suitable for any battery type. • Fully automatic charging cycle with electronic setting; protected against overload, short‐circuit at clamps and reversed polarity. • Never disconnect the battery while charging: this could cause sparks. • Never use the equipment in the rain, in areas used for washing and in damp areas. • Before starting to charge, make sure the voltage of the equipment suits the voltage of the battery and that the selected charging curve (for lead‐acid free batteries and airtight gel batteries) is correct for the type of battery to be charged. In addition, make sure the rated input voltage ...
- Page 29 BATTERY CHARGER be charged. The charging cycle progress will be shown by red (3), yellow (4), and green (5) LED indicators. At the end of the charge, when the green indicator (5) is on, unplug the cord from the socket and operate the machine. PROBLEMS SOLUTIONS AND CHECKS The battery charger does not switch on. Check that the plug is connected to the supply mains and that the fuse is efficient. The charging cycle does not start and the Check the connection to the battery and polarity.
-
Page 30: Maintenance & Storing Machine
Maintenance Daily Maintenance Yearly Maintenance Remove and clean pads or brushes. Never use soiled Call your local dealer for yearly maintenance pads when cleaning. Replace pads when they become packed with residue. Storing Machine Remove and clean debris from the float shut-off screen and drain saver located inside the recovery tank. -
Page 31: Preventative Maintenance Records
PREVENTATIVE MAINTENANCE RECORDS CUSTOMER INFORMATION CUSTOMER ADDRESS CITY STATE ZIP CODE MACHINE INFORMATION MODEL # SERIAL # WORK ORDER# HOUR METER: BATTERY CONDITION Cell #1 Cell #2 Cell #3 Cell #4 Cell #5 Cell #6 Battery # 1 Hydrometer Battery # 1 Water Condition Battery # 2 Hydrometer Battery # 2 Water condition Battery # 3 Hydrometer... - Page 32 PREVENTATIVE MAINTENANCE RECORDS CHECK OPERATION AND CONDITION OF: IN SPEC REPAIR PROBLEM Spray Jet Switch Spray Jet Pump, Hose & Nozzle Battery Charger Connectors Battery Charger CLEAN AND/OR LUBRICATE IN SPEC REPAIR PROBLEM Solution Filter Squeegee Pivot Points & Knobs Scrub Deck Linkage Caster grease fittings Squeegee Knob Threads...
-
Page 33: Lcd Screen Menu Display'spage
LCD Screen Menu Displays SCREEN # 1 (Operator) SCREEN #3 (Maintenance) SCREEN W/ERROR CODE ***Use green menu selection button on control panel to change screens*** - Indicates the energy level remaining in the batteries. (Shown on all menu displays) Battery level indicator - Sets the down pressure on the brushes. -
Page 34: Troubleshooting Central Command
TROUBLESHOOTING CENTRAL COMMAND This machine is operated by a sophisticated electronic "CONTROLLER" that has many fail-safes within it. NOTE: The controller self-analyzes problems and flashes a four-digit numeric code of what is wrong in the LCD window. Most of these codes require a technician's attention. You should not attempt repairs you are uncomfortable with, especially if you are not used to working on electronics. - Page 35 TROUBLESHOOTING CENTRAL COMMAND The emergency stop button 5. 7900 AND 7901 ERROR. is out. You pressed the drive button 6. HIGH THROTTLE ERROR. before turning on the key. Turn off the key, release the drive button and try again. Low voltage warning. 7.
-
Page 36: Troubleshooting
TROUBLE SHOOTING PROBLEM CAUSE SOLUTION NO POWER, NOTHING OPERATES FAULTY POWER SWITCH CONTACT LOCAL SERVICING DEALER BATTERIES NEED CHARGING SEE CHARGING BATTERIES FAULTY BATTERY REPLACE BATTERY LOOSE BATTERY CABLE TIGHTEN LOOSE CABLE MAIN CIRCUIT BREAKER TRIPPED WAIT 5 MINUTES FOR AUTO RESET DETERMINE CAUSE AND CORRECT BRUSH MOTOR DOE'S NOT OPERATE GREEN BUTTON IS NOT DEPRESSED... - Page 37 TROUBLE SHOOTING PROBLEM CAUSE SOLUTION NO SOLUTION FLOW NO SOLUTION IN TANK FILL SOLUTION TANK SOLUTION SWITCH OFF TURN SOLUTION SWITCH ON SOLUTION SCREEN CLOGGED REMOVE AND CLEAN SCREEN FAULTY SOLUTION SOLENOID CONTACT LOCAL SERVICING DEALER FAULTY SOLUTION SWITCH CONTACT LOCAL SERVICING DEALER POOR WATER RECOVERY RECOVERY TANK IS FULL EMPTY RECOVERY TANK...
Need help?
Do you have a question about the mini-mag series and is the answer not in the manual?
Questions and answers