Table of Contents
Advertisement
Quick Links
Advertisement
Table of Contents

Subscribe to Our Youtube Channel
Related Manuals for Planet WNL-U554M


Summary of Contents for Planet WNL-U554M
- Page 1 150Mbps 802.11n Wireless USB Adapte WNL-U554M...
-
Page 2: Federal Communication Commission Interference Statement
Copyright Copyright 2013 by PLANET Technology Corp. All rights reserved. No part of this publication may be reproduced, transmitted, transcribed, stored in a retrieval system, or translated into any language or computer language, in any form or by any means, electronic, mechanical, magnetic, optical, chemical, manual or otherwise, without the prior written permission of PLANET. -
Page 3: Ce Mark Warning
Do not dispose of WEEE as unsorted municipal waste and have to collect such WEEE separately. Revision User’s Manual for PLANET 150Mbps 802.11n Wireless USB Adapter Model: WNL-U554M Rev: EM-WNLU554M_v2.01 (January, 2013) Part No. 2081-E23170-000... -
Page 4: Table Of Contents
Windows XP - Use Windows Zero Configure ............28 3.2.2 Windows 7 - Use Windows 7 WLAN AutoConfig ........... 32 Chapter 4. PLANET USB WIRELESS LAN UTILITY................35 Connection Profile Management ..................35 4.1.1 Add a new profile ....................35 4.1.2... - Page 5 5.1.2 Soft Access Point Security ..................52 Advanced Settings......................54 Access Control List......................55 Connected Devices ......................56 About (AP Mode) ........................ 57 Appendix: Specifications........................59 Appendix: Troubleshooting....................... 61 Appendix: Glossary..........................62 Appendix: FAQ............................ 67...
-
Page 6: Chapter 1. Product Introduction
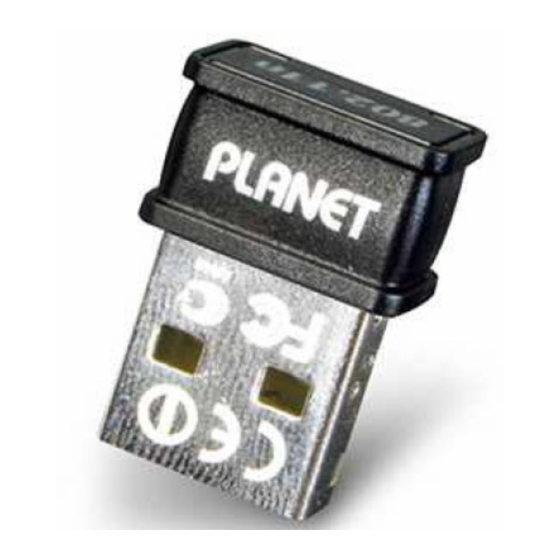
150Mbps 802.11n high speed wireless transmission. The ultra mini size compact design of WNL-U554M is convenient to carry for all mobile users. Users will not need to remove it from the laptop anymore, no matter operating, moving, or even put the laptop back to the briefcase. It is just like... - Page 7 High Speed 802.11n Wireless Experience The WNL-U554M offers a reliable and cost effective wireless extending solution. It adopts IEEE 802.11n technology and is backward compatible with IEEE 802.11b and 802.11g. The WNL-U554M supports USB 2.0 interface that integrates with one transmit channel and one concurrent receive...
- Page 8 WNL-U554M operation mode between Station mode and Access Point mode. When the WNL-U554M is in the Access Point mode, it turns to a Wi-Fi Hotspot. The Wi-Fi supported devices such as iPhone / Android / Symbian / Windows Phone / iPod Touch / iPad / NDS / PSP can connect to it and share the wireless access easily.
-
Page 10: Product Features
Product Features 2.4GHz ISM band, unlicensed operation Compliant with IEEE 802.11b/g/n Provides up to 150Mbps download and 150Mbps upload data rate Wi-Fi Protected Setup (WPS) support Supports WEP 64/128-bit, WPA / WPA2, WPA-PSK / WPA2-PSK (TKIP/AES encryption) ... -
Page 11: Main Screen
Wireless encryption is wrong. AP Mode Wireless connection is established, good signal reception. Wireless connection is established, normal signal reception. Wireless connection is established, weak signal reception. Connection is not established yet. Wireless network card is not detected. Wireless encryption is wrong. 1.5.2 Main Screen ... - Page 12 Use the About screen to find version information for your Utility. B. Use these buttons and icons to manage transmission and to find information about your wireless connection. Click this button to enable or disable wireless transmission. Indicates the security status of your connection. Indicates the quality of your wireless connection.
- Page 13 AP Mode A. Click these buttons to open the following screens and access the Utility's features. Use the AP Setup screen to set up a secure wireless network. Use the Advanced screen to configure advanced network settings. Use the Access Control List screen to configure an access policy for your network based on a client's MAC address.
- Page 14 D. Lets you change the operation mode of the Utility. Open Utility Select this option to display the Utility's main screen. (Windows 7 and higher only) Select this option to let computers and devices Switch to Station connected to the AP access the Internet (or another network to which the AP is Mode connected).
-
Page 15: Chapter 2. Installation
Chapter 2. INSTALLATION Microsoft Windows Driver Installation 1. If you had ever installed other wireless adapters before, please uninstall the existed drivers and utilities first. 2. The following installation is performed in Windows XP. The procedures in other OS are similar. Please follow the instructions below to install the USB Wireless Adapter: Step 1. - Page 16 Step 4. Then a webpage will appear. Click the “Windows Utility” hyperlink to initiate the installing wizard. Step 5. Read the License Agreement carefully. Select “I accept the term of the license agreement” and click “Next” button to accept it and continue.
- Page 17 Step 6. Click “Next” button to start installing the driver and utility. If the screen below appears during installation, please click “Continue Anyway” button to continue.
- Page 18 And there is also a new icon appeared on the system tray. Left-click the new icon will launch PLANET 11n USB Wireless LAN Utility, and right-click the icon will show the quick menu of configuration utility. This icon also uses different colors to show the status of wireless connection: Wireless connection is established, good signal reception.
-
Page 19: Mac Os X 10.X Driver Installation
MAC OS X 10.x Driver Installation The WNL-U554M supports MAC OS X 10.4 / 10.5 / 10.6 / 10.7. To install in MAC OS X operation system, please follow the instructions below to install the USB Wireless Adapter: Obtain the Mac driver from the bundled CD or download the official Mac driver from this site. - Page 20 Step 2. It will pop up a window “Welcome to the Wireless Utility Installer”, please click “Continue”. Step 3. After read the important information, please click “Install” in the following steps.
- Page 21 Step 4. Enter your Username and Password of the System. Then, click “OK”. Step 5. The window pops up the notice to remind you that computer will restart while finishing the installing. Please click “Continue Installation”. Step 6. When the installation was successful, click “Restart” to restart your computer.
- Page 22 Step 7. After restart the computer, plug the wireless adapter into the USB port on your computer. Step 8. Right-Click on the Wireless Utility icon displayed in the Mac OS X system tray. Then, click “Open Wireless Utility”. The Wireless Utility network connection menu will appear...
- Page 23 Step 9. Click “Site Survrty”. Choose the AP you would like to connect. Then, click “ADD PROFILE”. Step 10. Select the encryption type of the AP that you connected and fill in encryption key. Click “OK”, and finish the installation and configuration of the wireless adapter! Step 11.
-
Page 25: Linux Driver Installation
Linux Driver Installation The WNL-U554M supports following Linux platform: Linux Kernel 2.6.18~2.6.38 Linux Kernel 3.0.8 Obtain the Linux driver from the bundled CD or download the official Linux driver from this site, and build the driver for the Linux OS that you are using. -
Page 26: Chapter 3. Connecting To Wireless Network
Windows Zero Config utility (comes with Windows o perating system NET 11n USB Wireless LAN Utility Please follo the instructions below to connect the wireless access point via PLANET 11n USB ireless LAN Utility. Step 1. Left-click the PLANET Wireless Utility... - Page 27 150Mbps 802.11n Wireless USB Adapte WNL-U554M Step 4. If a password (Network Key) is required to access the wireless access point, please confirm the Authentication and Encryption method first, and then key in the password in the “WPA Preshared Key”.
-
Page 28: Windows Zero Configuration
Configuration” (WZC). You can also use WZC to configure your wireless network parameter: Step 1. Right-click PLANET Wireless Utility icon, and click “Open Config Utility”. To return to use PLANET wireless utility, click “Use RaConfig as Configuration Utility”. 3.2.1 Windows XP - Use Windows Zero Configure Step 2. - Page 29 Step 3. Double click “Network Connections”.
- Page 30 Step 4. Right-click “Wireless Network Connection” (it may have a number as suffix if you have more than one wireless network adapter, please make sure you right-click the PLANET Wireless LAN 802.11n USB Network Adapter), then select “View Available Wireless Networks”.
- Page 31 Step 6. If the access point is protected by encryption, you have to input its Network key or passphrase here. It must match the encryption setting on the access point. If the access point you selected does not use encryption, you’ll not be prompted for network key or passphrase.
-
Page 32: Windows 7 - Use Windows 7 Wlan Autoconfig
3.2.2 Windows 7 - Use Windows 7 WLAN AutoConfig AN AutoConfig service is built-in in Windows 7 that can be used to detect and connect to wir eless netwo rk. This built-in wi reless network connection tool is similar to wireless zero configuration tool in indows XP. - Page 33 Step 3: Enter the network security key of the wireless access point. (1) The Connect to a Network box will appear (2) Enter the security key If the access point is protected by encryption, you have to input its Network key or passphrase here.
-
Page 35: Chapter 4. Planet Usb Wireless Lan Utility
To manage profiles, right-click the PLANET wireless utility icon located at lower-right corner of the screen, then click “Launch Config Utility”. - Page 36 You’ll be prompted to input connection parameters for the wireless access point you wish to connect: Required parameters are as follows: Object Description Profile name You can give a name to this profile, so you can remember its purpose easily. It can be any phrase to help you remember. ...
- Page 37 Shared – Only wireless devices using a shared key (WEP Key identified) are allowed to connecting each other. WPA – WPA provides a scheme of mutual authentication using either IEEE 802.1x/Extensible Authentication Protocol (EAP) authentication or pre-shared key (PSK) technology. It provides a high level of assurance to enterprises, small businesses and home users that data will remain protected and that only authorized users may access their networks.
-
Page 38: Remove An Existing Profile
keys. TKIP – TKIP (Temporal Key Integrity Protocol) changes the temporal key every 10,000 packets (a packet is a kind of message transmitted over a network.) This insures much greater security than the standard WEP security. AES – AES has been developed to ensure the highest degree of security and authenticity for digital information and it is the most advanced solution defined by IEEE 802.11i for the security in the wireless network. -
Page 39: Edit An Existing Profile
If you wish to use a specific profile as the default wireless connection, you can select the profile in the list, and click “Active”. The selected profile will become default selection and PLANET wireless utility will attempt to connect to the selected access point. -
Page 40: General Information, Status, And Network Statistics
General Information , Status, and Network Statistics The PLANET wireless utility provides the detailed information about the wireless connection you’re using. 4.2.1 General Information If you want to know the general information of the access point you’re connecting to, click “Link Information”... -
Page 41: Network Transmission Statistics
4.2.2 Network Transmission Statistics To view the statistical data of wireless adapter, click “Statistics” icon, and the statistics of wireless connection will be displayed: All connection-related statistics is displayed here. You can click “Reset Counter” button to reset the statistics of all items back to 0. 4.2.3 About / Status If you want to know the status of your wireless network card, click “About”... -
Page 42: Advanced Settings
Advanced Settings This section is used to configure advanced settings including channel selection, wireless mode, and certificate management. -
Page 43: Wi-Fi Protected Setup (Wps)
WPS-supported wireless access point and the PLANET wireless adapter. Step 1. Right-click PLANET wireless utility icon, and click “Launch Config Utility”. Step 2. Go to Profile List, and then click “WPS” icon. Step 3. -
Page 44: Push Button Config (Pbc)
4.4.1 Push Button Config (PBC) This is the easiest way to establish secure connection by WPS, but if there’re more than one -support ed access poin t using Push-B utton config, please use PIN / numeric code instead. a. To use the PBC method, select “Push-Button Configuration(PBC)”. -
Page 45: Pin Input Config (Pin)
4.4.2 PIN Input Config (PIN) a. To use the PIN method, select “PIN / numeric code” and, in the “WPS AP List” field, select the name of the network to which you connecting. Click the right arrow to save your settings. b. - Page 46 PIN provided by the device to which you connecting. If the device to which you are connecting provides a PIN (e.g. on the device casing), in the “Config Mode” field, select “Registrar”. In the “Pin Code” field, type the PIN provided by the device to which you are connecting.
- Page 47 c. For both PIN methods, the following screen displays. Click the Start PIN button. At the same time (within 120 seconds) activate the corresponding WPS PIN connection function on the device to which you are connecting. d. Once connected, your WPS profile appears in the Profile List screen.
-
Page 48: Chapter 5. Soft Access Point Mode
Chapter 5. SOFT ACCESS POINT MODE Excepting be a wireless client of other wireless access points, the PLANET wireless adapter can also act as a wireless service provider. You can switch the operation mode of wireless adapter to “Access Point” mode to simulate the function of a real wireless access point by software. And all other computers and Wi-Fi supported devices can connect to your computer wirelessly, even share your internet connection service. -
Page 49: Switch Between Access Point Mode And Station Mode
Please follow the instructions below to switch to Access Point mode: Step 1. Right-click PLANET wireless utility icon, and select “Switch to AP Mode”. It requires few seconds to switch mode. After the mode switch is complete, the window of general information about software access point will appear, includes SSID, IP address of the Soft AP and connected wireless clients. -
Page 50: Configure Ssid And Channel
150Mbps 802.11n Wireless USB Adapte WNL-U554M 5.1.1 Configure SSID and Channel To configure software Access Point, click “Config” button, and the “Wireless Network Properties” will be displayed. a. The Network Settings Screen Use the left and right arrows to navigate through the Setup screens. - Page 51 b. The Channel Settings Screen The setup options are listed below: Object Description This indicates the 'Wireless Mode' selected in the previous Network Settings screen. From the drop-down list, select the appropriate 2.4 G code for your region. For more information on the c hannels available for each region, see the Country Channel List.
-
Page 52: Soft Access Point Security
150Mbps 802.11n Wireless USB Adapte WNL-U554M 5.1.2 Soft Access Point Security To setup security options for Soft Access Point, configure “Wireless Network Security” as follows: The set up items abo ut wireless security are listed below: Object Description Select the strongest security method supported by your network. - Page 53 security. Shared a. The WPA-PSK, WPA2-PSK or WPA-PSK/WPA2-PSK Security Screen WPA-PSK Key: Type a security key 8-63 characters long made up of characters '0'-'9', 'a'-'z', 'A'-'Z', keybo ard symbol s and spaces. Group Rekey Interval: T he interval after which th e AP resets the group key.
-
Page 54: Advanced Settings
If you select a key format of 'ASCII(5 or 1 3 ASCII c haracters)' in the WEP Key field, type a security key 5 or 13 characters long made up of digits '0'-'9' and letters 'a'-'z' and 'A'-'Z'. Advanced Settings Click “Advanced”... -
Page 55: Access Control List
Access Control List you’re not going to open your computer and wireless resources to the public, you can use MAC address filtering function to enforce y our access control policy, so only wireless clients with MAC address you defined by this function ca n be connected to your software access point. -
Page 56: Connected Devices
the access control list have access to your network. Type a MAC address in hexadecimal format without additional MAC Address characters (e.g. colons or hyphens). Adds the MAC address in the MAC Address field to the MAC address control list. Removes the selected MAC address from the MAC address control list. -
Page 57: About (Ap Mode)
The information items are list ed below: Object Description The unique hexadecimal manufacturer-assigned identifier of a device MAC Address connected t o the this AP. An ID number assigned to each device on your AP's network, starting Client ID at 2 w ith a maximum of 32. - Page 58 Date Shows the date of release for the DLL version shown. MAC Address The unique he xadecimal identifier assigned to the Adapter.
-
Page 59: Appendix: Specifications
Appendix: Specifications Product 150Mbps 802.11n Wireless Micro-size USB Adapter Model WNL-U554M Hardware Specification Interface USB 2.0, Type-A Antenna Type Internal Omni-directional Antenna Antenna Gain 2dBi Operation Voltage 5V DC, power input from USB port Dimension 20 x 14.4 x 7mm Weight 0.3g... - Page 60 Macintosh 10.4/10.5/10.6 Certification CE, FCC, RoH Regulatory Environment Operating Temperature 0 - 40 Degree C 10 - 90% (Non-Condensing) Humidity WNL-U554M(150Mbps 802.11n W ireless Micro-Size USB adapter) Package Content Quick Installati on Guide CD (includes driver/utility/user’s manual)
-
Page 61: Appendix: Troubleshooting
Appendix: Troubleshooting Symptom : The LED is off. Make sure the PC Card is inserted properly. Otherwise contact your Remedy : vendor. Symptom : The L ED is always on not blinkin Make sure that you have installed the driver from attached CD. Remedy : Otherwise contact your vendor. -
Page 62: Appendix: Glossary
Appendix: Glossary 1. IEEE 802.11 Standard The IEEE 802.1 Wi reless LAN standards subcommi ttee, which is formulating a standard for the industry. 2. Access Point An in ternetworkin evice that seamlessly connects wired a nd wireless networks together. 3. Ad An Ad Hoc wireless LAN is a group of computers, each with a WLAN adapter, connected as an indep endent wirel... - Page 63 10. IEEE Institute of Electrical and Electronics Engineers Infrastructure. An integrated wireless and wired LAN is called an Infrastructure configuration. Infrastructure is applicable to enterprise scale for wireless access to central database, or wirele . ISM Band The FCC and their counterparts outside of the U.S. have set aside bandwidth for unlicensed use in the so-called ISM (Industrial, Scientific and Medi cal) band.
- Page 64 refer to the entire suite of related protocols. 9. Transmit / Receive The wireless throughput in Bytes per seco nd averaged over two seconds. 20. Wi-Fi Allian The Wi-Fi Alliance is a nonprofit international association formed in 1999 to certify interoperability of wireless Local Area Network products based on IEEE 802.11 specification.
- Page 65 asymmetric packet reception (all send packets, for example). You may want to try lowering your fragmentation threshold. This will cause packets to be broken into smaller fragments. These small fragments, if corrupted, ca n be resent faster than a larger fragment. Fragmentation increases overhead, so you'll want to keep this value as close to the maximum value as possible.
- Page 66 1. 802.1x Authentication 802.1x is a framework for authenticated MAC-level access control, defines Extensible Authentication Protocol (EAP) over LANs (WAPOL). The standard encapsulates and leverages much of EAP, which was defined for dial-up authentication with Point-to-Point Protocol in RFC 22 84.
-
Page 67: Appendix: Faq
Appendix: FAQ What is WMM? Wi-Fi Multimedia (WMM), a group of features for wireless networks that improve the user experience for audio, video and voice application s. WMM is based on a subset of the IEEE 802.11e WLAN QoS draft standard. WMM adds prioritized capabilities to Wi-Fi networks and optimizes their performance when multiple concurr ing applications, each with different latency and throughput requirements, compete for network resources. -
Page 68: Ec Declaration Of Conformity
WNL-U554M *Model Number * Produced by: Manufacturer‘s Name : Planet Technology Corp. Manufacturer‘s Address: 10F., No.96, Minquan Rd., Xindian Dist., New Taipei City 231, Taiwan (R.O.C.) is herewith confirmed to comply with the requirements set out in the Council Directive on the 99/5/EC R&TTE. - Page 69 ΤΙΣ ΟΥΣΙΩΔ ΕΙΣ ΑΠΑΙΤΗΣΕΙΣ ΚΑΙ ΤΙΣ ΛΟΙΠΕΣ disposições da Directiva 1999/5/CE. ΣΧΕΤΙΚΕΣ ΔΙΑΤΑΞΕΙΣ ΤΗΣ ΟΔΗΓΙΑΣ 1999/5/ΕΚ Por medio de la presente, PLANET Technology Español Slovensky Výrobca PLANET Technology Corporation, Corporation, declara que 802.11n Wireless USB týmto deklaruje, že táto 802.11n Wireless U Adapter cumple con los requisitos esenciales y Adapter je v súlade so základnými...
Need help?
Do you have a question about the WNL-U554M and is the answer not in the manual?
Questions and answers