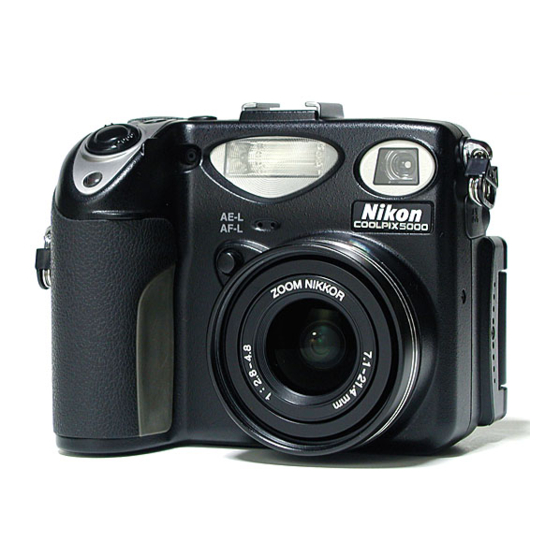
Nikon Coolpix 5000 Pocket Manual
Hide thumbs
Also See for Coolpix 5000:
- Manual (223 pages) ,
- Owner's manual (51 pages) ,
- Software manual (7 pages)
Table of Contents
Advertisement
Quick Links
Advertisement
Table of Contents

Subscribe to Our Youtube Channel
Summary of Contents for Nikon Coolpix 5000
- Page 1 5000 P HORT OURSE IN IKON OOLPIX HOTOGRAPHY HORT OURSE OCKET UIDE TO THE IKON 5000 OOLPIX The Editors of ShortCourses.com http://www.shortcourses.com HORT OURSES ITE AND LINE IGITAL HOTOGRAPHY OOKSTORE HTTP SHORTCOURSES...
-
Page 2: Preface
“A Short Course in Nikon Coolpix 5000 Photogra- means, or stored in a database or retrieval system, phy” and its accompanying e-book. Feel free to print... -
Page 3: Table Of Contents
5000 P HORT OURSE IN IKON OOLPIX HOTOGRAPHY ONTENTS Preface ................ 2 Using Focus Lock ............10 Taking a Picture in Programmed Auto Mode ....4 Turning Focus Confirmation On and Off ....10 Selecting a User Set with the FUNC Button ....4 Selecting Continuous or Single Autofocus .... -
Page 4: Taking A Picture In Programmed Auto Mode
5000 P HORT OURSE IN IKON OOLPIX HOTOGRAPHY command’s full name is displayed at the bottom Taking a Picture in Programmed Auto Mode or top of the monitor. (On the Set-up and Play 1. Set the mode selector on the back of the camera Back menus the command names are spelled out to the shooting position (the camera icon), right on the menu.) -
Page 5: Managing Your Images
5000 P HORT OURSE IN IKON OOLPIX HOTOGRAPHY 2. Use any of the procedures described in the release it, or press it all the way down to take a QuickSteps box “Managing Your Images.” picture. 3. To resume shooting, slide the mode selector to shooting mode (the camera icon). -
Page 6: Deleting All Or Selected Images
5000 P HORT OURSE IN IKON OOLPIX HOTOGRAPHY To adjust playback volume, press the zoom- arrowhead in a box icon), and press the MENU in and zoom-out buttons to select off, low, or button. high. 2. Press the up or down point on the Multi To pause the movie, press the Flash/ISO Selector to highlight Slide Show and then press button. -
Page 7: Preparing A Print Set
5000 P HORT OURSE IN IKON OOLPIX HOTOGRAPHY image icon. (You use the same procedures to indicated on the monitor, the image size is set to remove the icon.) Full. When image quality is set to HI, only Full (no icon) and 3:2 sizes are available. 4. -
Page 8: Using Aperture-Priority Mode
5000 P HORT OURSE IN IKON OOLPIX HOTOGRAPHY displays the result of the changes. Using Aperture-Priority Mode Selecting a + value makes the scene look 1. With the camera in user set 1, 2, or 3, hold brighter. down the MODE button and turn the Com- Selecting a –... -
Page 9: Using The Self-Timer
5000 P HORT OURSE IN IKON OOLPIX HOTOGRAPHY tion to add exposure (page 51). Move farther back from the subject. If the histogram shows most pixels toward the Zoom the lens to a wider angle of view. right (lighter) side of the graph, use exposure Switch to shutter-priority (page 37) or flexible compensation to reduce exposure (page 51). -
Page 10: Using Focus Lock
5000 P HORT OURSE IN IKON OOLPIX HOTOGRAPHY 4. Press the up or down point on the Multi Using the Infinity Focus Setting Selector to highlight m or ft, then press the right With the camera in any user set, press the AF/ point to set it. -
Page 11: Setting White Balance
5000 P HORT OURSE IN IKON OOLPIX HOTOGRAPHY Try blurring images in low-light situations. In and press the right point to display a submenu. bright light, the shutter will open and close too fast. 3. Press the up or down point on the Multi Selector to highlight WB Bracketing and press In some situations, you may want to turn the the right point to set it. -
Page 12: Changing Maximum Bulb Duration
5000 P HORT OURSE IN IKON OOLPIX HOTOGRAPHY 4. Press the shutter button all the way down and 5. When finished using the lens converter, repeat hold it there until you get the exposure time Steps 1–4 but select Normal. you want. -
Page 13: Using Slow Sync Flash
5000 P HORT OURSE IN IKON OOLPIX HOTOGRAPHY Using Slow Sync Flash Adjusting Brightness and Contrast 1. With the camera in any user set, press the 1. With the camera in user set 1, 2, or 3, press the Flash/ISO button on the back of the camera MENU button. -
Page 14: Shooting In Black & White
5000 P HORT OURSE IN IKON OOLPIX HOTOGRAPHY On locks in aperture, shutter speed, white Using the Set-up Menu balance (if set to Auto), and the ISO when you 1. With the camera in the appropriate mode (see take the first image in a series after turning on table above), press the MENU button.


Need help?
Do you have a question about the Coolpix 5000 and is the answer not in the manual?
Questions and answers