
Related Manuals for Zerowatt XQB55-526


Summary of Contents for Zerowatt XQB55-526
-
Page 1: Service Manual
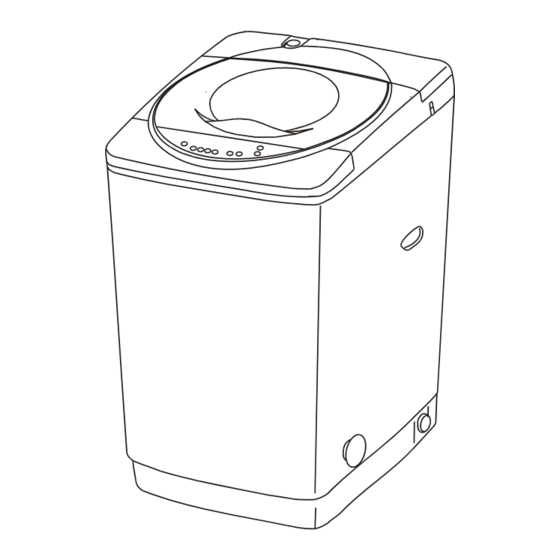
ZEROWATT MODEL: XQB55-526 Service Manual CONTENTS 1.PARTS & FEATURES 2.IMPORTANT SAFETY INSTRUCTIONS 3 .INSTALLATION INSTRUCTIONS 4.CONTROL PROGRAM 5.CIRCUIT DIAGRAM 6. HOW TO DISASSEMBLE THE UNIT 7. TROUBLESHOOTING 8.EXPLOSION VIEWS & PARTS LISTS... - Page 2 1.PARTS & FEATURES 1. DETERGENT CASE 2. SOFTENER DISPENSER 3. INNER TUB 4. CONTROL PANEL 5. BASE 6. NOISE PROOF PLATE 7. INLET HOSE (2 PCS) 8. LINT FILTER 9. PULSATOR 10. POWER SUPPLY CORD 11. DRAIN HOSE (1 PC) 12.
-
Page 3: Important Safety Instructions
2.IMPORTANT SAFETY INSTRUCTIONS WARNING To reduce the risk of fire, electrical shock, or injury when using your portable washer, follow these basic precautions: • Read all instructions before using the portable washer. • Do not wash articles that have been previously cleaned in, washed in, soaked in, or spotted with gasoline, dry-cleaning solvents, or other flammable or explosive substances, as they give off vapors that could ignite or explode. -
Page 4: Installation Instructions
3.INSTALLATION INSTRUCTIONS BEFORE USING YOUR PORTABLE WASHER SCREWDRIVER • Remove the exterior and interior packing. • You will need the following tools: • Wrench • Pliers • Screwdriver • Check to be sure you have all of the following parts: PLIERS WRENCH 2 Inlet Hoses... - Page 5 Return the machine to the upright position. When the machine is positioned for operation set the height of the adjustment foot slightly higher than the front caster to prevent movement of the machine during wash and spin operation. NOTE: Not all movement will be totally eliminated, this is normal. INSTALLING THE NOISE PROOF PLATE The opening of the Take the noise proof...
- Page 6 DISCONNECTING THE INLET HOSE Dismantling the hose directly may cause water to splash due to the possible high water pressure in the hose, even after the faucet has been turned off. Please take off the hose as per following steps, even if the faucet is closed: •...
-
Page 7: Operating Your Portable Washer
OPERATING YOUR PORTABLE WASHER PREPARATION 1. Connect the water inlet hose 3. Insert the plug into the 4. Insert the end of drain hose to the water faucet. Don’t socket. For safety the plug into the hook shelf, and hang switch on the power if the should have ground the drain hose over a drain... - Page 8 OPERATION INSTRUCTIONS PRESS DOWN POWER BUTTON. PRESS DOWN WATER LEVEL BUTTON. Choose appropriate water level according to wash load quantity. WATER TEMPERATURE CHOICE. Press down the water temperature selection button, you can choose to inlet cold water or hot water. When the cold-water indicator and the hot-water indicator turn on simultaneously, which means you chose the warm water.
- Page 9 SOAK – For dirty laundry • Press down the power button. • Press the functions button to select the SOAK function until the SOAK indicator is ON. • Press the water supply button to select the water temperature. • Press the water level button to select the appropriate water level setting. •...
- Page 10 MANUAL FUNCTIONS WASH ONLY • Press down the power button. • Press the functions button to select the appropriate program. • Press the water supply button to select the water temperature. • Press the water level button to select the appropriate water level setting. •...
-
Page 11: Care And Maintenance
Press down each button within 5 minutes since the program will reset the process group. Then press down STRAT/HOLD button to re-start the washing machine. If not, the washing machine will shut down automatically. Close the lid, or the washing machine will not operate. In case the unbalance of load triggers the safety switch when spinning, the washing machine will automatically refill water to adjust the balance. - Page 12 • Clean the lint filter. Clean and rinse it thoroughly. Pull upward to remove the lint filter. • Vacation time...
-
Page 13: Control Panel
4. CONTROL PANEL 1. Water Temperature Indicator 2. Water Level Indicator 3. Wash Time Indicator 4. Rinse Time Indicator 5. Spin Time Indicator 6. LED Display 7. Children-proof Indicator 8. Function Indicator 9. Power Button 10. START/HOLD Button 11. Function Selection Button 12. -
Page 14: Circuit Diagram
5.CIRCUIT DIAGRAM Microcomputer Controlled board assembly Water level sensor Safety switch Drain Motor motor Plug B-BLUE BL-BLACK BR-BROWN G-GREEN GR-GRAY R-RED WH-WHITE Y-YELLOW O-ORANGE P-PURPLE C-CAPACITOR L-INDUCTIVE COIL The power supply cord must be unplugged after use. Please use low foam powdered laundry detergent. "CAUTION: if this appliance is supplied with a cord extension set or and electrical portable outlet device, the cord extension set or electrical portable device must be positioned so that it is not subject to splashing or ingress or moisture.
Need help?
Do you have a question about the XQB55-526 and is the answer not in the manual?
Questions and answers
The washing machine doesn’t fill up it the water exits as soon as it enters the washing machine.. and it’s not washing the clothes. However, it can spin to remove the water. Is there something else wrong?
The Zerowatt XQB55-526 washing machine may not fill up with water and may drain immediately due to incorrect positioning of the drain hose. If the drain hose is placed too low, water may siphon out as it fills. The manual states that only up drainage is available, and the highest point of the drain hose must be properly positioned. Ensure the drain hose is securely fastened and elevated to prevent immediate draining.
This answer is automatically generated