Sony BDV-E880 Operating Instructions Manual
Blu-ray disc/dvd home theatre system
Hide thumbs
Also See for BDV-E880:
- Operating instructions manual (80 pages) ,
- Manual (79 pages) ,
- Instruction & operation manual (14 pages)

Related Manuals for Sony BDV-E880


Summary of Contents for Sony BDV-E880
- Page 1 4-288-249-11(1) Blu-ray Disc/DVD Home Theatre System Operating Instructions BDV-E880...
-
Page 2: Copy Protection
WARNING protective housing inside the and (ii) our website (http:// enclosure. esupport.sony.com/) for the latest information. The vision of young Do not install the appliance in a children (especially those under six confined space, such as a bookcase years old) is still under or built-in cabinet. - Page 3 Microsoft to revoke the device’s • “Blu-ray 3D” and “Blu-ray 3D” • “PhotoTV HD” and the “PhotoTV ability to consume PlayReady- logo are trademarks of Blu-ray HD” logo are trademarks of Sony protected content. Revocation Disc Association. Corporation. should not affect unprotected •...
-
Page 4: About These Operating Instructions
About These Operating Instructions • The instructions in these Operating Instructions describe the controls on the remote. You can also use the controls on the unit if they have the same or similar names as those on the remote. • In this manual, “disc” is used as a general reference for BDs, DVDs, Super Audio CDs, or CDs unless otherwise... -
Page 5: Table Of Contents
Table of Contents Settings and Adjustments About These Operating Instructions ..4 Unpacking ..........6 Using the Setup Display ....... 52 Index to Parts and Controls.....8 [Network Update] ......... 53 Getting Started [Screen Settings]........53 [Audio Settings]........54 Step 1: Installing the System..13 [BD/DVD Viewing Settings].... -
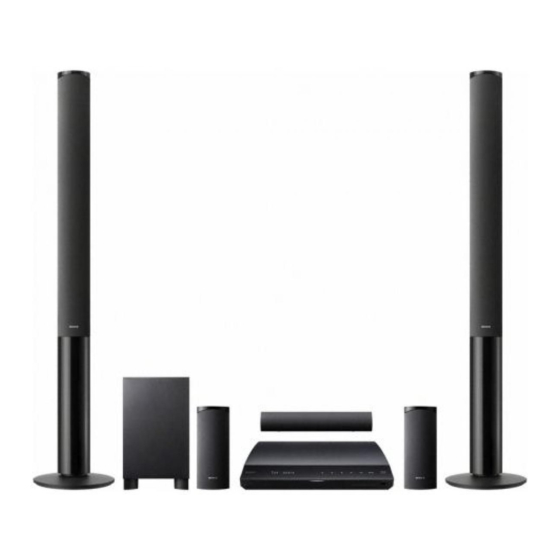
Page 6: Unpacking
Unpacking • Front speakers (2) • Speaker-bottom covers (2) • Remote commander (remote) (1) • Bases (2) • R6 (size AA) batteries (2) • Lower parts of the front speakers (2) • Calibration mic (1) • Surround speakers (2) • Dock for iPod/iPhone (TDM-iP30) (1) •... - Page 7 Preparing the remote Insert two R6 (size AA) batteries (supplied) by matching the 3 and # ends on the batteries to the markings inside the compartment.
-
Page 8: Index To Parts And Controls
Index to Parts and Controls For more information, refer to the pages indicated in parentheses. Front panel FUNCTION A Front panel display (USB) port (page 29) Used for connecting a USB device. B Soft-touch buttons/indicators D Power indicator Z (open/close) (page 28) Lights up while the system is turned on. -
Page 9: Front Panel Display
Front panel display About the indications in the front panel display A Displays the system’s playing status. F Lights up when muting is on. B Lights up when repeat play is G Displays the system’s status, such as activated. radio frequency, etc. C Lights up when stereo sound is H Lights up when outputting 720p/1080i/ received. -
Page 10: Rear Panel
Rear panel SPEAKERS COMPONENT VIDEO OUT SAT/ DIGITAL IN CABLE COAXIAL DIGITAL IN FRONT R FRONT L SUBWOOFER CENTER OPTICAL AUDIO IN SUR R SUR L ECM-AC2 IN 1 IN 2 COAXIAL VIDEO OUT LAN (100) AUDIO A.CAL MIC ANTENNA A SPEAKERS jacks (page 14) H TV (DIGITAL IN OPTICAL) jack (page B COMPONENT VIDEO OUT jacks (page... - Page 11 A Z (open/close) Remote control Opens or closes the disc tray. SPEAKERS TVyAUDIO The buttons for system operation only are Selects whether TV sound is output from described below. See “Controlling Your TV or the system’s speakers or the TV’s Other Components with the Supplied Remote”...
- Page 12 E FUNCTION (pages 24, 39) G MUTING Selects the playback source. Turns off the sound temporarily. HOME (pages 23, 39, 42, 43, 46, 48, 52) AUDIO (pages 37, 38) Enters or exits the system’s home menu. Selects the audio format/track. SOUND MODE (page 37) VOL +/–...
-
Page 13: Getting Started
Getting Started Step 1: Installing the System How to position the system Install the system by referring to the illustration below. A Front speaker (L (left)) B Front speaker (R (right)) C Center speaker D Surround speaker (L (left)) E Surround speaker (R (right)) F Subwoofer G Unit •... -
Page 14: Step 2: Connecting The System
Step 2: Connecting the System For connecting the system, read the information on the following pages. Do not connect the AC power cord (mains lead) of the unit to a wall outlet (mains) until all the other connections are made. To assemble the speakers, refer to the supplied “Speaker Installation Guide.”... - Page 15 To connect speaker cords to the unit Connect the speaker cords to match the color of the SPEAKERS jacks of the unit. When connecting to the unit, insert the connector until it clicks. White (Front left speaker (L)) Purple (Subwoofer) (Front right Green speaker (R))
-
Page 16: Connecting The Tv
Connecting the TV Connect the system to your TV to display the image of the system on your TV, and listen to TV sound via the system’s speakers. Depending on the jacks and functions on your TV, select the connection method. •... - Page 17 A HDMI cable connection If your TV has an HDMI jack, connect to the TV with an HDMI cable. This will provide better image quality compared to other types of connections. When connecting with an HDMI cable, you need to select the type of output signal when performing the Easy Setup (page 23).
-
Page 18: Connecting The Other Components
Connecting the other components When a component you wish to connect to the system has an HDMI (OUT) jack You can connect a component that has an HDMI (OUT) jack such as a set-top box/digital satellite ® receiver or PLAYSTATION 3, etc., with an HDMI cable. - Page 19 When the component does not have an HDMI OUT jack Connect the system so that video signals from the system and other component are sent to the TV, and audio signals from the component are sent to the system as follows. Video out Component Audio out...
- Page 20 Connecting the antenna (aerial) Rear panel of the unit COAXIAL ANTENNA FM wire antenna (aerial) (supplied) • Be sure to fully extend the FM wire antenna (aerial). • After connecting the FM wire antenna (aerial), keep it as horizontal as possible. •...
-
Page 21: Step 3: Connecting To The Network
Use a LAN cable to connect to the LAN (100) terminal on the unit. 2 USB Wireless Setup Use a wireless LAN via the USB Wireless LAN Adapter (Sony UWA-BR100* only). The USB Wireless LAN Adapter may not be available in some regions/countries. - Page 22 USB Wireless LAN Adapter to a different position or place the USB Wireless LAN Adapter and the wireless LAN router closer to each other. • You can also get information for network settings from the following Sony support page: For customers in the U.S.: http://www.sony.com/support...
-
Page 23: Step 4: Performing The Easy Setup
Perform the [Easy Setup]. Follow the Step 4: Performing the on-screen instructions to make the basic settings using C/X/x/c, and Easy Setup Depending on the connection method (page 16), perform the following setting. • HDMI cable connection: Follow the Before performing Step 4 instructions that are displayed on the TV Make sure all connections are secure, and then screen. -
Page 24: Step 5: Selecting The Source
Step 5: Selecting the Source You can select the playback source. FUNCTION Press FUNCTION repeatedly until the desired function appears in the front panel display. Each time you press FUNCTION, the function changes as follows. “BD/DVD” t “FM” t “HDMI1” t “HDMI2”... -
Page 25: Step 6: Enjoying Surround Sound
Step 6: Enjoying Surround Sound After performing the previous Steps and starting playback, you can easily enjoy surround sound. You can also select pre-programmed surround settings that are tailored to different kinds of sound sources. They bring the exciting and powerful sound of movie theaters into your home. X/x/c, OPTIONS Selecting surround settings based on your listening preference... - Page 26 Press OPTIONS. The option menu in the front panel display turns off. • When the home menu is displayed on the TV screen, this setting can be changed by selecting the surround setting via [Surround Setting] in [Audio Settings] of [Setup] (page 55). About speaker output of each surround setting The table below describes the options when you connect all the speakers to the unit.
- Page 27 • When you select [A.F.D. Multi] (“A.F.D. MULTI”), depending on the disc or source, the beginning of the sound may be cut off while the optimum mode is automatically selected. To avoid cutting the sound, select [A.F.D. Standard] (“A.F.D. STD”). •...
-
Page 28: Playback
Prepare for BD-LIVE (BD-LIVE only). • Connect the system to a network Playback (page 21). • Set [BD Internet Connection] to [Allow] Playing a Disc (page 55). Insert a BD-ROM with BONUSVIEW/ For playable discs, see “Playable Discs” BD-LIVE. (page 66). The operation method differs depending on Switch the input selector on your TV so the disc. -
Page 29: Playing From A Usb Device
Displaying the play information Playing from a USB Device You can check the playback information, etc., by pressing DISPLAY. The displayed information differs depending on You can play video/music/photo files on the the disc type and system status. connected USB device. For playable types of files, see “Playable Types Example: when playing a BD-ROM of Files”... -
Page 30: Enjoying An Ipod/Iphone
Front panel Enjoying an iPod/iPhone Rear panel You can enjoy the music/video/photo and charge the battery of an iPod/iPhone via the system. VIDEO IN Compatible iPod/iPhone models The compatible iPod/iPhone models are as Dock for iPod/iPhone follows. Update your iPod/iPhone with the latest software before using with the system. - Page 31 • To change a system setting, such as the surround this system. setting, while viewing images from your iPod/iPhone • Sony cannot accept responsibility in the event that on your TV, select the input on your TV for this data recorded to iPod/iPhone is lost or damaged when system before operating the system.
-
Page 32: Playing Via A Network
For further details, visit the following website: This unit can be used as a player and renderer. http://www.sony.com/blurayhtsupport/ • Server: Stores and sends files • Player: Receives and plays files from the Prepare for BRAVIA Internet Video. - Page 33 You can play the same music at the same time Server across all Sony components which are compatible with the PARTY STREAMING function and connected to your home network. There are two kinds of PARTY STREAMING- compatible components.
-
Page 34: Available Options
To search for further related information • The sale and product lineup of products that are compatible with the PARTY STREAMING function Select an item in the lists, and then select the differ depending on the area. service for searching. Searching for video/music Available Options information... - Page 35 [Video] only [Music] only Items Details Items Details [A/V SYNC] Adjusts the gap between [Add Slideshow Registers music files in the picture and sound. For BGM] USB memory as slideshow details, see “Adjusting the background music (BGM). delay between the picture and [Music Search] Displays information on the sound”...
- Page 36 Press OPTIONS. Adjusting the delay between The option menu in the front panel display the picture and sound turns off. (A/V SYNC) When the sound does not match the pictures on the TV screen, you can adjust the delay between the picture and sound.
-
Page 37: Sound Adjustment
• “OMNI-DIR”: The same sound is audible anywhere in the room. • “3D SUR.”: “3D SUR.” is a unique Sony algorithm used for playing 3D (three- dimensional) content that provides a 3D sound experience with depth and presence by... -
Page 38: Enjoying Multiplex Broadcast Sound
x BD/DVD VIDEO Enjoying Multiplex Depending on the BD/DVD VIDEO, the choice of language varies. Broadcast Sound When 4 digits are displayed, they indicate a language code. See “Language Code List” (page 70) to confirm which language the code (DUAL MONO) represents. -
Page 39: Tuner
Adjust the volume by pressing VOL +/–. Tuner If an FM program is noisy Listening to the Radio If an FM program is noisy, you can select monaural reception. There will be no stereo effect, but reception will improve. You can enjoy radio sound with the system’s speakers. - Page 40 Selecting the preset station Press FUNCTION repeatedly until “FM” appears in the front panel display. The last received station is tuned in. Press PRESET +/– repeatedly to select the preset station. The preset number and frequency appear on the TV screen and front panel display. Each time you press the button, the system tunes in one preset station.
-
Page 41: Other Operations
• When sound from the TV or other components “BRAVIA” Sync function. is output via the speakers of the system, you By connecting Sony components that are can adjust the volume and turn off the sound of compatible with the Control for HDMI function the system by operating the TV. -
Page 42: Calibrating The Appropriate Settings Automatically
• Make sure that the component is connected to the • Before [Auto Calibration], make sure that the system via an HDMI cable, and the Control for surround amplifier turns on and you install the HDMI function of the connected component is set to surround amplifier in the appropriate location. -
Page 43: Setting The Speakers
Setting the Speakers The speakers in the illustration correspond to the following: 1Center speaker [Speaker Settings] 2Front left speaker (L) To obtain the best possible surround sound, set 3Front right speaker (R) connection of the speakers and their distance 4Subwoofer from your listening position. -
Page 44: Using The Sleep Timer
[Surround Left/Right] 0.0 dB: Set the surround Using the Sleep Timer speaker level. [Subwoofer] 0.0 dB: Set the subwoofer level. * This item appears when you set it to [Yes] in the You can set the system to turn off at a preset [Connection] setting. -
Page 45: Controlling Your Tv Or Other Components With The Supplied Remote
(PAGE –) remote (Preset mode)” (page 46). SOUND MODE (PAGE +) • When you replace the batteries of the remote, the ./> remote setting may be reset to the default (SONY) NETFLIX setting. QRIOCITY Controlling your components with the supplied remote... -
Page 46: Saving Power In Standby Mode
You can connect to the Internet and enjoy buttons, then press ENTER. websites like the Sony homepage using the For the manufacturer’s code, see system. “Manufacturer’s Code List” (page 71). - Page 47 Internet Browser display Available options You can check website information by pressing Various settings and operations are available by DISPLAY. The display information differs pressing OPTIONS. depending on the website and page status. The available items differ depending on the situation.
-
Page 48: Setting Up The Network
• For more information, go to the following URL. For customers in the U.S.: The home menu appears on the TV screen. http://www.sony.com/support Press C/c to select [Setup]. For customers in Canada: English: http://www.sony.ca/support French: http://fr.sony.ca/support For customers in Mexico and Latin America: http://esupport.sony.com/LA... - Page 49 Press X/x to select the network setting When connecting to the LAN type, then press with a LAN cable • [Auto]: The system sets the IP address automatically, and the [DNS Settings] display appears. Follow the Steps below for connecting to a LAN When you select [Auto] and press , the (Local Area Network).
- Page 50 Press X/x to select the wireless LAN When connecting to the name, then press wireless LAN with the USB x When the selected wireless LAN is unsecured Wireless LAN Adapter Setup of wireless LAN connectivity is finished. Next, enter the IP address settings Follow the Steps below for connecting to a by following the Steps of “Auto setting”...
- Page 51 About wireless LAN security Since communication via the wireless LAN function is established by radio waves, the wireless signal may be susceptible to interception. To protect wireless communication, this system supports various security functions. Be sure to correctly configure the security settings in accordance with your network environment.
-
Page 52: Settings And Adjustments
You can setup the following options. Settings and Adjustments Icon Explanation [Network Update] (page 53) Using the Setup Display Updates the software of the system. [Screen Settings] (page 53) You can make various adjustments of items such Makes the screen settings as picture and sound. -
Page 53: [Network Update]
[TV Type] [16:9]: Select this when connecting to a wide- For customers in Canada: screen TV or a TV with a wide-mode function. English: http://www.sony.ca/support [4:3]: Select this when connecting to a 4:3 French: http://fr.sony.ca/support screen TV without a wide-mode function. -
Page 54: [Audio Settings]
x [Cinema Conversion Mode] x [HDMI Deep Color Output] [Auto]: Normally select this. The unit [Auto]: Normally select this. automatically detects whether the material is [16bit], [12bit], [10bit]: Outputs 16bit/12bit/ video-based or film-based, and switches to the 10bit video signals when the connected TV is appropriate conversion method. -
Page 55: [Bd/Dvd Viewing Settings]
x [Audio Output] [BD/DVD Viewing You can select the output method where the Settings] audio signal is output. [Speaker]: Outputs multi-channel sound from You can make detailed settings for BD/DVD the system’s speakers only. playback. [Speaker + HDMI]: Outputs multi-channel sound from the system’s speakers and 2-channel x [BD/DVD Menu] linear PCM signals from the HDMI (OUT) jack. -
Page 56: [Parental Control Settings]
[Parental Control [Music Settings] Settings] You can make detailed settings for Super Audio CD playback. x [Password] x [Super Audio CD Playback Layer] Set or change the password for the Parental [Super Audio CD]: Plays the Super Audio CD Control function. A password allows you to set layer. -
Page 57: [Network Settings]
[On]: Automatically displays information on the DLNA controller. screen when changing the viewing titles, picture [Smart Select]: Allows a Sony DLNA controller modes, audio signals, etc. to find the system as the target component to [Off]: Displays information only when you operate by using the infrared ray. -
Page 58: [Easy Setup]
[Easy Setup] Re-runs the Easy Setup to make the basic settings. Follow the on-screen instructions. [Resetting] x [Reset to Factory Default Settings] You can reset the system settings to the factory default by selecting the group of settings. All the settings within the group will be reset. -
Page 59: Additional Information
• Place the system in a location with adequate If you have any questions or problems concerning ventilation to prevent heat build-up in the system. your system, please consult your nearest Sony dealer. • At high volume, over long periods of time, the cabinet On cleaning discs, disc/lens becomes hot to the touch. -
Page 60: Notes About The Discs
On moving the system Notes about the Discs • Before moving the system, make sure that there is no disc inserted, and remove the AC power cord (mains lead) from the wall outlet (mains). On handling discs • To keep the disc clean, handle the disc by its edge. -
Page 61: Troubleshooting
• Contact your nearest Sony dealer or local authorized Sony service facility. front panel display. “Exxxx” appears in the front • Contact your nearest Sony dealer or local authorized Sony service facility and panel display. give the error code. appears without any •... - Page 62 Picture Symptom Problems and solutions There is no picture. • Check the output method on your system (page 16). There is no picture when you • The unit is connected to an input device that is not HDCP (High-bandwidth make an HDMI cable Digital Content Protection) compliant (“HDMI”...
- Page 63 Sound Symptom Problems and solutions There is no sound. • The speaker cord is not connected securely. • Check the speaker settings (page 43). The Super Audio CD sound of a • HDMI (IN 1) and HDMI (IN 2) does not accept an audio format that contains component that is connected to copy protection.
-
Page 64: Usb Device
• Picture/sound quality may be improved by changing the connection speed. detail, especially during fast- Sony recommends a connection speed of at least 2.5 Mbps for standard- motion or dark scenes. definition video and 10 Mbps for high-definition video. -
Page 65: Network Connection
“BRAVIA” Sync ([Control for HDMI]) Symptom Problems and solutions The [Control for HDMI] • Check that [Control for HDMI] is set to [On] (page 56). function does not work • If you change the HDMI connection, turn the system off and on again. (“BRAVIA”... -
Page 66: Playable Discs
Notes on discs Playable Discs This product is designed to play back discs that conform to the Compact Disc (CD) standard. DualDiscs and some music discs encoded with Blu-ray Disc BD-ROM copyright protection technologies do not BD-R/BD-RE conform to the Compact Disc (CD) standard. DVD-ROM Therefore, these discs may not be compatible DVD-R/DVD-RW... -
Page 67: Playable Types Of Files
Playable Types of Files • Some files may not play depending on the file format, the file encoding, the recording condition, or DLNA server condition. Video • Some files edited on a PC may not play. • The system can recognize the following files or File format Extensions folders in BDs, DVDs, CDs and USB devices:... -
Page 68: Supported Audio Formats
Supported Audio Formats Audio formats supported by this system are as follows. Format LPCM 2ch LPCM 5.1ch Dolby Digital Dolby DTS-ES DTS-HD DTS-HD LPCM 7.1ch TrueHD, Discrete 6.1, High Master Function Dolby Digital DTS-ES Resolution Audio Plus Matrix 6.1, Audio DTS96/24 “BD/DVD”... -
Page 69: Specifications
Antenna (aerial) terminals 75 ohms, unbalanced Specifications Speakers Front (SS-TSB108) Amplifier Section Dimensions (approx.) 96 mm × 775 mm × 72 mm POWER OUTPUT (rated) in × 30 in × Front L/Front R: 108 W + 108 W (at 3 ohms, in) (w/h/d) (wall- 1 kHz, 1% THD) mounted part) -
Page 70: Language Code List
Language Code List The language spellings conform to the ISO 639: 1988 (E/F) standard. Parental Control/Area Code List... -
Page 71: Manufacturer's Code List
Manufacturer’s Code List Manufacturer Code number General Instrument 8503, 8512, 8513, 8514, 8515, Manufacturer Code number 8516, 8517, 8518, 8519, 8529, Sony 5501 8533, 8542, 8543 Admiral 5502, 5509, 5514 Jerrold 8512, 8513, 8514, 8515, 8516, 5512 8517, 8518, 8519, 8529, 8533,... -
Page 72: Index
Index Numerics 3D 28 FM Mode 39 Quick Start Mode 57 3D Output Setting 53 Front panel 8 Front panel display 9 Rear panel 10 A/V SYNC 36 Region code 66 Attenuate - AUDIO 54 Gracenote Settings 57 Registered Media Remote Audio 55 Devices 57 Audio DRC 54... - Page 76 The software of this system may be updated in the future. To find out details on any available updates, please visit the following URL. For customers in the U.S.: http://www.sony.com/support For customers in Canada: English: http://www.sony.ca/support French: http://fr.sony.ca/support For customers in Mexico and Latin America: http://esupport.sony.com/LA ©2011 Sony Corporation Printed in Malaysia...