Panasonic KX-TG6671C Operating Instructions Manual

Panasonic KX-TG6671C Operating Instructions Manual

Digital corded/cordless answering system

Advertisement

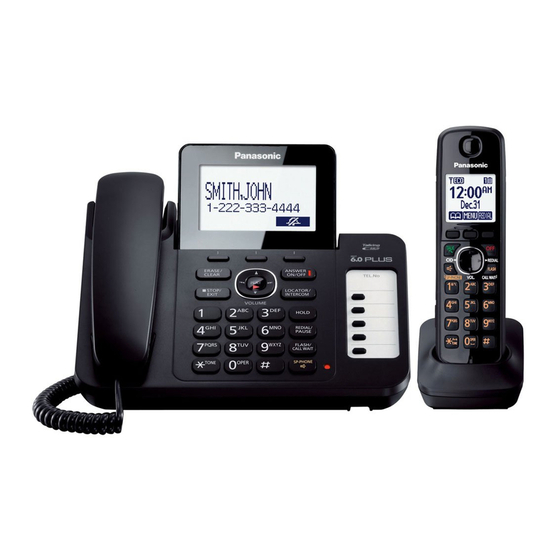
Model shown is KX-TG6671.
Before initial use, see "Getting Started" on
page 8.
Thank you for purchasing a Panasonic product.
Please read these operating instructions before using the unit and save them for future
reference.
This unit is compatible with Call Display. You must subscribe to the appropriate service offered
by your service provider/telephone company.
For assistance, please call 1-800-561-5505 or visit us at www.panasonic.ca

Operating Instructions

Digital Corded/Cordless Answering System
Model No.
KX-TG6671C
KX-TG6672C
KX-TG6673C

Advertisement

Table of Contents
loading

Summary of Contents for Panasonic KX-TG6671C

  • Page 1: Operating Instructions

    Please read these operating instructions before using the unit and save them for future reference. This unit is compatible with Call Display. You must subscribe to the appropriate service offered by your service provider/telephone company. For assistance, please call 1-800-561-5505 or visit us at www.panasonic.ca...
  • Page 2: Table Of Contents

    Table of Contents Introduction Useful Information Model composition ..........3 Wall mounting ...........41 Accessory information ........3 Error messages ..........42 Troubleshooting ..........43 Important Information Industry Canada Notices and other For your safety ............5 information ............47 Important safety instructions .......6 Warranty ............48 For best performance .........6 Index Other information ..........6 Specifications ............7...
  • Page 3: Introduction

    KX-TG6671 series KX-TG6671 KX-TG6671 KX-TGA660 KX-TG6672 KX-TG6671 KX-TGA660 KX-TG6673 KX-TG6671 KX-TGA660 R The suffix (C) in the following model numbers will be omitted in these instructions: KX-TG6671C/ KX-TG6672C/KX-TG6673C Accessory information Supplied accessories Quantity Accessory item/Part number KX-TG6671 KX-TG6672 KX-TG6673 AC adaptor/PNLV226...
  • Page 4: Expanding Your Phone System

    Introduction Additional/replacement accessories Please contact your nearest Panasonic dealer for sales information. Accessory item Order number Rechargeable batteries HHR-4DPA or HHR-4MRA R To order, please call 1-800-332-5368 or visit http://www.panasonic.com/batterystore Battery type: – Nickel metal hydride (Ni-MH) – 2 x AAA (R03) size for each handset...
  • Page 5: Important Information

    Important Information the frequency range of 1.92 GHz to 1.93 GHz, and the RF transmission power is 115 mW (max.).) For your safety R Do not use the product in health care facilities if any regulations posted in the area instruct you not to do so. To prevent severe injury and loss of life/property, read this Hospitals or health care facilities may be using section carefully before using the product to ensure...
  • Page 6: Important Safety Instructions

    Base unit location/avoiding noise Compliance with TIA-1083 standard The base unit and other compatible Panasonic units use Telephone handsets identified with this logo have radio waves to communicate with each other.
  • Page 7: Specifications

    Important Information Specifications R Standard: DECT 6.0 (Digital Enhanced Cordless Telecommunications 6.0) R Frequency range: 1.92 GHz to 1.93 GHz R RF transmission power: 115 mW (max.) R Power source: 120 V AC, 60 Hz R Power consumption: Base unit: Standby: Approx.
  • Page 8: Getting Started

    Getting Started n Charger Setting up Connections R Use only the supplied Panasonic AC adaptor Hooks PNLV226. (120 V AC, 60 Hz) n Base unit Battery installation R USE ONLY Ni-MH batteries AAA (R03) size. R Do NOT use Alkaline/Manganese/Ni-Cd batteries.
  • Page 9: Note When Setting Up

    R Use the supplied rechargeable batteries. For R Eco mode is turned off when the clarity booster replacement, we recommend using the is activated (page 15). Panasonic rechargeable batteries noted on page 4, 5. R Wipe the battery ends ( ) with a dry cloth.
  • Page 10: Controls

    Getting Started MLOCATORN MINTERCOMN Controls N (PLAY) Message indicator MHOLDN Base unit MREDIALN MPAUSEN MFLASHN MCALL WAITN M N (SP-PHONE: Speakerphone) SP-PHONE indicator n Control type Soft keys The base unit features 3 soft keys. By pressing a soft key, you can select the feature shown directly above it on the display.
  • Page 11: Belt Clip

    Getting Started Charge indicator Display Ringer indicator Message indicator Nonslip pad Base unit display items R Nonslip pad offers support when you cradle Item Meaning the handset between your shoulder and ear. Ringer volume is off. Speaker (page 14) N (TALK) PRIV.
  • Page 12: Initial Settings

    Getting Started Item Meaning Date and time In use Answering system is being used by the base unit or Handset another handset. MMENUN#101 Line in use Someone is using the line. Enter the current month, date, and year by selecting 2 digits for each. Example: July 15, 2011 Initial settings 07 15 11...
  • Page 13: Making/Answering Calls

    Making/Answering Calls When you finish talking, press MOFFN or place Making calls the handset on the charger. Using the speakerphone Using the base unit Dial the phone number and press M N. R Speak alternately with the other party. Dial the phone number. R To correct a digit, press MCLEARN.
  • Page 14: Answering Calls

    Making/Answering Calls R Base unit: Base unit / Handset To turn the ringer off, press and hold MCN 9 a MPAUSEN until the unit beeps. Dial the phone number. n Programming the volume beforehand: Proceed with the operation for your unit. MMENUN#160 Base unit: Lift the corded handset.
  • Page 15 Making/Answering Calls R If another phone is connected to the same line, Note: you can also take the call by lifting its handset. R Please contact your service provider/telephone R While an outside call is on hold, the SP-PHONE company for details and availability of this indicator on the base unit flashes.
  • Page 16: Call Share

    Making/Answering Calls Call share You can join an existing outside call. Important: R When the privacy mode is on, you cannot join the conversation. Turn it off. Base unit To join the conversation, lift the corded handset when the handset is on an outside call. Handset To join the conversation, press M N when the...
  • Page 17: Shared Phonebook

    Shared Phonebook Character Shared phonebook The shared phonebook allows you to make calls without having to dial manually. The base unit and any handset registered to the base unit can use the shared phonebook. You can add 100 names and phone numbers to the shared phonebook, and assign each phonebook entry to the desired group.
  • Page 18: Chain Dial

    Shared Phonebook Edit the phone number if necessary (24 digits Finding and calling from a max.). a MOKN phonebook entry MbN: Select the desired group (page 17). a MSELECTN 2 times Base unit / Handset MOFFN Scrolling through all entries Erasing entries Erasing an entry MbN: Select the desired entry.
  • Page 19: Speed Dial

    Shared Phonebook Note: Lift the corded handset. R When storing a calling card access number and Note: your PIN in the phonebook as one phonebook R In step 1, if no phone number is stored to the entry, press MPAUSEN to add pauses after the speed dial button, you can assign a number by number and PIN as necessary (page 13).
  • Page 20: Programming

    Programming Programmable settings You can customize the unit by programming the following features. To access the features, there are 2 methods. Base unit / Handset n Scrolling through the display menus MMENUN Proceed with the operation for your unit. Base unit: Press MCN, MDN, M N, or M N to select the desired main menu.
  • Page 21 Programming Main menu: “Ringer volume” Operation Settings Code Adjusting the ringer volume. (Base unit) Off–6 <6> #160 Main menu: “Initial settings” Sub-menu 1 Sub-menu 2 Settings Code – Level 1–6 <3> #145 – Contrast (Display contrast) Change language – <English> #110 (Display) (Base unit) Français...
  • Page 22 Programming Sub-menu 1 Sub-menu 2 Settings Code – – #328 Answer off Main menu: “V.M. access” (V.M.: Voice Mail) Operation Code Listening to Voice Mail messages. #330 Main menu: “Intercom” Operation Code Paging the desired unit. #274 Main menu: “Set date & time” Sub-menu 1 Sub-menu 2 Settings...
  • Page 23 Programming Sub-menu 1 Sub-menu 2 Settings Code Voice mail – #331 Store VM access# (VM: Voice Mail) 1: <On> 0: Off #332 VM tone detect Message alert – 1: <On> 0: Off #340 – 1–6: Level 1–6 <3> #145 – LCD contrast (Display contrast) –...
  • Page 24 Programming To use this feature, set the date and time first (page 12). *4 Ringer volume cannot be turned off for alarm, intercom calls, and paging. *5 If you subscribe to a distinctive ring service, select a tone (tone 1 to 5). If you select a melody, you cannot distinguish lines by their ringers.
  • Page 25: Special Programming

    Programming R We recommend turning the base unit ringer off Special programming (page 14) in addition to turning the night mode R If you have set the alarm, the alarm sounds Alarm even if the night mode is turned on. An alarm sounds at the set time for 3 minutes Turning night mode on/off once or daily.
  • Page 26: Registering A Unit

    Programming Enter the phone number (24 digits max.). Call block (Call Display subscribers R To erase a digit, press MCLEARN. only) MSAVEN a MOFFN This feature allows the unit to reject calls when: Blocking incoming calls without phone number – the unit receives a call from a phone number stored in the call block list as unwanted (“Storing You can reject a call when no phone number is unwanted callers”, page 26).
  • Page 27: Registering A Handset To The Base Unit

    Programming Registering a handset to the base unit The supplied handset and base unit are pre-registered. If for some reason the handset is not registered to the base unit, re-register the handset. Handset: MMENUN#130 Base unit: Press and hold MLOCATORN for about 5 seconds until the registration tone sounds.
  • Page 28: Call Display Service

    Call Display Service stored name in the phonebook is displayed and Using Call Display service logged in the caller list. Important: Talking Call Display R This unit is Call Display compatible. To use Call Display features, you must subscribe to a Call Base unit / Handset Display service.
  • Page 29 Call Display Service Displayed Handset Function option N a MMENUN Hold Holds the waiting call. The MbN: “Group” a MSELECTN caller will hear the prerecorded MbN: Select the desired group. a MSELECTN hold message played by your service provider/telephone MbN: Select the current setting of the ringer ID. company.
  • Page 30: Caller List

    Call Display Service Press MEDITN repeatedly until the phone Caller list number is shown in the desired format. 1 – Area code – Local phone number Important: Example: 1-555-321-5555 R Only 1 person can access the caller list at a Local phone number time.
  • Page 31 Call Display Service MbN: Select the desired entry. R To edit the number, press MEDITN repeatedly until the phone number is shown in the desired format. MSAVEN a MbN: “Yes” a MSELECTN MnN (EXIT) Note: R If you stored caller information to the phonebook using the base unit, the entry is automatically assigned to group 1.
  • Page 32: Answering System

    Answering System Handset Answering system To turn on: MMENUN#327 The answering system can answer and record To turn off: calls for you when you are unavailable to answer MMENUN#328 the phone. MOFFN You can also set the unit to play a greeting message but not to record caller messages by Note for base unit and handset: selecting “Greeting only”...
  • Page 33: Listening To Messages Using The Base Unit

    Answering System Operation Using a pre-recorded greeting message Repeat message Skip message The unit provides 2 pre-recorded greeting MPAUSEN Pause message messages: To resume playback, press – If you erase or do not record your own greeting message, the unit plays a pre-recorded greeting asking callers to leave a message.
  • Page 34: Remote Operation

    Answering System Press MEDITN repeatedly until the phone Operating the answering system number is shown in the desired format (page 30). a M MMENUN a MbN: “Answering device” a MSELECTN Erasing all messages Operation MDN or MCN Adjust the receiver/speaker volume MMENUN#325 (during playback) MbN: “Yes”...
  • Page 35: Answering System Settings

    Answering System When finished, hang up. Answering system settings Voice guidance Number of rings before the unit During remote operation, the unit’s voice guidance answers a call starts and prompts you to press 1 to perform a specific operation, or press 2 to listen to more You can change the number of times the phone available operations.
  • Page 36: Message Alert

    Answering System answer the call first. To do so, contact your service provider/telephone company. Caller’s recording time You can change the maximum message recording time allowed for each caller. The default setting is “3 min”. Handset MMENUN#305 MbN: Select the desired setting. a MSAVEN a MOFFN Selecting “Greeting only”...
  • Page 37: Voice Mail Service

    Voice Mail Service To erase the Voice Mail access number Voice Mail service Handset Voice Mail is an automatic answering service MMENUN#331 offered by your service provider/telephone Press and hold MCLEARN until all digits are company. After you subscribe to this service, your erased.
  • Page 38 Voice Mail Service Base unit To listen to Voice Mail messages, you have to dial your Voice Mail access number manually. Handset MVMN MMENUN#330 R The speakerphone turns on. R If there are no new messages in the Voice Mail, MVMN is not displayed. Follow the pre-recorded instructions.
  • Page 39: Intercom/Locator

    Intercom/Locator Intercom Handset locator Intercom calls can be made: You can locate a misplaced handset by paging it. – between the base unit and a handset Base unit: Press MLOCATORN. – between handsets R All registered handsets beep for 1 minute. To stop paging: Note: Base unit:...
  • Page 40 Intercom/Locator To complete the transfer: Press MOFFN. R The outside call is being routed to the destination unit. To establish a conference call: MMENUN a MbN: “Conference” a MSELECTN R To leave the conference, press MOFFN. The other 2 parties can continue the conversation.
  • Page 41: Useful Information

    Useful Information Insert the lower tabs of the adaptor into the Wall mounting unit’s bottom slots (A), then insert by pushing down the levers of the adaptor into the upper The base unit can be mounted on a wall by slots (B).
  • Page 42: Error Messages

    Useful Information Error messages Display message Cause/solution Access # to VM service R You have not stored the Voice Mail access number. Store the is not stored number (page 37). Base no power R The handset has lost communication with the base unit. Move closer to the base unit and try again.
  • Page 43: Troubleshooting

    Useful Information Troubleshooting If you still have difficulties after following the instructions in this section, disconnect the base unit’s AC adaptor, then reconnect the base unit’s AC adaptor. Remove the batteries from the handset, and then insert the batteries into the handset again. General use Problem Cause/solution...
  • Page 44 Useful Information Making/answering calls, intercom Problem Cause/solution is displayed. R The handset is too far from the base unit. Move closer. R The base unit’s AC adaptor is not properly connected. Reconnect AC adaptor to the base unit. R The handset is not registered to the base unit. Register it (page 27).
  • Page 45 Useful Information Problem Cause/solution Caller information is not announced. R The base unit or handset’s ringer volume is turned off. Adjust it (page 14, 22). R The Talking Call Display feature is turned off. Turn it on (page 22). R The number of rings for the answering system is set to “2 rings”...
  • Page 46 Useful Information Liquid damage Problem Cause/solution Liquid or other form of moisture has R Disconnect the AC adaptor and telephone line cord from the entered the base unit/handset. base unit. Remove the batteries from the handset and leave to dry for at least 3 days. After the base unit/handset are completely dry, reconnect the AC adaptor and telephone line cord.
  • Page 47: Industry Canada Notices And Other Information

    Useful Information Industry Canada Notices and other information NOTICE: L To comply with IC RF exposure requirements, This equipment meets the applicable Industry Canada the base unit must be installed and operated Terminal Equipment Technical Specifications. This is 20 cm (8 inches) or more between product and confirmed by the registration number.
  • Page 48: Warranty

    PANASONIC PRODUCT - LIMITED WARRANTY EXCHANGE PROGRAM Panasonic Canada Inc. warrants this product to be free from defects in material and workmanship under normal use and for a period as stated below from the date of original purchase agrees to, at its option either (a) repair your product with new or refurbished parts, (b) replace it with a new or a refurbished equivalent value product, or (c) refund your purchase price.
  • Page 49: Index

    Index Intercom: 39 Index K Key tone: 23 Line mode: 23 4-way conference: 16 M Making calls: 13 A Additional handset: 26 Missed calls: 28 Alarm: 25 Mute: 15 Answering calls: 14 N Night mode: 25 Answering system Pause: 13 Call screening: 32 Phonebook: 17 Erasing messages: 33, 34, 35...
  • Page 50 Notes...
  • Page 51 Notes...
  • Page 52 Date of purchase (found on the bottom of the base unit) Name and address of dealer Attach your purchase receipt here. 5770 Ambler Drive, Mississauga, Ontario L4W 2T3 © Panasonic System Networks Co., Ltd. 2011 Printed in Malaysia *TG6671C* *TG6671C* PNQX3147ZA...

This manual is also suitable for:

Kx-tg6673cKx-tg6672c

Table of Contents