Table of Contents
Advertisement
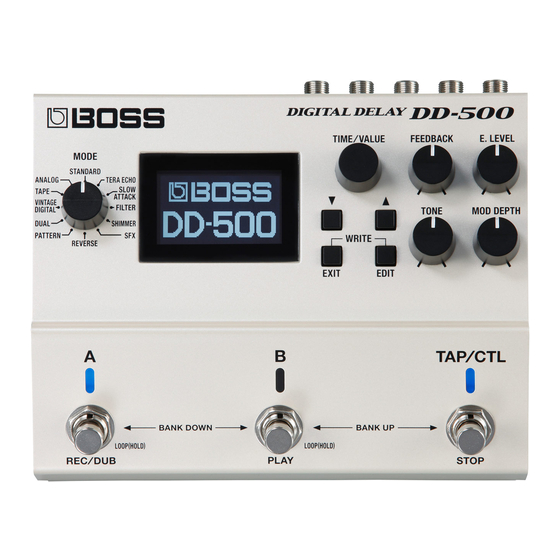
Owner's Manual
5 High-precision 96 kHz 32-bit audio processing from input to output ensures high audio quality.
5 Easily visible delay time indication and an independent [TAP/CTL] switch provide sophisticated
functionality that's easy to use in live performance.
5 A total of 12 different delay modes, including "VINTAGE DIGITAL" that models the SDE-3000 and
DD-2, as well as "ANALOG" and "TAPE. "
5 The memory function lets you store and recall 297 different setups from internal memory.
"CARRY OVER" provides seamless transition that preserves the reverberant sound when
switching between patches.
5 "Phrase Loop" function lets you layer new material in real time while recording and playing back.
This can be used simultaneously with delay.
5 By connecting the DD-500 via a USB cable or MIDI cables, you can switch sounds and control
parameters in synchronization with your computer DAW or an external MIDI device.
2
2
2
4
5
5
6
7
8
9
10
11
12
12
14
15
17
17
18
19
Before using this unit, carefully read "USING THE UNIT SAFELY" and "IMPORTANT NOTES"
19
(leaflet "USING THE UNIT SAFELY" and Owner's Manual (p. 26)). After reading, keep the
document(s) including those sections where it will be available for immediate reference.
19
20
20
20
21
21
22
24
24
25
25
26
26
© 2015 Roland Corporation
Advertisement
Table of Contents

Related Manuals for Boss DD-500


Summary of Contents for Boss DD-500
-
Page 1: Table Of Contents
5 “Phrase Loop” function lets you layer new material in real time while recording and playing back. This can be used simultaneously with delay. 5 By connecting the DD-500 via a USB cable or MIDI cables, you can switch sounds and control parameters in synchronization with your computer DAW or an external MIDI device. -
Page 2: Getting Ready
Getting Ready Installing the Batteries Install four alkaline batteries (AA, LR6) in the battery compartment located on the bottom of the unit. * When turning the unit over, be careful so as to protect the buttons and knobs from damage. Also, handle the unit carefully;... - Page 3 Getting Ready INPUT A/MONO, B jacks OUTPUT A/MONO, B jacks Connect your electric guitar, or another Connect these jacks to your amp or monitor speakers. instrument or effect unit, to these jacks. If you’re using a mono setup, use only the OUTPUT A/MONO jack. * Use the INPUT A/MONO jack and B jack * Do not connect headphones to the OUTPUT A/MONO, B jacks.
-
Page 4: Turning The Power On
Insert a plug into the INPUT A/MONO jack. The DD-500 power turns on. Turn on the power of your guitar amp or other equipment. * This unit is equipped with a protection circuit. A brief interval (a few seconds) after turning the unit on is required before it will operate normally. -
Page 5: Basic Operation
Basic Operation Adjusting the Delay [MODE] knob Selects the type of delay. STANDARD Clear digital delay. TERA ECHO Spacious echo sound with movement, neither reverb nor delay. SLOW ATTACK Delay with a suppressed attack as if the volume is being faded-in. FILTER Delay with a swept filter added. -
Page 6: Turning Delay On/Off
Basic Operation Turning Delay On/Off Patch A delay Each time you press the [A] switch, the delay alternately turns on (lit blue) / off (unlit). Patch B delay Each time you press the [B] switch, the delay alternately turns on (lit blue) / off (unlit). Blue: on Unlit: off Press once... -
Page 7: Switching Banks/Patches
Basic Operation Switching Banks/Patches Switch banks (01–99). Bank up (press the [B] and [TAP/CTL] switches simultaneously) Bank down (press the [A] and [B] switches simultaneously) Press a blinking switch ([A] or [B]) to switch patches. Blinking blue MEMO You can recall a different patch by turning the [TIME/VALUE] knob while you hold down the [EXIT] button. -
Page 8: Using The [Tap/Ctl] Switch To Control The Delay
Basic Operation Using the [TAP/CTL] Switch to Control the Delay With the default settings, the [TAP/CTL] switch is used for tap input, but you can change this setting to make the switch affect the delay in various ways. Press the [EDIT] button. Use the [ H ] [ I ] buttons to select “CONTROL”... -
Page 9: Playing Phrase Loops
Basic Operation Playing Phrase Loops By operating the switches, you can carry out recording and playback in real time to create layered performances. You can apply the delay while creating layered performances. Recording time (seconds) Enter Phrase Loop mode If you hold down the blue-lit [A] or [B] switch for two seconds or longer, the Phrase Frequency 48 kHz 96 kHz... -
Page 10: Editing A Patch
Editing a Patch You can edit a variety of patch-related parameters. Press the [EDIT] button. Use the [ H ] [ I ] buttons to select “PATCH,” and then press the [EDIT] button. Use the [ H ] [ I ] buttons to select a parameter, and use the [TIME/ VALUE] knob to edit the value. -
Page 11: Saving A Patch
Saving a Patch Here’s how to save a patch that you’ve edited. Press the [EXIT] button and [EDIT] button simultaneously. Use the [TIME/VALUE] knob to select the save-destination number. Bank [A] switch [B] switch [TAP/CTL] switch Bank 01 Bank 02 Bank 99 * If you want to use the [TAP/CTL] switch to select patch C, refer to “Assigning the Functions of the [A], [B], and [TAP/CTL] Switches”... -
Page 12: Parameter List
Parameter List PATCH Parameter Explanation MODE Selects the type of delay (p. 5). The same function as the [MODE] knob. TIME Specifies the delay time. The same function as the [TIME/VALUE] knob. Specifies the tempo. NOTE Specifies the delay time with the note length relative to BPM. Adjusts the feedback level (or how much the sound is repeated). - Page 13 Parameter List MODE: TERA ECHO Parameter Explanation RESONANCE This adjusts the amount of resonance (and the tone coloration) of the effect sound. MODE: SLOW ATTACK Parameter Explanation Adjusts the sensitivity of the slow gear. When it is set to a lower value, the effect of the slow gear can be obtained only with a stronger picking, while SENS no effect is obtained with a weaker picking.
-
Page 14: Control
Parameter List MODE: DUAL Parameter Explanation DUAL MODE Specifies whether the two delays are connected in series or in parallel. DUAL TYPE Selects the type of delay. DUAL LINK Link the delay time and feedback of the second delay to the settings of the first delay. D2 TIME Specifies the delay time of the second delay. -
Page 15: Assign
Parameter List ASSIGN ASSIGN COMMON Parameter Explanation SENS (INPUT SENS) This adjusts the input sensitivity when INPUT LEVEL is selected for SOURCE. ASSIGN 1–8 Parameter Value Explanation OFF, ON Turns the ASSIGN 1–8 on/off. Specifies the controller (source). TAP/CTL [TAP/CTL] switch. EXP PDL External footswitch (EV-5 etc.;... - Page 16 Parameter List Parameter Value Explanation Select one of the following to specify the change produced by the wave pedal. WAV.FM (WAVE FORM) SAW, TRI, SIN Specifies how the motion of the internal pedal will be triggered. PAT CNG This is activated when a patch is selected. (PATCH CHANGE) This is activated when an external expression pedal connected to the CTL 1,2/ EXP LO...
-
Page 17: System
Parameter List SYSTEM Parameter Explanation CONTRAST Adjusting the contrast of the display OUTPUT Selects how output occurs. BANK MODE Specifies the timing at which the patch is changed when you change banks. BANK EXTENT MIN Sets the lower limit for the banks. BANK EXTENT MAX Sets the upper limit for the banks. -
Page 18: Midi Pc Map
Parameter List MIDI PC MAP Parameter Explanation BNK-PC# Specifies the program number that corresponds to each patch number. -
Page 19: Convenient Functions
Convenient Functions Specifying Whether to Carry-Over the Delay Sound You can specify whether the effect sound is carried-over (ON/OFF) when you switch patches or turn the delay off. Press the [EDIT] button. Use the [ H ] [ I ] buttons to select “PATCH,” and then press the [EDIT] button. -
Page 20: Synchronizing With A Daw Or External Midi Device
You can synchronize your DD-500 performance with a computer or an external MIDI device by sending and receiving MIDI messages. For example, an external MIDI device or DAW could switch patches on the DD-500 or control its tempo. Connection Example... -
Page 21: Midi Messages That Can Only Be Received
If you experience problems connecting with your DAW Normally, you don’t need to install a driver in order to connect the DD-500 to your computer. However, if some problem occurs, or if the performance is poor, using the BOSS original driver may solve the problem. -
Page 22: Assigning A Function To An External Pedal
Assigning a Function to an External Pedal You can assign a function to a footswitch (sold separately: FS-5U, FS-5L, FS-6, FS-7) or expression pedal (sold separately: Roland EV-5 etc.) connected to the CTL 1,2/EXP jack. Press the [EDIT] button. Use the [ H ] [ I ] buttons to select “CONTROL,” and then press the [EDIT] button. - Page 23 Assigning a Function to an External Pedal EXP FUNC Settings Value Explanation No function is assigned Select this if you’re using the ASGN1–8 setting (p. 15). TIME Controls the DELAY TIME. FEEDBACK Controls the FEEDBACK. TONE Controls the TONE. E. LEVEL Controls the E.
-
Page 24: Restoring The Factory Default Settings
Transmitting Data to an External MIDI Device You can use Exclusive messages to set another DD-500 to the same settings or to save effect sound settings to MIDI sequencers and other such devices. This transmission of data is referred to as bulk dump. -
Page 25: Troubleshooting
Options (sold separately) Dual Footswitch: BOSS FS-6, FS-7 Expression pedal: BOSS FV-500H, FV-500L, Roland EV-5 * 0 dBu = 0.775 Vrms * In the interest of product improvement, the specifications and/or appearance of this unit are subject to change without prior notice. -
Page 26: Using The Unit Safely
IMPORTANT NOTES Power Supply: Use of Batteries • Use only the specified expression pedal (Roland EV-5, BOSS FV-500L, BOSS FV- 500H; sold separately). By connecting any other expression pedals, you risk causing • If operating this unit on batteries, please use alkaline batteries.
Need help?
Do you have a question about the DD-500 and is the answer not in the manual?
Questions and answers