Table of Contents
Advertisement
Quick Links
Advertisement
Table of Contents

Related Manuals for Certa CTSHRPRCHSA


Summary of Contents for Certa CTSHRPRCHSA
-
Page 2: Table Of Contents
Table of Contents Product Layout...........................2 Technical Specifications........................2 General Safety Precautions......................2 Additional Safe Work Tips......................3 Assembly...............................4 Grinding Disk Maintenance......................5 Grinding Disk Assembly......................5 Clamping Screw Setup.......................6 Grinding..............................6 Grinding Depth Gauge........................7 Dimensions............................7 Parts List..............................8... -
Page 3: Product Layout
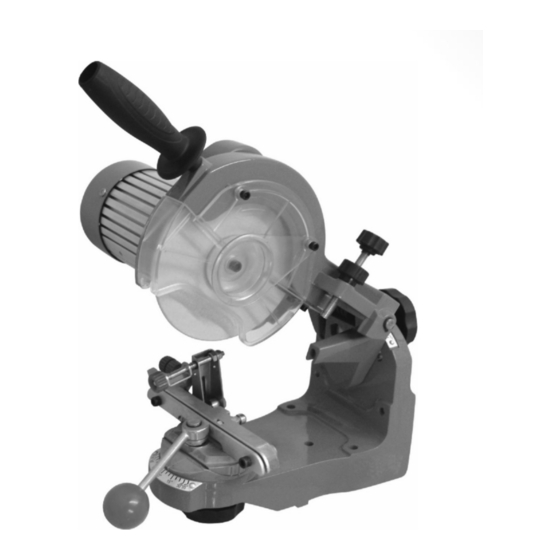
Product Layout Handle 2. Grinding Disk Lateral Guard 3. Depth of Grind Set Screw 4. Cutting Edge Angle Wheel 5. Base 6. Screw Clamp Cradle 7. Cutting Angle Wheel 8. Scale 9. Clamping Lever 10. Mean Distance Set Screw 11. Guide Flap Valve 12. -
Page 4: Additional Safe Work Tips
Do not use any caustic substances to clean the sharpener. • Do not use the unit or work on it within the proximity of flammable liquids or vapours. • Protect the power cable from any damage, including acids or oils. •... -
Page 5: Assembly
Assembly The chainsaw sharpener is delivered partially assembled. One part consists of the base, on which the chain guide is located. The other part is the bearing arm with the motor and hand-grip. The assembly MUST be performed with the machine unplugged! The unit design allows either for a desk installation or a wall mounting. -
Page 6: Grinding Disk Maintenance
Grinding Disk Maintenance To avoid injuries and accidents, only grinding disks free of defects should be used. Check the disk you are about to fit for any damages prior to assembly. This can be done by a simple sound test: Hold the disk so that a pencil can be put into the hole of the disk and the disk can swing freely (see image). -
Page 7: Clamping Screw Setup
Clamping Screw Setup Before you start grinding, the chain should be placed between both of the attachment guides. The tooth to be sharpened should be placed against the stop. Watch out for the sharpening angle to correspond to the guides section. The type of chain to be sharpened should be determined using the sharpening block provided or by viewing the table on page 7. -
Page 8: Grinding Depth Gauge
Grinding Depth Gauge Determine the correct height of the depth gauge using the table below. When grinding, the depth gauge, the vice angle (G) should always be 0. Set the supporting strut and holder at 90 ° The grind depth may be set using set screw K. Dimensions... -
Page 9: Parts List
Parts List If you have any further questions regarding the use of this product, please contact the Kogan.com customer support team.
Need help?
Do you have a question about the CTSHRPRCHSA and is the answer not in the manual?
Questions and answers