Table of Contents
Advertisement
Quick Links
Advertisement
Table of Contents

Related Manuals for Comcast XFINITY TDC788X


Summary of Contents for Comcast XFINITY TDC788X
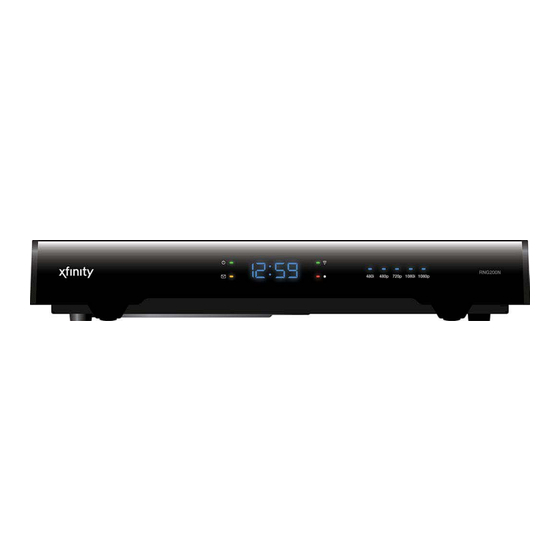
- Page 1 TDC788X DVR High-definition digital set-top OPERATOR’S MANUAL DRAFT...
-
Page 2: Table Of Contents
CableCARD™ is a trademark of Cable Television Laboratories, Inc. COMCAST, the COMCAST logo, XFINITY and the XFINITY logo are all trademarks or service marks of Comcast Corporation or its subsidiaries. All other trademarks and service marks appearing herein are the properties of their respective owners. -
Page 3: Safety Information
SAFETY INFORMATION IMPORTANT SAFETY INSTRUCTIONS This digital set-top has been manufactured and tested with your safety in mind. However, improper use can result in potential electric shock or fire Before you install or use the apparatus, you must read and hazards. - Page 4 SAFETY INFORMATION (cont.) In addition to the Important Safety Instructions, please read the Safety Water and moisture Information below. Do not expose your set-top to rain or moisture, dripping or splashing, and ensure that no objects filled with liquids, such as vases, are placed on Power sources your set-top.
- Page 5 SAFETY INFORMATION (cont.) Safety aspects of connections Regulatory information Full details of the rear panel are on page 6. CAUTION: Do not attempt to modify your set-top without written authorization from the manufacturer. Unauthorized modification Connecting could void your authority to operate your set-top. Do not connect your set-top (or any other equipment such as a TV or VCR) to the power supply until you have properly connected all the other cables.
-
Page 6: Rear Panel
REAR PANEL CABLE IN VIDEO OUT DIGITAL AUDIO OUT HDMI IR RECEIVE ® From cable Composite video Electrical S/PDIF Video and audio output for Infra-red input from a digital HDTV service-provider output audio output remote “eye” ETHERNET AUDIO OUT S-VIDEO CableCARD™... -
Page 7: Connecting The Equipment
CONNECTING THE EQUIPMENT Possible setups WARNINGS In order for you to view programs broadcast in high-definition, your set-top must be connected to a suitable Do not connect your set-top (or HDTV or computer monitor. Your set-top is also compatible with standard-definition TVs and VCRs. any other equipment such as a TV or VCR) to the power supply until Your equipment should have been connected up by your installer. -
Page 8: Setup A - Home Theater System With Hdtv (Hdmi Connection)
CONNECTING THE EQUIPMENT (cont.) Setup A - Home theater system with HDTV (HDMI connection) Setup A uses an HDMI connector to connect to the HDTV. This displays the highest quality picture on the HDTV and also means there will be no picture degradation on any copy-protected programs (provided the link remains secure –... -
Page 9: Setup B - Home Theater System With Hdtv (Component Video / Ypbpr Connection)
CONNECTING THE EQUIPMENT (cont.) Setup B - Home theater system with HDTV (Component video / YPbPr connection) Setup B uses a component video connection to connect to the HDTV. This displays a high definition picture on your TV. LEFT LEFT TV / RF AUDIO IN AUDIO OUT... -
Page 10: Connecting The Power Supply Unit To Your Set-Top
CONNECTING THE EQUIPMENT (cont.) WARNINGS Do not connect your set-top (or any other equipment such as a TV or VCR) to the power supply until you have properly connected all the other cables. Do not defeat the safety purpose of the polarized or grounding-type plug. A polarized plug has two blades with one wider than the other. -
Page 11: Operating Your Set-Top
OPERATING YOUR SET-TOP Displaying a picture on your HDTV screen Current output resolution from your set-top If your set-top is connected to your HDTV’s component video or HDMI input and is turned on (the POWER light is green), but your HDTV does not initially display a picture from your set-top, your HDTV may not support your set-top’s current output resolution (for further details on resolutions, see page 15). -
Page 12: Using Dvr (Digital Video Recorder) Functions
OPERATING YOUR SET-TOP (cont.) Using DVR (digital video recorder) functions Your set-top has an internal hard disk to provide DVR functions. It also has a rear-panel eSATA port to which NOTES you can connect an external hard disk (see further detail below). This increases the recording capacity of your Exact DVR functionality depends set-top. -
Page 13: Using Zoom To Change The Picture
OPERATING YOUR SET-TOP (cont.) Using Zoom to change the picture Making the appropriate TV Aspect Ratio and TV Display Capability settings (see pages 14 through 16) should ensure that the picture on your TV screen is not distorted (stretched or squashed) and that it fills as much of the screen as possible. -
Page 14: Making User Settings
MAKING USER SETTINGS About User Settings Your installer should have made the correct settings so that your set-top is compatible with your HDTV or TV. However, you may wish to change some settings, for example if you purchase a new HDTV. You can make the following settings and you can also reset them to the factory defaults. -
Page 15: About Tv Display Capability (Resolution Settings)
MAKING USER SETTINGS (cont.) About TV Display Capability (resolution settings) • Your set-top can transmit pictures to your TV in a range of resolutions (also called “Display Capabilities” NOTE - see below for the settings available). Generally, higher screen resolutions give better quality pictures. When your HDTV and set-top are However, the quality always depends on how the program was originally transmitted. -
Page 16: Setting Auto Pillarbox
MAKING USER SETTINGS (cont.) Further information about the TV Display Capability The TV Display Capability settings relate to equipment that is connected to the HDMI and COMPONENT VIDEO connectors because the settings control the output at those connectors. If equipment is connected via an HDMI cable, that equipment may also pass information back to your set-top, which may affect the settings that are available. -
Page 17: Making Closed Caption Settings
MAKING USER SETTINGS (cont.) Making Closed Caption Settings Closed captioning is a means of displaying alerts and subtitles on your TV screen, superimposed on whatever you are watching. You can turn closed captions on or off, as required, and you can also change the closed captions’... -
Page 18: Making Hdmi Settings
MAKING USER SETTINGS (cont.) Making HDMI Settings You can use the HDMI Settings menu to choose an Audio Output Mode, and to enable or disable automatic detection of a newly connected HDTV (if it is connected by an HDMI cable). If you have not done so already, put your set-top into User Settings mode, as described on page 14. -
Page 19: Restoring The Factory Default Settings
MAKING USER SETTINGS (cont.) Restoring the factory default settings If you wish, you can restore the user settings to their factory defaults. All the changes you have made will be lost NOTE and the settings will revert to those that were programmed in the factory. The factory settings are: If your set-top and HDTV are connected via a standard HDMI USER/SUBTITLE SETTINGS menu item... -
Page 20: Using The Setup Menus
USING THE SETUP MENUS In addition to the user settings described on pages 14 through 18, setup menus may be available in your on- screen guide. These should be described in the information provided by your service-provider. There may also be on-screen information to explain these menus. -
Page 21: Solving Problems
SOLVING PROBLEMS If the installed system does not seem to be working properly, first make sure that all the cables are securely connected, then carry out the following checks, in the order shown. Check Suggested solution Further checks, if there is still a problem Is anything lighted on your Press the POWER button on your remote Power may not be reaching your set-top. - Page 22 SOLVING PROBLEMS (cont.) Check Suggested solution Further checks, if there is still a problem Can you hear stereo First check that the program is likely to have If your TV is mono, you will hear stereo sound only if sound? stereo sound (an old movie, for example, may you have a stereo audio amplifier and speakers or home not be in stereo).
-
Page 23: Terms And Conditions For Use Of Software ("Terms")
TERMS AND CONDITIONS FOR USE OF SOFTWARE (“TERMS”) THE PRODUCT TO WHICH THESE TERMS RELATE (THE “PRODUCT”) INCORPORATES SOFTWARE WHICH IS OWNED BY PACE plc (“PACE”) OR ITS THIRD PARTY LICENSORS (THE “SOFTWARE”). BEFORE USING THE PRODUCT PLEASE READ THESE TERMS. IF YOU DO NOT AGREE TO THESE TERMS YOU MAY NOT USE THE PRODUCT AND SHOULD IMMEDIATELY RETURN THE PRODUCT TO YOUR SUPPLIER. - Page 24 TERMS AND CONDITIONS FOR USE OF SOFTWARE (“TERMS”) (cont.) D. Termination These Terms are effective until terminated. You may terminate these Terms by returning the Product to your supplier. These Terms will terminate automatically without notice if you fail to comply with these Terms or any other written agreement between you and Pace. Upon termination you must return the Product to your supplier. E.
Need help?
Do you have a question about the XFINITY TDC788X and is the answer not in the manual?
Questions and answers