Advertisement
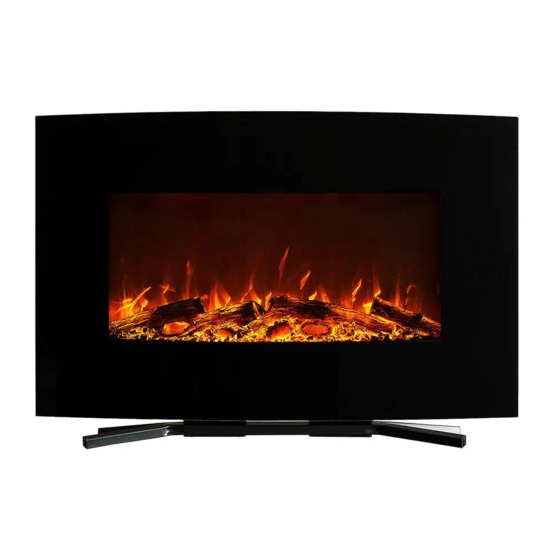
ELECTRIC CURVED PANEL FIREPLACE HEATER
OWNERS MANUAL
Model Numbers: WS-G-03-2 &WS-G-03-2-Mini
WS-G-03-2
WS-G-03-2-Mini
Only use this heater as described in this manual. Any other use is not recommended
by the manufacturer, and may cause fire, electric shock, or other personal injury.
WARNING! Read and understand this entire owner's manual, including all safety
information, before plugging in or using this product. Failure to do so could result in fire,
electric shock, serious personal injury, or death.
WARNING! INDOOR use only! NEVER use this heater outdoors!
SAVE THESE INSTRUCTIONS!
CAUTION! Keep this owner's manual for future reference.If you sell or give this product
away, make sure this manual accompanies this product.
1
Advertisement
Table of Contents

Related Manuals for HomeTech WS-G-03-2


Summary of Contents for HomeTech WS-G-03-2
- Page 1 ELECTRIC CURVED PANEL FIREPLACE HEATER OWNERS MANUAL Model Numbers: WS-G-03-2 &WS-G-03-2-Mini WS-G-03-2 WS-G-03-2-Mini Only use this heater as described in this manual. Any other use is not recommended by the manufacturer, and may cause fire, electric shock, or other personal injury.
-
Page 2: Important Safety Information
IMPORTANT SAFETY INFORMATION! WARNING 1.ALWAYS keep electric cords, home furnishings, drapes, clothing, papers, or other combustibles at least 3 feet (0.9m) away from the front of this heater, and away from the bottom, sides, and rear of this heater. 2.DO NOT place the heater near a bed because objects such as pillows or blankets can fall off the bed and be ignited by the heater. - Page 3 WARNING 1.Risk of electric shock! DO NOT OPEN! No user-serviceable parts inside! 2.ALWAYS disconnect this unit from the power supply before performing any assembly or cleaning, before replacing the light bulb, or before relocating the electric fireplace. 3.NEVER use this heater in bathrooms, laundry rooms, or any other location where the heater could fall into a bathtub or pool, become damp or come in contact with water.
-
Page 4: Parts And Hardware
D – ST4x8 Metal Screws (2) RC – Remote Control E - Wall Bracket (1) F - Decorative Glass H-ST5x10 Screws (8) I - M6x15 screws for TV G - TV bracket(2pcs) bracket(4pcs)-WS-G-03-2 K- M6x15 screws for TV J-Glass Tray(1) bracket(6pcs)-WS-G-03-2- Mini... -
Page 5: Installation And Assembly
Installation and Assembly Wall mounted installation Step 1. Find a safe location. Rear View of Fireplace Minimum clearance on each side: 19.7” Minimum 39.4” (50 cm). (100 cm) Minimum clearance below: 59.1” (150 cm). Minimum clearance above: 39.4” (100 cm). Minimum clearance from the front and sides: 3 feet (90 cm). - Page 6 screwed into the drywall anchors. D. Mark the hole locations with a pencil. The holes should be 8” (20.3 cm) apart, and level. The minimum height from the surface below must be 59.1” (150 cm). AVOID INJURY and DAMAGE! The center screw must be screwed directly into a wall stud.
- Page 7 NOTE: We recommend that two capable adult perform this procedure. STEP 5A. With the help of a capable adult, lift the fireplace and align the two hooks on the back of the fireplace with the slots on the wall bracket. Carefully set the hooks into the slots. STEP 5B.
- Page 8 Tabletop installation WS-G-03-2 4pcs M6x15(I) WS-G-03-2-Mini 6pcs M6x15(K) STEP 1.Place the bracket (G)symmetrically on the mounting holes,fix two sides with M6x15 screws(I). STEP 2.Put the fireplace on a soft surface flatly,see the drawing above,locate the bracket to the bottom mounting holes,fix the baseboard with 8pcs ST5x10 screws(H) This next step involves GLASS! ALWAYS use extreme caution when handling glass.
-
Page 9: Methods Of Operation
NOTE: We recommend that two capable adult perform this procedure. STEP 6A. With you or someone holding the glass panel, remove the two screws at the top edge of the fireplace with a Phillips (+) screwdriver. STEP 6B. Together, carefully remove the front glass panel upward and set it aside on a clean soft surface. -
Page 10: Control Panel Operation
Side View Power ON / OFF Remote control LED Indicators Sensor Signal Heat Control Power Color changing Flame Timer Control Panel Operation BUTTON FUNCTION ACTION & INDICATION ON (l). Enables all functions. 1. Press ON (l). Power turns on. All functions are enabled. -
Page 11: Troubleshooting
HEATER button: Turns heater on 1. Press once. Indicator lights up. and off. Fan blows cool air for 10 seconds. 750W NOTE: The heater only works when heater turns on and blows warm air. the flame effect is on. If the flame 2. - Page 12 TIMER button: Controls timer settings to 1. Press once. Indicator light turns on. turn off fireplace at selected time. Timer is set to 0.5 hours. Settings range from 0.5 hours to 7.5 hours. 2. Press again until desired setting is TIMER reached.
-
Page 13: Care And Maintenance
Care and Maintenance Cleaning ALWAYS turn the heater OFF and unplug the power cord from the outlet before cleaning, performing maintenance, or moving this fireplace. Failure to do so could result in electric shock, fire, or personal injury. NEVER immerse in water or spray with water. Doing so could result in electric shock, fire, or personal injury.
Need help?
Do you have a question about the WS-G-03-2 and is the answer not in the manual?
Questions and answers