Table of Contents
Advertisement
Advertisement
Table of Contents

Related Manuals for NEFF V7446X1GB


Summary of Contents for NEFF V7446X1GB
- Page 1 WASHER DRYER en Instruction Manual and Installation Instructions V7446X1GB...
- Page 2 Your new washer dryer Display rules : Warning! You have chosen a Neff washer dryer. This combination of symbol and signal Please take a few minutes to read and word indicates a possibly dangerous become familiar with the advantages of situation.
-
Page 3: Table Of Contents
Contents e n I n s t r u c t i o n M a n u a l a n d I n s t a l l a t i o n I n s t r u c t i o n s Intended use. -
Page 4: Intended Use
Intended use Customer service ... 35 Intended use Technical specifications ..35 For private domestic use only. ■ I n t e n d e d u s e The washer dryer is suitable for ■... -
Page 5: Safety Instructions
Safety instructions Warning Safety instructions Risk of scalding! When washing at high Electrical safety ■ temperatures, you may be S a f e t y i n s t r u c t i o n s scalded if you touch the hot Warning washing water (e.g. -
Page 6: Protection Of The Environment
Protection of the environment Warning Protection of the Risk of choking! environment Children may become wrapped in packaging/film or packing parts if Packaging/old appliance allowed to play with them, or they P r o t e c t i o n o f t h e e n v i r o n m e n t may pull them over their heads and suffocate. -
Page 7: The Main Points In Brief
The main points in brief The main points in brief T h e m a i n p o i n t s i n b r i e f Plug into the mains. Open the washer Select the washing/ Max. -
Page 8: Getting To Know Your Appliance
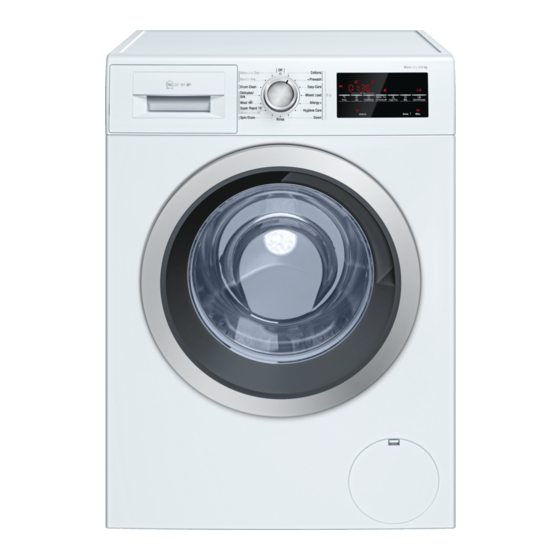
Getting to know your appliance Getting to know your appliance Washer dryer G e t t i n g t o k n o w y o u r a p p l i a n c e 9S Open the door Detergent drawer 9T Close the door Operating/display panel... -
Page 9: Control Panel
Getting to know your appliance Control panel Change the default settings for the 8 Display panel for information. selected programme and select ~ Page 10 additional functions: @ Start programme. Select the A Start/Reload button to start, ( Select a programme. Can be interrupt (e.g. -
Page 10: Display Panel
Getting to know your appliance Display panel Displays for the programme ( Temperature for washing Ž (cold) – 90° Temperature in °C programme 0 Programme information 1:50* Programme duration after programme selection in h:min (hours:minutes) Finish in time in h (h=hour) 1 –... - Page 11 Getting to know your appliance @ Programme information and E lights up On if childproof lock has been activated ~ Page 17 additional function symbols E flashes The childproof lock is actived, and if the pro- gramme selector has been adjusted or the buttons have been pressed Õ...
-
Page 12: Laundry
Laundry An especially gentle washing Laundry process is required; e.g. Delicates/Silk programme P reparing laundry for washing Suitable for washing by hand; L a u n d r y e.g. W Wool program Sorting laundry according to: Do not machine wash. Ž... -
Page 13: Preparing Laundry For Drying
Laundry Trousers, knitwear and knitted Before drying, spin at the optimum ■ ■ textiles, e.g. jersey garments, T-shirts speed. A spin speed of more than or sweatshirts, should be turned 1000 rpm is recommended for inside out. cotton, more than 800 rpm for easy- Ensure that underwired bras are care textiles. -
Page 14: Operating The Appliance
Operating the appliance Selecting the programme/ Operating the Switching on the appliance appliance Note: Preparing the washer dryer If you have activated the childproof lock, O p e r a t i n g t h e a p p l i a n c e you must deactivate it before you can The washer dryer was tested before set a programme. -
Page 15: Adjusting The Drying Programme
Operating the appliance The buttons are sensitive, they only Adjusting the drying ■ need to be touched gently. If the programme button °C Temp., 0 rpm, ñ Finished in is held down, the Note: setting options are automatically If an individual drying programme or scrolled through. -
Page 16: Dosing And Adding Detergent And Care Product
Operating the appliance Observe the indicated maximum the manufacturer’s specifications on ■ ■ load. Overfilling adversely affects the packaging, the washing result and promotes the amount of laundry, ■ creasing. soiling. ■ Unfold presorted laundry items and Filling the dispensers place in the drum. -
Page 17: Starting The Programme
Operating the appliance If an individual drying programme is programme progress symbols when the ■ selected, please do not add washing programme has started. detergent and/or care product in the Display panel~ Page 10 appliance. Childproof lock Measuring aid* for liquid detergent *depending on the model You can secure the washer dryer to prevent the set functions from being... -
Page 18: Changing The Programme
Operating the appliance Touch button Š Dry and set drying Notes time to 15 minutes. If there is a high water level, high ■ Select A Start/Reload. temperature or if the drum is rotating, the door remains locked for safety reasons and reloading is End of the programme not possible. -
Page 19: After Washing/Drying
Operating the appliance After washing/drying Open the door and remove the laundry. Turn the programme selector to Û Off. The appliance is switched off. Turn off the tap. Not required for Aqua-Stop models. Disconnect the mains plug. Notes Do not leave any items of laundry in ■... -
Page 20: Overview Of Programmes
Overview of programmes Overview of programmes Programme on the programme O v e r v i e w o f p r o g r a m m e s selector Programme/Type of washing Options/Information Name of the programme maximum load according to EN50229 Brief explanation of the programme and which textiles it is suitable for. - Page 21 Overview of programmes Programme/Type of washing Options/Information Allergy+ max. 6.5 (5)* kg/4 kg Hardwearing textiles made of cotton or linen. Ž (cold) – 60 °C Notes – – – –, 0 – 1500 rpm Especially suitable for increased hygienic demands or particu- ■...
- Page 22 Overview of programmes Programme/Type of washing Options/Information : Wool max. 2 kg Hand and machine-washable fabrics made of wool or wool blend; Ž (cold) – 40 °C particularly gentle wash programme to prevent shrinkage of laun- – – – –, 0 – 800 rpm dry, with longer programme breaks (soaking garments in the deter- gent solution).
-
Page 23: Drying Table
Overview of programmes Drying table Estimated drying time (min) Load type Recommended Drying load Cupboard dry » Extra dry · drying programme (kg) Cottons/coloureds (color fast tex- Intensive dry 0.5 - 2.0 40 - 90 60 - 100 tiles made of cotton or linen such 2.0 - 3.5 90 - 160 100 - 180... -
Page 24: Starching
Changing programme default settings Starching Changing programme default settings The laundry should not be Note: treated with fabric softener. You can change the default settings for Liquid starch can be used in all wash C h a n g i n g p r o g r a m m e d e f a u l t s e t t i n g s selected programmes. -
Page 25: Ñ Finished In
Changing programme default settings ñ Finished in Š Dry 8 Define the Finish in time (end @ The drying function can be of programme). activated, deactivated and set with this button. Washing and drying without The respective programme Note: interruption is possible in automatic duration is displayed by selecting mode only. -
Page 26: Selecting Additional
Selecting additional functions Selecting additional functions You can select your desired additional S e l e c t i n g a d d i t i o n a l f u n c t i o n s functions by touching the respective buttons. -
Page 27: Setting The Signal
Setting the signal Setting the signal S e t t i n g t h e s i g n a l Setting signal volume Activate setting mode for signal volume. Turn to Û Off 1 step clockwise Press 1 step clockwise Release hold and a) Set volume for button signals. -
Page 28: Cleaning And Maintenance
Cleaning and maintenance Descaling Cleaning and Not required if detergent dosed maintenance correctly. However, if this does occur, follow the instructions of the descaling Warning agent manufacturer. Suitable descalers C l e a n i n g a n d m a i n t e n a n c e Risk of electric shock! can be purchased on our website or Danger of death if live parts are... -
Page 29: Drainage Hose On The Siphon Blocked
Cleaning and maintenance Turn off the tap so that no more water can flow in and has to be drained via the drain pump. Switch off the appliance. Pull out the mains plug. Open and remove the service flap. To prevent unused detergent Note: from flowing into the outlet during the next wash: Pour 1 litre of water into... -
Page 30: Filter In The Water Inlet Hose Blocked
Cleaning and maintenance Filter in the water inlet hose blocked Warning Danger of death! Do not immerse the Aqua-Stop safety device in water (it contains an electric valve). First, reduce the water pressure in the supply hose: Turn off the tap. Select any programme (except Spin /Drain). -
Page 31: Faults And What To Do About
Faults and what to do about them Wait until the drum has stopped turning. Faults and what to do Caution! about them Water damage Any escaping water may cause water Emergency release, e.g. if a damage. F a u l t s a n d w h a t t o d o a b o u t t h e m power failure occurs Do not open the washer dryer door if water can be seen through the glass. -
Page 32: Faults And What To Do About Them
Faults and what to do about them Information Cause/Remedy E:18 Drain pump blocked; clean the drain pump. Clean the drainage hose on the siphon. E:32 Alternating display with End when programme is finished: unbalance problem, spinning phase is aborted. Alternating display with End when programme is finished: no water detected in E:95 drying phase, may get bad drying result. - Page 33 Faults and what to do about them Faults Cause/Remedy Compartment M is not Remove the insert. Clean the detergent drawer and reinsert it. rinsed out completely. Odour formation in the Run the Drum Clean 90°C programme without laundry and detergent. ■...
- Page 34 Faults and what to do about them Faults Cause/Remedy The drying result is not Excessively high ambient temperature (above 30 °C) or inadequate venti- ■ satisfactory (laundry is lation in the room in which the washer dryer is situated. not dry enough). The laundry has not been spun well enough before drying.
-
Page 35: Customer Service
Customer service Customer service Technical specifications If you cannot correct the fault yourself, C u s t o m e r s e r v i c e see section, Faults and what to do Dimensions: about them ~ Page 32 T e c h n i c a l s p e c i f i c a t i o n s 850 x 600 x 590 mm Please contact our customer service. -
Page 36: Consumption Values
Consumption values Consumption values C o n s u m p t i o n v a l u e s Programme Option Load Energy Water Programme (kg) consumption *** Consumption *** duration *** (kWh) (liter) (hours) Cottons 20 °C* 0,30 Cottons 40 °C* 1,06... -
Page 37: Positioning And Connecting
Positioning and connecting 0 Bag: Positioning and Installation and operating ■ connecting instructions Customer services location ■ Included with the appliance directory* P o s i t i o n i n g a n d c o n n e c t i n g Warranty* ■... -
Page 38: Installation Surface
Positioning and connecting If the hose and mains cables are not Holding brackets: order no. ■ routed properly, there is a risk of WMZ 2200, WX 975600, CZ 110600, tripping and injury. Z 7080X0. Lay hoses and cables in such a way If installing on a wooden joist Note: that there is no risk of tripping. -
Page 39: Hose And Cable Lengths
Positioning and connecting Keep the screws and sleeves in Hose and cable lengths Note: a safe place. Connection on left side Take the hoses out of the holders. Connection on right side Unscrew and remove all four transport brace screws. Remove the sleeves. -
Page 40: Water Inlet
Positioning and connecting Water inlet Connection Connect the water supply hose to the Warning tap (26.4 mm = ¾") and to the Danger of death! appliance (not necessary for Aqua-Stop There is a risk of electric shock if you models as this is permanently installed): touch live components. -
Page 41: Water Outlet
Positioning and connecting Water outlet Connection Drainage into a washbasin Warning ■ Risk of scalding! When you are washing at high temperatures, there is a risk of scalding if you come into contact with hot water (e.g. when draining hot water into a washbasin). -
Page 42: Alignment
Positioning and connecting Alignment Electrical connection Loosen the lock nut in a clockwise Electrical safety direction with a wrench. Check the alignment of the washer Warning dryer with a spirit level and, if Risk of electric shock! required, correct. Adjust the height Danger of death if live parts are by rotating the appliance foot. -
Page 43: Before Washing/Drying For The First Time
Positioning and connecting Before washing/drying for the Transportation first time Preparatory work Turn off the tap. The washer dryer was inspected Release the water pressure in the thoroughly before leaving the factory. To supply hose. remove any residual test water, run the Filter in the water inlet hose blocked Drum Clean programme the first time ~ Page 30... - Page 44 Repair order and advice in the event of faults 0344 892 8989 Calls charged at local or mobile rate. 01450 2655 0.03 € per minute at peak. Off peak 0.0088 € per minute. You can find the contact information for all countries in the attached after-sales service directory: *9001062633*...
Need help?
Do you have a question about the V7446X1GB and is the answer not in the manual?
Questions and answers