Table of Contents
Advertisement
Advertisement
Table of Contents

Related Manuals for Eurolux PVVTC4

Summary of Contents for Eurolux PVVTC4
- Page 2 Do not hesitate to contact us in case of necessity. We always will be close to you in order to assist you in need and give you useful information for all products under Eurolux brand.
-
Page 3: Table Of Contents
CONTENTS: ............DESCRIPTION OF THE HOB SAFETY INSTRUCTIONS ............................. INSTALLATON ............Locating Your Built-in Hob ..........Electrical Connection of Your Hob USAGE ............................Turn On and Turn Off The Control Select Heater ................. Turn on dual- and triple zones ............. -
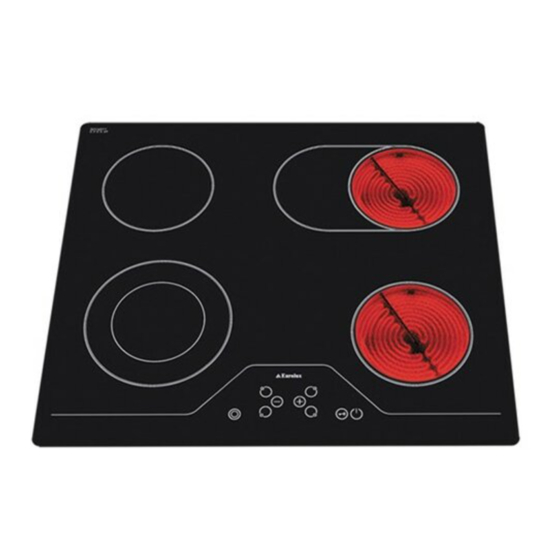
Page 4: Description Of The Hob
DESCRIPTION OF THE HOB Dear Customer, It is important that you should read this manual for best performance and to extend the life of your appliance. We recommend you to keep this manual for future reference. Your new hob is guaranteed and will give lasting service. This guarantee is only applicable if the appliance has been installed and operated in accordance with the operating and installation instructions detailed in this manual. -
Page 5: Safety Instructions
SAFETY INSTRUCTIONS Please comply with these instructions. If you do not, any damage resulting from improper, incorrect or negligent use or improper connection or installation is not covered by the warranty. · This appliance should be used only for normal domestic use. ·... - Page 6 · Never leave the the appliance hob unattended when cooking with fat or . They can rapidly catch fire if overheated. · Do not cut any food on the glass of the vitroceramic hob. Glass panels should not be used as working surfaces. ·...
-
Page 7: Installaton
INSTALLATION The electrical connection of this hob should be carried out by an authorised service personal or a qualified electrician, according to the instructions in this guide and in compliance with the current regulations. · Prior to installation, ensure that the local distribution conditions and the adjustment of the appliance are compatible. - Page 8 · Create an opening with the dimensions shown in the picture below. · Apply the one-sided self-adhesive sealing tape supplied all the way round the lower edge of the cooking surface along the outer edge of the glass ceramic panel. Do not stretch it.
-
Page 9: Electrical Connection Of Your Hob
Electrical connection of your hob . Before proceeding with the electrical connection, verify that the current carrying capacity of the system and the socket is adequate for the maximum power rating of the hob. · Electrical installation of the residence and the electrical current plug in use must be earthed and conform with safety regulations. - Page 10 * This appliance must be earthed. * For this connetion a power lead of wire type H05V V -F should be used. . For the touch controlled vitroceramic hob, the cable must be H05VV-F 3X2,5 mm² / 60227 IEC 53. You will find the connection diagram shown on the back of your appliance.
-
Page 11: Usage
USAGE The appliance is operated by touching buttons and the functions are confirmed by displays and acoustic signals. The mains are applied to the hob control Stand-By-Mode S-Mode and all heater displays are off or a residual heat display is active. At least one heater display shows a heat Operating-Mode B-Mode... -
Page 12: Turn On And Turn Off The Control
Turn On and Turn Off The Appliance If the appliance is in Stand-By-Mode, it is put in Operating-Mode by pressing the On/Off button at least 1 second. A buzzer signal indicates the successful operation acoustically. On all heaters a ´0` appears and all Decimal Point of the heater flashes (1 sec on, 1 sec off). -
Page 13: Turn On Dual- And Triple Zones
Turn on dual and triple zones (available only in some models) Turn on the dual zone The activation of the dual zone is done after selecting the desired heater by actuating . This is confirmed by a buzzer signal. At the same time, the corresponding Dual Zone Indicator goes on statically. -
Page 14: Turn Off Individual Heaters
The heat boost can be turned off by pressing until heat setting ´0` appears. If the heat boost should be used, it can always be activated by actuating again if the heat setting is set to level 9. In the heat display ´A/9` flashes. Turn Off Individual Heaters A selective heater can be turned off with 3 different ways: . -
Page 15: Timer Function
Use of timer turn off function for corresponding heater (available only in some models) After reaching a remaining time of 0 minutes, the timer stops the linked heater, showing the ´0` shown in the Heater Display and shuts down Timer Display. - Page 16 Minute Minder No matter whether a heater is activated or not, the minute minder can be operated by touching . The appearing ´00` shows that timer is active and the dot in the right Timer Display indicates that are now linked for setting the timer value.
-
Page 17: Key Lock
10 sec after the last operation, the timer display changes to the timer that will run out next. The assignment of that timer is displayed always by a flashing Cooking Zone Indicator. How many timer are running you can identify by the number of Cooking Zone Indicator that are statically on. -
Page 18: Child Lock
If the heater is locked, only can be operated, all other buttons are blocked. If there is any other button operated in the blocked mode, the buzzer signal sounds and the Key Lock Indicator flashes as indication for the activated key lock functionality. -
Page 19: Stop & Go Function
The same way the child lock is activated, it can also get deactivated. After pressing until the beep, then the have to be pressed simultaneously for at least 0,5 sec, followed by touching only the . As a confirmation for successful unlocking, ´L` symbol in the displays will be erased immediately. - Page 20 If the timer is used as minute minder, the time will continue during Stop & Go function. If the timer is used with the turn off functionality of an assigned heater, then the timer stops decrementing the time during Stop & Go operation. After deactivating the Stop &...
-
Page 21: Touch Control Safety Functions
TOUCH CONTROL SAFETY FUNCTIONS The following safety functions are available to avoid unintended operations of the hob control. Sensor Safety Cut Off To prevent the appliance from unwanted, random sensor operation, a sensor monitoring is included. In case of one or more buttons are pressed longer than 12 sec, the sensor monitoring routine indicates acoustically that wrong operation (pot or other object placed on the button, sensor failure, etc.) and switches off the appliance. -
Page 22: Over Temperature Switch Off
Over Temperature Switch Off Due to the placement of the control is very close to the heater in the middle front of the hob, it can occur that a not correctly placed pot half on the control and not sensed by the sensor safety cut off (not covering a button) heats up the hob to a very high temperature, which makes the glass and the buttons untouchable without get burned the finger. -
Page 23: Residual Heat Functions
Residual Heat Functions After all cooking processes there is some heat stored in the vitroceramic glass called residual heat. The control can calculate roughly how hot the glass is in the worst case. If the calculated temperature is higher than + 60 °... -
Page 24: Cleaning And Care
CLEANING AND CARE Cookware with rough bottoms should not be used since these can scratch the glass ceramic surface. The bottom of the good cookwares should be as thick and flat as possible. Before use, make sure that cookware bottoms are clean and dry. - Page 25 The symbol on the product or on its packaging indicates that this product may not be treated as household waste. Instead it shall be handed over to the applicable collection point for the recycling of electrical and electronic equipment. By ensuring this product is disposed of correctly, you will help prevent potential negative consequences for the environment and human health, which could otherwise be caused by inappropriate waste handling of this...
Need help?
Do you have a question about the PVVTC4 and is the answer not in the manual?
Questions and answers