Cavalry CAND series User Manual
Hide thumbs
Also See for CAND series:
- User manual (44 pages) ,
- Installation manual (12 pages) ,
- User manual (44 pages)
Table of Contents
Advertisement
Quick Links
Advertisement
Table of Contents

Related Manuals for Cavalry CAND series


Summary of Contents for Cavalry CAND series
- Page 1 User's Manual CAND Series...
- Page 2 Dear Valued Customer: Thank you for choosing Cavalry Storage. We at Cavalry extend our sincere gratitude for your purchase of this product. We hope our dedication to delivering high quality products with excellent customer service will ensure your continued interest in our products.
-
Page 3: Table Of Contents
Table of Contents Preface………………………………………………………………………….. Conventions & Safety Instructions…………………………………………….. Accessories List………………………………………………………………… Features………………………………………………………………………… Product Illustrations……………………………………………………………. Quick Start Guide……………………………………………………………… Web-based GUI………………………………………………………………… Accessing Instructions………………………………………………... DiskTools Tab………………………………………………………… RAID Setting.……………………………………………….. Basic Mode………………………………………………….. Disk Usage…………………………………………………... System Tab……..…………………………………………………….. Information…….……………………………………………. LAN Settings………………………………………………… Time Settings……...…………………………………………. Save Configuration……..…………………………………… Restore Configuration..……………………………………… Firmware Upgrade…………………………………………... Install Software………………………………………………... -
Page 4: Preface
Disassembling or opening this product will void your warranty. Disclaimer Cavalry is not liable for compensation for data loss which may result from a malfunction of the product or from changes due to improper use, repairs, defects, or battery change. Please back up your data to avoid unexpected losses. -
Page 5: Conventions & Safety Instructions
Conventions & Safety Instructions CAUTON This symbol is to remind the user to pay attention and read carefully. Failure to do so could result in data loss. Note This symbol is used to provide the user with useful information. Please read through this entire manual and save for future reference. Place the NAS in a secure location free from the possibility of being bumped and/or dropped. -
Page 6: Accessories List
Accessories List 1. Ethernet cable 2. Power adapter / power cord (images may vary with product) 3. Resources CD Features Network Attached Storage (NAS) Supports 10/100/100 Mbps LAN Speed Printer server capability with USB 2.0 Supports RAID 0 & 1, Spanning, and JBOD RAID 1 preconfigured Supports FTP/SMB server Supports UPnP Protocol... -
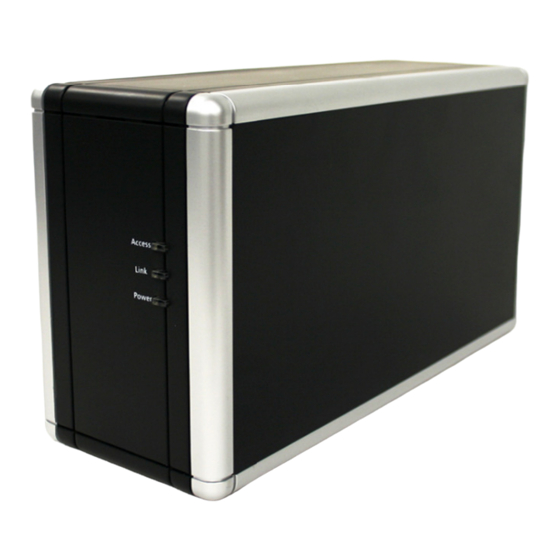
Page 7: Product Illustrations
Product Illustrations Package Contents... - Page 8 Front Rear...
-
Page 9: Quick Start Guide
Quick Start Guide Note: For optimal security and convenience, we recommend designating a single computer to handle all NAS configurations. Items in BOLD are included in your package contents. Connect your power adapter to the NAS. Then plug the adapter into an electrical outlet. - Page 10 Double-click “Microsoft Windows Network” >> “Workgroup” >> “Storage (Giganas)” Right-click “public” and select “Map Network Drive…” Specify the drive letter that you want for your NAS and then click “Finish”. Your NAS will now show up under “My Computer” in the “Network Drives” section.
- Page 11 On your Vista desktop, click “Start” and “Network”. The “Network” window will pop-up showing your current network locations. Vista will display your networks hard drives in the window. Find your NAS which should be named “Nas” or “Giganas” and double-click.
- Page 12 A smaller window will pop-up and ask for authentication for access to the CAND. Enter username: “admin” and password: “admin”. The NAS’ window will show. Double-click on the “public” folder.
- Page 13 Click on the top address bar in the area as shown below and highlight the path to your NAS. With the path to your NAS still highlighted, right-click anywhere on the blue highlighted area. Select “Copy”. Double-click the “Computer” icon on the desktop or click “Start” and the “Computer”...
- Page 14 Click on the top menu, “Map network drive” to start the Map network drive wizard.
- Page 15 Select the drive letter you wish the mapped network drive to have. Press the down-arrow next to “Drive:” as shown. The pull-down menu will show the available drive letters to choose from. In this example, “N:” was chosen. Right-click inside the “Folder” textbox. A pop-up menu should appear. Left- click “Paste”...
- Page 16 You should be able to see the drive normally. You can access it by accessing the “Computer” icon. Mac OS X 10.4/10.5 Users While on your Mac OS X desktop, go to the top menu “Go” and select “Network”. The NAS is preset to show up in a workgroup called “Workgroup”. Double- click “Workgroup”.
- Page 17 Double-click on the name of the drive that represents your NAS (normally Giganas or NAS). A small window will pop up giving you an option of which folder you would like to connect to on the NAS. Click on the “double up-down arrow” icon to open the pull-down menu.
- Page 18 Select “public” and click “OK”. Click “OK”.
- Page 19 Enter the name: “admin” and password: “admin”. Click “OK”. Now you can click on the “Public” icon on the left to access your NAS or you can click on the “Public” icon on your desktop.
- Page 20 To setup the NAS to be accessible on other computers in your home network, simply repeats step 3 for each additional computer. You are now ready to transfer files to and from your NAS!
-
Page 21: Web-Based Gui
Web-based GUI Accessing Instructions Insert the Resources CD. Start the setup utility by double-clicking the “SetupUtil.exe” file under the folder: “Contents/CAND/”. Click “Run Setup Utility”. Press the “Setup” button. Keep a record of the “IP Address” for later use. - Page 22 Open your web browser and type the IP address from 5.) as the website address and press “Enter” on your keyboard. This will bring you to a login screen for the web-based GUI. Input the username: “admin” and password: “admin”. Click “Login”. You have now accessed your NAS’...
-
Page 23: Disktools Tab
RAID Setting Use this section to change the configuration of your NAS to RAID 0, RAID 1 or JBOD. Your unit is preconfigured to RAID 1. Cavalry recommends using RAID 1 (mirrored) as it protects your data by automatically backing up the contents of one drive onto the second drive. Unfortunately, RAID 1 only allows for a maximum storing capacity equal to a single drive. -
Page 24: Disk Usage
Disk Utility – To save power and reduce heat, you can set your hard drives spin down when the NAS has not been used for a user-defined period of time. Disk Usage This section shows details regarding your NAS’ disk usage. Choose between a summary of the information or a breakdown by Users. -
Page 25: System Tab
System Tab Information Use this section to review important system information. LAN Settings Use this section to change your LAN settings. We recommend selecting “Obtain IP Address automatically” and “Obtain DNS Server Address automatically”. If you are unsure which settings to use, please contact your network administrator. Changing Settings 1.) Input Hostname. -
Page 26: Save Configuration
1.) Select an NTP Server. 2.) Press “Update Time”. You will need to enter a valid NTP Server or select one from the dropdown list. If the default address does not work, you will need to find a valid NTP Server. If you cannot find one, disable this feature by selecting “Default”... -
Page 27: Install Software
2.) Check http://www.cavalrystorage.com/su_download.htm to see if a firmware update is available. If available, proceed to 3.), if not, you do not need to upgrade at this time. 3.) Download the new firmware and store the file to your computer. 4.) Press “Browse” and select the firmware upgrade file saved in 3.). The upgrade process will take approximately 20-30 minutes. - Page 28 Install Sysbas (Media Server) 1.) Insert your Resources CD. 2.) Click “Browse”. 3.) Go to your CD Drive >> NAS Software >> Sybas DLNA software >> syabas-1.11.bz2 4.) Click “Install” and press “OK” to confirm. 5.) Check the “Server” tab to make sure the software has successfully installed.
-
Page 29: Email Notification
Email Notification Use this to have notification emails sent to a user-defined email address in case of NAS malfunction/warnings. 1.) Enter the required fields. 2.) Click “Save”. 3.) Click “Send Test Email” to verify the service works. Notifications Password changes; Successful firmware updates; HDD failure, HDDs are over 90% used To send notification emails, you must know the address to the SMTP server you intend to use. -
Page 30: Account Tab
Account Tab User Management Use this to create user accounts and define new user access permissions to NAS. admin – This is an administrator account. guest-share – This is a built-in user. When someone uses a nonregistered user name to login, the NAS will recognize the user as a guest and will only allow limited access. A guest does not belong to any user group. -
Page 31: Share Management
1.) Select a user from the “Existing Users” list. 2.) Click “Delete User” and click “OK” to confirm. Share Management Use this to create shared folders and assign access permissions. Create Shared Folder 1.) Click “Add Share”. 2.) Enter name of shared folder next to “Share Name”. Enter description for the share (optional). -
Page 32: Group Management
5.) Enter IP addresses which you would like to have access to your server. 6.) Click “Confirm”. Assigning users and groups Users and groups must first be created to assign permissions to shares. Please see how to create new users on page 30 and groups on page 32 (bottom). Grant access to all Selecting this will give access to all users without the need for a password or a set IP address. - Page 33 4.) Assign shares to the group. Click “Confirm”. Modifying Group Members 1.) Select a group under “Existing Groups”. 2.) Click “Setting”. 3.) Select which users to set as members or non-members. Click “Save”. Delete Groups 1.) Select a group under “Existing Groups”. 2.) Click “Delete Group”.
-
Page 34: Server Tab
Server Tab File Server Use this to configure all settings related to the DHCP, FTP, and NFS printer server settings. Windows Setting – In this section you can manage the workgroup that the NAS belongs to and modify its description. The IP for the WINS Server can be left blank unless required by your network. -
Page 35: Bonjour
2.) The printer should be detected under “Printer Server”. Press “Save”. 3.) Install the printer driver onto any computer performing a print job with the printer detected in 2.). The driver should be included with your printer. Please contact your printer’s manufacturer if you do not have the driver. - Page 36 Check the box next to “Enable” and “iTunes Enable”. Store your music files in the music folder of your NAS. The folder has already been created in /public/music. Start iTunes and the NAS will appear as a shared device.
-
Page 38: Backup Tab
Backup Tab Backup Scheduling Setup remote backup to duplicate files from your NAS to another identical NAS system. The files are encrypted and compressed before the duplicate process in order to secure the data as well as reduce the time of data transfer. Create a backup task 1.) Enter the IP address for another NAS system. -
Page 39: Scheduling Task
Task Limit A limit of 5 backup tasks can be created at a time. Scheduling Task This page shows the queue of backup tasks. -
Page 40: Logfiles Tab
LogFiles Tab Review all log files of the NAS. Logs can be found for the SAMBA, FTP, and DHCP Serve, also, system and administration logs. Logout Tab Logging Out 1.) Click the “Logout” tab.” 2.) Click “OK” to confirm. -
Page 41: Troubleshooting
Troubleshooting Why can’t I access the NAS setup page? Please connect the NAS directly to your computer via the RJ45 port. Open your web browser and key in the default IP address 192.168.1.1 Then type “admin” for both Account Name and Password to enter the NAS setup page. Why can’t I perform RAID functions under the FAT32 format? FAT32 format doesn’t support RAID functions, to perform RAID functions please use the ext2 or ext3 formats. - Page 42 c.) Open Internet Explorer or FTP software, and enter the NAS IP address in the address field (ftp://NAS IP). Why can’t the FTP link to the NAS or show link time out when using IE? Due to IE FTP incompatibility with the router, we suggest users use FTP software to start with.
-
Page 43: Contact
Contact Please feel free to email us with any comments or questions regarding this product. We welcome feedback from our customers. Email: customersupport@cavalrystorage.com Website: www.cavalrystorage.com...
Need help?
Do you have a question about the CAND series and is the answer not in the manual?
Questions and answers