Table of Contents
Advertisement
Quick Links
Advertisement
Table of Contents

Related Manuals for Pioneer dvh-885avbt


Summary of Contents for Pioneer dvh-885avbt
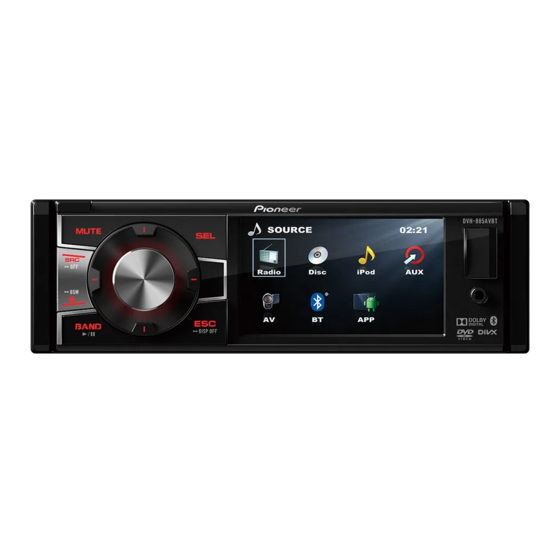
- Page 1 Owner's Manual DVD AV RECEIVER DVH-885AVBT...
-
Page 2: Table Of Contents
Contents Thank you for purchasing this PIONEER product. To ensure proper use, please read through this manual before using this product. It is especially important that you read and observe WARNINGs and CAUTIONs in this manual. Please keep the manual in a safe and accessible place for future reference. -
Page 3: Precautions
Section Precautions IMPORTANT SAFEGUARDS WARNING Please read all of these instructions Do not attempt to install or service regarding your display and retain them for your display by yourself. Installation future reference. or servicing of the display by persons Read this manual fully and carefully without training and experience in before operating your display. -
Page 4: To Avoid Battery Exhaustion
Section Precautions To avoid battery exhaustion This equipment complies with FCC radiation exposure limits set forth for an Keep the vehicle engine running when uncontrolled environment and meets using this unit to avoid draining the battery the FCC radio frequency (RF) Exposure power. -
Page 5: Before You Start
In case of trouble Should this product fail to operate properly, please contact your dealer or nearest authorized Pioneer Service Station. Resetting the microprocessor The microprocessor must be reset in the following situations: • Before using this unit for the first time after installation •... -
Page 6: Operating This Unit
Section Operating this unit Press the [ ] button to flip down the front panel. Part Operation Part Operation • Power off (2 sec.) • Panel open • Select playing mode: • Radio • Mute on/off • Disc (when disc inserted) •... - Page 7 CAUTION • Search the next station automatically (press more • Use an optional Pioneer USB cable (CD-U50E) to connect the USB audio player/USB memory than 2 seconds) (in Radio as any device connected directly to the unit mode). will protrude out from the unit and may be •...
- Page 8 Section Operating this unit • Repeat A-B • Fast forward • Press to pause or resume playback. • Switch the HFP voice between unit and HFP device. • Next track/chapter. • Seek station by step. • Seek the next available SEEK + station.
-
Page 9: Basic Operations
Section Operating this unit Basic operations Important • H a n d l e g e n t l y w h e n r e m o v i n g o r attaching the front panel. • Avoid subjecting the front panel to excessive shock. -
Page 10: Use And Care Of The Remote Control
Section Operating this unit Use and care of the remote Important • Do not store the remote control in high control temperatures or direct sunlight. • The remote control may not function Using the remote control properly in direct sunlight. Point the remote control in the direction of •... -
Page 11: Radio
Section Operating this unit Radio select a preset number, then press [M.C.] button to store it. Radio menu You may also do the operation by the remote control as following step: Press and hold a number button (1-6) on the remote control, the current station will Radio be stored in the memory. -
Page 12: Usb Playback
Section Operating this unit USB playback Selecting a folder 1 Press [ ] (Up) / [ ] (Down) or [ ] / [ Playing files on a USB storage button to select a folder (if there are device folders in the storage), press [M.C.] or 1 Open the USB port cover. -
Page 13: Playing Photo Files
Disconnect USB storage devices from the unit when not in use. • It will take several minutes when playing external storage devices that contain a mixture of various media file types. • Use an optional Pioneer USB cable (CD-U50E) to connect the USB audio player/USB memory... -
Page 14: Disc Playback
Section Operating this unit Disc playback To resume normal play, repeat the operation. Insert a disc Stop playback entirely 1 Press (page 6, ) button to flip down the 1 During playback, press [ BSM] panel. button once to stop the playback and 2 Insert a disc into the disc loading slot the relevant location on the disc is (page 6,... -
Page 15: Goto
Section Operating this unit GOTO button on the remote control or digit number to select, press [M.C.] or [ENTER] button to Goto desired title/chapter or time point play. directly of video. 1 Press [ G ] (GOTO) button on the remote DVD angle select control, search menu display on top of the screen. -
Page 16: Bluetooth Operation
[ESC] menu. again to return the BT main menu. 4 Search for new Bluetooth devices. 5 Select DVH-885AVBT from the pairing Notes list on the mobile phone, and paired • The display information only includes;... -
Page 17: Transfer The Call
Section Operating this unit Transfer the call processed as a steady and continuous stream. Users can stream music from their Press [ BAND] button on the front external audio player to their car stereo panel or [ ] button on the remote wirelessly and listen to the tracks through control to switch the HFP voice between the car’s speakers. -
Page 18: App Operation
The device is connected to this unit via Bluetooth. • Compatibility with all Android devices is not guaranteed. Notes • Pioneer is not liable for any issues that may POWERFUL arise from incorrect or flawed app-based content. • The content and functionality of the supported applications are the responsibility of the App providers. -
Page 19: Ipod/Iphone Playback
Section Operating this unit iPod/iPhone Playback Fast forward/backward Connect an optional iPod or iPhone to the Press the [ ] (Left) / [ ] (Right) button unit by iPod/iPhone cable. Connect the USB on the front panel for more than 2 seconds port to the USB connector on the front of to fast backward or forward track during the panel. -
Page 20: System Setup
Section Operating this unit System setup ® DivX Deactivation: ® Display the DivX activation information. In all mode, press and hold [SEL] to enter ® In order to play DivX VOD (video on system setting menu. demand) contents on this unit, the unit The unit could not enter the setting menu ®... -
Page 21: Language
Section Operating this unit Aspect Ratio: SubWoofer: 4:3: For 4:3 TV picture. Selecting 80Hz, 120Hz or 160Hz to activate 16:9: For 16:9 wide screen TV. subwoofer-out. Selecting subwoofer off to activate rear line- Note out. There is no 16:9 specification for VCD; for VCD the video output only in 4:3 format;... -
Page 22: Audio Setting
Section Operating this unit Audio Setting Other Function Using an AUX source Audio Setting A separately sold auxiliary device such as a VCR or portable device can be connected POWERFUL to this unit. When connecting auxiliary device using the front AUX input. •... -
Page 23: Installation
INJURY OR DAMAGE. falls out, it could result in fire, generation of smoke or malfunction. CAUTION • PIONEER does not recommend that POWER AMP Ground wire you install or service your display unit yourself. Installing or servicing the product may expose you to risk of electric shock or other hazards. - Page 24 Section Installation • To prevent a short-circuit, overheating or malfunction, be sure to follow the directions below. — Disconnect the negative terminal of the battery before installation. — Secure the wiring with cable clamps or adhesive tape. Wrap adhesive tape around wiring that comes into contact with metal parts to protect the wiring.
-
Page 25: Wiring Diagram
Section Installation Wiring diagram VIDEO OUT (To Monitor with NTSC system) VIDEO IN (AV) (This output, Volume display and Mute display does not appear.) AUDIO IN L (AV) Rear L / Subwoofer out Rear R / Subwoofer out AUDIO IN R (AV) (Steering Wheel Control) BT ANT Fuse 10A... -
Page 26: Installation
Section Installation Installation As the reverse driving is done, the playing source switches to the previous. Before installing this unit Parking Brake 1 Disconnect battery 1 If "PARKING SW" cable is connected to Before you begin, always disconnect the hand brake switch, video display on the battery negative terminal. -
Page 27: Kit Installation
Section Installation 4 Place the unit in front of the dashboard 6 Secure the rear of the unit to the car opening so the wiring can be brought body using the mounting bolt and rubber through the mounting sleeve. Follow cushion. -
Page 28: Iso Installation
Section Installation Remove the Unit ISO installation This unit has threaded holes in the chassis 1 Remove the panel (Reference page 9). side panels which may be used with the 2 Remove the trim ring by firmly grasping original factory mounting brackets of one side and pulling. -
Page 29: Additional Information
Appendix Additional information Troubleshooting Common Symptom Cause Action Leads and connectors are Confirm once more that all incorrectly connected. connections are correct. Rectify the cause and then replace The fuse is blown. the fuse. Be sure to install a fuse with the same rating. -
Page 30: Error Messages
Error messages When you contact your dealer or your nearest Pioneer Service Center, be sure to note the error message. Message Cause Action Disc or storage device is Please wait, it may take several minutes Loading being read. -
Page 31: Handling Guidelines
Appendix Additional information Handling guidelines Codec High Definition) format. Do not insert AVCHD discs as you may not be Discs and player able to eject the disc. — When using discs that can be printed on — Use discs featuring any of the following label surfaces, check the instructions and logos. -
Page 32: Usb Storage Device
CAUTION — Firmly secure the USB storage device when driving. Do not let the USB storage Pioneer accepts no responsibility for data device fall onto the floor, where it may lost on the USB memory/USB portable become jammed under the brake or audio player even if that data is lost while accelerator pedal. -
Page 33: Ipod Compatibility
LPCM: Compatible USB Cable is required. Bit rate: 8 kbps to 320 kbps (CBR), VBR A Pioneer CD-IU51 interface cable is also Sampling frequency: 8 kHz to 48 kHz available. For details, consult your dealer. Compatible external subtitle file extension: When using an iPod, an Lightning connector .srt, .txt... -
Page 34: Example Of A Hierarchy
H o w e v e r , d e p e n d i n g o n t h e s y s t e m CAUTION environment, you may not be able to specify the playback sequence. • Pioneer accepts no responsibility for data For USB portable audio players, the lost on the USB memory/USB portable sequence is different and depends on the audio player even if that data is lost while player. -
Page 35: Copyright And Trademark
To protect the LED backlight, the display immediately and consult your dealer will darken in the following environments: or the nearest authorized PIONEER — In the direct sunlight Service Station. Using this unit in this — Near the heater vent condition may result in permanent •... -
Page 36: Dolby Digital
Bluetooth SIG, Inc. and any use of such marks ® This DivX Certified device has passed by PIONEER CORPORATION is under ® rigorous testing to ensure it plays DivX license. Other trademarks and trade names video. -
Page 37: Specifications
Appendix Additional information Specifications General Rated power source: ....... 14.4 V cc (12.0 V to 14.4 V allowable) Grounding system ........Negative type Maximum current consumption: ....10.0 A Dimensions (W × H × D): Chassis ..........178 mm × 50 mm × 165 mm Nose .......... - Page 38 Appendix Additional information Subwoofer (mono): Frequency ........80 Hz/120 Hz/160 Hz Gain ..........-79 dB to 0 dB USB standard specification: ....USB 1.1, USB 2.0 full speed Maximum current supply ......1.0 A File system: ..........FAT16, FAT32 FM tuner Frequency range: ........
- Page 40 253 Alexandra Road, #04-01, Singapore 159936 TEL: 65-6472-7555 PIONEER ELECTRONICS AUSTRALIA PTY. LTD. 5 Arco Lane, Heatherton, Victoria, 3202 Australia TEL: (03) 9586-6300 PIONEER ELECTRONICS DE MEXICO, S.A. de C.V. Blvd.Manuel Avila Camacho 138 10 piso Col.Lomas de Chapultepec, Mexico, D.F. 11000 TEL: 55-9178-4270 先鋒股份有限公司...
Need help?
Do you have a question about the dvh-885avbt and is the answer not in the manual?
Questions and answers