
Related Manuals for Bissell Powerglide 1645 Series


Summary of Contents for Bissell Powerglide 1645 Series
-
Page 1: User Guide
POWERGLIDE ® Vacuum ___________ USER GUIDE 1645, 1646, 1647, 1918 SERIES For How-To videos, go to www.BISSELL.com Sections marked with this video icon have more information online. -
Page 2: Safety Instructions
This plug will fit in a polarized outlet only one way. If the plug does not fit fully in the outlet, reverse the plug. If it still does not fit, contact a qualified electrician to install a proper outlet. Do not change the plug in any way. www.BISSELL.com... -
Page 3: Table Of Contents
My great-grandfather invented the floor sweeper in 1876. Today, Contact Information ..11 BISSELL is a global leader in the design, manufacture, and service Product Registration..12 of high quality homecare products like your BISSELL vacuum. -
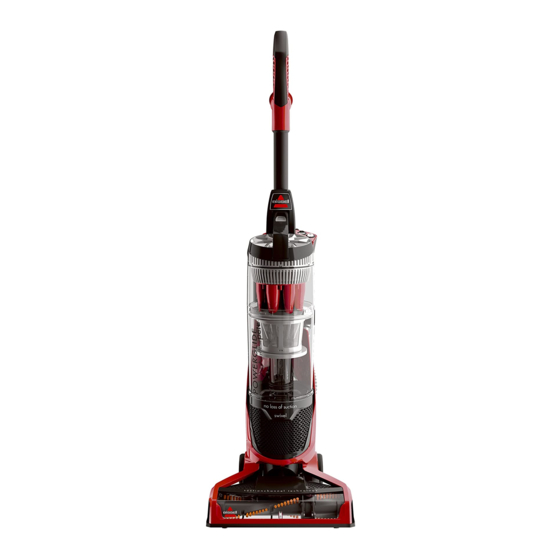
Page 4: Product View
(when used as a Wand) Handle Height Cord Release Adjustment Carry Handle Extra Reach Filters Hose Model # Dirt Container Cord Variable Suction Control Main Post-Motor Hose Filter PowerBrush Cord Release and Storage Twist Cord Release down to quickly remove cord www.BISSELL.com... -
Page 5: Assembly
NOTE: The Crevice Tool is stored inside the Extra Reach Stair Hose. Remove the tool when the hose is in use and replace it inside the hose when ready to store the Extra Reach Hose. www.BISSELL.com... -
Page 6: Operations
WARNING Before using your vacuum, make sure that the dirt container is in locked position and that all filters, both pre and post-filters are in place. DO NOT operate your vacuum without these filters. www.BISSELL.com... -
Page 7: Above Floor Cleaning
Attach desired cleaning Adjustment Lever and to back of Handle, making tool to end of wand. pull out Handle. it a Wand. Parts & Supplies For Parts and Supplies, go to www.BISSELL.com and enter your model number in the search field. www.BISSELL.com... -
Page 8: Maintenance & Care
When reassem- detergent, rinse, and squeeze all post-motor filter back to bottom bling, place top excess water. Allow filters to dry front of vacuum and snap filter tank piece last completely before reinserting. cover door back on. and twist left. www.BISSELL.com... - Page 9 Container in place. Allow components to dry before reassembling the Dirt Container. NOTE: If an object becomes lodged in foot and brush shuts off, turn vacuum off and unplug from electrical outlet. Remove obstruction and brush will automatically reset when vacuum is plugged and turned back on. www.BISSELL.com...
-
Page 10: Troubleshooting
There is a crack or hole in the If there is a crack or hole, order a new won’t pick Main Hose Main Hose from the BISSELL website up dirt The Power Brush bristles are worn Replace the PowerBrush There is a clog in the vacuum... -
Page 11: Warranty
Service If your BISSELL product should require service: Contact BISSELL Consumer Care to locate a BISSELL Authorized Service Center in your area. If you need information about repairs or replacement parts, or if you have questions about your warranty, contact BISSELL Consumer Care. -
Page 12: Product Registration
Visit www.BISSELL.com/registration now! Visit the BISSELL website: www.BISSELL.com When contacting BISSELL, have model number of cleaner available. Please record your Model Number: ___________________ Please record your Purchase Date: ___________________ NOTE: Please keep your original sales receipt. It provides proof of purchase date in the event of a warranty claim.
Need help?
Do you have a question about the Powerglide 1645 Series and is the answer not in the manual?
Questions and answers