Table of Contents
Advertisement
Quick Links
This service information is designed for experienced repair technicians only and is not designed for use by the general public.
It does not contain warnings or cautions to advise non-technical individuals of potential dangers in attempting to service a product.
Products powered by electricity should be serviced or repaired only by experienced professional technicians. Any attempt to service or repair
the product or products dealt with in this service information by anyone else could result in serious injury or death.
SERVICE MANUAL
Model No.
Service No. HL24XK2a
Chassis
WARNING
©2010 Qingdao Haier Electronics Co., Ltd.
All rights reserved. Unauthorized copying and distribution is a violation of law.
Haier Group
Order No.
TV1001S019V0
LCD TV
HL24XK2
MTK5305
Advertisement
Table of Contents

Related Manuals for Haier HL24XK2


Summary of Contents for Haier HL24XK2
-
Page 1: Service Manual
Products powered by electricity should be serviced or repaired only by experienced professional technicians. Any attempt to service or repair the product or products dealt with in this service information by anyone else could result in serious injury or death. ©2010 Qingdao Haier Electronics Co., Ltd. All rights reserved. Unauthorized copying and distribution is a violation of law. -
Page 2: Table Of Contents
CONTENTS Chapter 1: General Information 1-1. Document Information ................3 1-2. General Guidelines ................3 1-3. Important Notice ..................3 1-3-1. Follow the regulations and warnings ............. 3 1-3-2. Be careful to the electrical shock ............3 1-3-3. Electro static discharge (ESD) ............... 3 1-3-4. -
Page 3: Remove The Speaker
4-3. TV Power Board ................16 4-3-1. Function description:................16 ................16 4-4. LCD Panel ....................16 Chapter 5. Installation Instructions .......... 18 Chapter 6. Operation Instructions .......... 23 6-1. Front Panel Controls ................23 6-2. Back Panel Controls ................23 6-3. -
Page 4: Chapter 1: General Information
Service Manual Model No.: HL24XK2 Chapter 1: General Information 1-1. Document Information Document format: Adobe PDF Author: Wanghaiyan Compiler: Bao Qinghong 1-2. General Guidelines When servicing, observe the original lead dress. If a short circuit is found, replace all parts which have been overheated or damaged by the short circuit. -
Page 5: About Lead Free Solder (Pbf)
Service Manual Model No.: HL24XK2 components commonly are called Electrostatically Sensitive (ES) Devices. The following electros static discharge (ESD). Electrostatically Sensitive (ES) Devices Some semiconductor (solid-state) devices can be damaged easily by static electricity. Such components commonly are called Electrostatically Sensitive (ES) Devices. Examples of typical ES devices are integrated circuits and some field-effect transistors and semiconductor "chip"... - Page 6 Service Manual Model No.: HL24XK2 1. Always unplug the receiver AC power cord from the AC power source before: a. Removing or reinstalling any component, circuit board module or any other receiver assembly. b. Disconnecting or reconnecting any receiver electrical plug or other electrical connection.
-
Page 7: Ordering Spare Parts
Service Manual Model No.: HL24XK2 3. Use only a grounded-tip soldering iron to solder or unsolder ES devices. 4. Use only an anti-static type solder removal device. Some solder removal devices not 5. Do not use freon-propelled chemicals. These can generate electrical charges sufficient to damage ES devices. - Page 8 Service Manual Model No.: HL24XK2 Caution: A “caution” is used when there is danger that the reader, through incorrect restart(part of) a procedure. Warning: A “warning” is used when there is danger of personal injury. Reference: A “reference” guides the reader to other places in this binder or in this manual, where...
- Page 9 Service Manual Model No.: HL24XK2a Model HL24XK2a Screen Size 23.6 inch Aspect Ratio 16:9 Resolution 1920x1080 5 (GRAY TO Response Time (ms) GRAY) Angel of View H:170/V:60 Color Display 16777216 No. of Preset Channels OSD Language English/French/Spanish Color System NTSC Audio System M, BG, I, L, L' Audio Output Power...
-
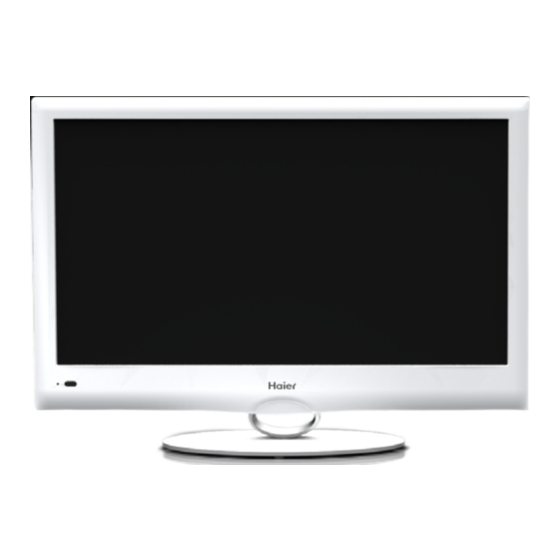
Page 10: External Pictures (Four Faces)
Service Manual Model No.: HL24XK2 2-2 External pictures (four faces) Front Side Left Side... - Page 11 Service Manual Model No.: HL24XK2 Right Side Back Side...
-
Page 12: Remove The Front Cover And Remove The Lcd Panel
Service Manual Model No.: HL24XK2... -
Page 13: Remove The Remote Control Board
Service Manual Model No.: HL24XK2... -
Page 14: Chapter 4. Location Of Controls And Components
Service Manual Model No.: HL24XK2 Chapter 4. Location of Controls and Components 4-1. Board Location Main Board Parts number Description Board Main Board(0090724296) DC1AJ0E0100M 4-2. Main Board... -
Page 15: Function Description
Service Manual Model No.: HL24XK2 4-2-1 Function Description: Main Board Main board connector Power connectors (CN1) Pin number Signal name +12V +12V Notes: CN1-Pin 3: Backlight on/off: The system can turn on or turn off the backlight of TFT LCD Panel through the power supply unit path. - Page 16 Service Manual Model No.: HL24XK2 LVDS Connector (CN5) Pin number Signal name Description LVDS_D0E_N LVDS EVEN 0 - Signal LVDS_D0E_P LVDS EVEN 0 + Signal Ground LVDS_D1E_N LVDS EVEN 1 - Signal LVDS_D1E_P LVDS EVEN 1 + Signal Ground LVDS_D2E_N...
-
Page 17: Tv Power Board
Service Manual Model No.: HL24XK2 4-3.TV Power Board 4-3-1. Function description: To supply power for Panel. INPUT CONNECTOR (CNC1) Power supply and Inverter Connector CNC1 number Signal name Description Ground Ground Power Power Other Connector Power supply for panel (CNC2) Power supply for panel (CNC3) 4-4. - Page 18 Service Manual Model No.: HL24XK2 Panle LVDS Connector (CNC4)
-
Page 19: Chapter 5. Installation Instructions
Service Manual Model No.: HL24XK2 Chapter 5. Installation Instructions Accessories Antenna Connection Over-the-air TV reception quality will depend on your antenna type, antenna location and antenna positioning. Multi-family Dwellings/Apartments (Connect to wall antenna socket) Wall Antenna Socket Bronze Wire RF Coaxial Wire (75 ohm) -
Page 20: Connecting A Computer
Service Manual Model No.: HL24XK2 Connection Option 1 Note Set VCR output switch to channel 3 or 4 and then tune If your DVD player does not have the TV to the same channel number. component video output, use S-Video. -
Page 21: Hdmi Input
Service Manual Model No.: HL24XK2 How to use VIDEO L -AUDIO- R ANT IN Turn on the computer and the TV. Use INPUT on the remote control to select VGA or HDMI source. Check the image on your TV. There may be noise associated with the resolution, vertical pattern, contrast or brightness in VGA mode. -
Page 22: Cable Sample
Service Manual Model No.: HL24XK2 How To Use If the source device supports Auto HDMI function, the output resolution of the source device will be automatically set to 1280x720p. If the source device does not support Auto HDMI, you need to set the output resolution appropriately. -
Page 23: Connecting Headphones
Service Manual Model No.: HL24XK2 Analog Audio Cable (Stereo to RCA type) (not supplied with the product) Connecting Headphones You can connect a set of headphones to your set if you wish to watch a TV programmer without disturbing the other people in the room. -
Page 24: Chapter 6. Operation Instructions
Service Manual Model No.: HL24XK2 6. Operation Instructions 6-1 Front panel controls INPUT MENU VOL- VOL+ POWER 1 POWER Press to turn on and off the TV. Press to access the input source mode. Press repeatedly to change the source to the one 2 INPUT you want to watch. -
Page 25: Battery Loading
Service Manual Model No.: HL24XK2 Battery loading 1. Slide open the cover of the battery compartment on the back of the remote controller. 2. Load two 7# (AAA) alkaline batteries in the compartment, (plus and minus poles to respective mark) 3. -
Page 26: Chapter 7. Electrical Parts
Service Manual Model No.: HL24XK2 Chapter 7. Electrical Parts 7-1. Block Diagram HDMI1 MT5305 Main IC TDA1517 YPbPr tuner LVDS Composite YPbPr Composite Flash VGA(P11)L/R EEPROM... -
Page 28: Wiring Connection Diagram
Service Manual Model No.: HL24XK2 7-3 .Wiring Connection Diagram... - Page 29 Service Manual Model No.: HL24XK2...
- Page 30 Service Manual Model No.: HL24XK2...
- Page 31 Service Manual Model No.: HL24XK2...
- Page 32 Service Manual Model No.: HL24XK2...
- Page 33 Service Manual Model No.: HL24XK2...
- Page 34 Service Manual Model No.: HL24XK2...
- Page 35 Service Manual Model No.: HL24XK2...
- Page 36 Service Manual Model No.: HL24XK2...
- Page 37 Service Manual Model No.: HL24XK2...
- Page 38 Service Manual Model No.: HL24XK2...
- Page 39 Service Manual Model No.: HL24XK2...
- Page 40 Service Manual Model No.: HL24XK2...
-
Page 41: Chapter 8. Measurements And Adjustments
Service Manual Model No.: HL24XK2 Chapter 8. Measurements and Adjustments 8-1. Service Mode 8-1-1.How to enter into Service Mode The way to the factory mode menu: Step 1: Press Menu, Step 2: Input 8893, Step 3: Press “OK” System will be into the factory mode menu when 3 steps above are done. -
Page 42: Video
Service Manual Model No.: HL24XK2 8-2-2. Video Auto Color The option could only be used in the VGA and Component model. When we found the color in the two models was abnormal. Then we can use the function to adjust it automatically. -
Page 43: Audio
Service Manual Model No.: HL24XK2 8-2-3. Audio Dolby Banner: When turn it “ON”, the model will be in Dolby authentication state. Compression: Compression style. RF atv line AV/S-Video/YPbPr/VGA Compression Factor: Compression state. Downmix: output model. MTS System: used when debugging. The parameters only used when 8-2-4. - Page 44 Service Manual Model No.: HL24XK2 Factory Scan: According to ANTENNA-ANALOG---ANTENNA-DIGITAL---CABLE- ANALOG---CABLE- DIGITAL to search channels, used only in project debugging. Tuner Diagnostic: Project debugging setting, used to inspect the audio function.
-
Page 45: Gamma
Service Manual Model No.: HL24XK2 8-2-5. Gamma Gamma: Bright GAMMA0.8 Middle default settings in the program Dark GAMMA1.2 8-2-6. Backlight Backlight: adjust the backlight. -
Page 46: Function
Service Manual Model No.: HL24XK2 8-2-7. Function Burning Mode: Turn it “ON” to enter the aging model, This is for factory run-in testing. The screen would display red, green, blue and black screen repeatedly. Each color screen could be exam at that time. - Page 47 Service Manual Model No.: HL24XK2 Remark: The date of the chart only is an example, please don’t adjust the factory mode base on it.
-
Page 48: Chapter 9. Trouble Shooting
Service Manual Model No.: HL24XK2 Chapter 9. Trouble shooting 9-1. Simple check Verify if the television is properly plugged Verify if the television is properly supplied power No picture/ No sound Verify if electricity is available. Verify if correct signals are input... -
Page 49: Power Supply Board Failure Check
Service Manual Model No.: HL24XK2 9-2. Power Supply Board Failure Check. -
Page 50: Mainboard Failure Check
Service Manual Model No.: HL24XK2 9-3. Mainboard Failure Check Symptom: No Sound No Sound (All Mode) Fail Check the input Change Source input Source Pass Fail Check Re-soldering or change input/output IC U13 Pass Fail Check Re-soldering or change input/output... -
Page 51: Pannel Failure
Service Manual Model No.: HL24XK2 9-4. Pannel Failure Failure Mode... - Page 52 Service Manual Model No.: HL24XK2...
- Page 53 Service Manual Model No.: HL24XK2...
- Page 54 Service Manual Model No.: HL24XK2...
- Page 55 Service Manual Model No.: HL24XK2...
- Page 56 Sincere Forever Haier Group Haier Industrial Park, No.1, Haier Road 266101, Qingdao, China http://www.haier.com Printed in China...
Need help?
Do you have a question about the HL24XK2 and is the answer not in the manual?
Questions and answers