Table of Contents
Advertisement
Quick Links
Advertisement
Table of Contents

Related Manuals for Nakamichi NA5501


Summary of Contents for Nakamichi NA5501
-
Page 2: Safety Precautions
Safety Precautions Thank you for purchasing this product. Please Please contact your nearest dealer if one of read through these operating instructions the following is experienced: so you will know how to operate your model properly. Please keep this manual in a safe place for future reference. -
Page 3: Expanding Systems
Safety Precautions 1. Never disassemble or adjust the unit without professional guidance. For details, please consult an authorised service provider or dealer. 2. If the front panel or TFT monitor is dirty, please use a clean silicone cloth and neutral detergent to clean. -
Page 4: Table Of Contents
Contents Safety Precautions ........1 Select Subtitle Language ......15 Change Viewing Angle ......15 Before Using ..........4 Video Setup ..........15 Front Panel ..........4 Playback Information ......15 Remote Control........5 Direct Track Entry .........16 Notes on Remote Control Usage ....6 Rotate Pictures ........16 Uninstall Battery........6 Zoom.............16 Install Battery ..........6 Bluetooth Mode ........17... -
Page 5: Before Using
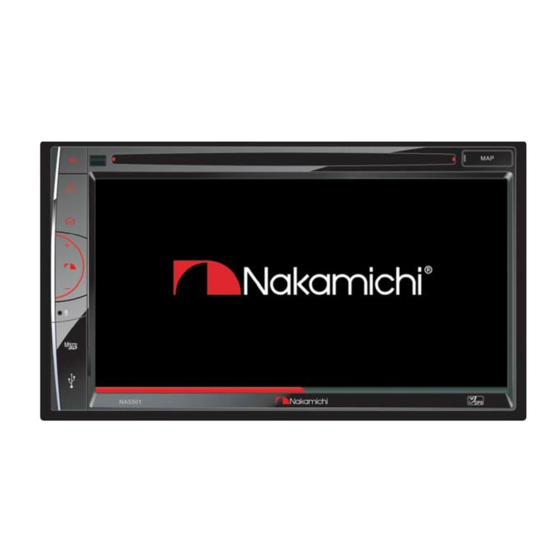
Before Using Front Panel RESET Notice: The graphic in this manual is for reference only, and may be different from the actual unit. Reference to actual unit is suggested. ] Button Press to eject a disc. ] Button Press to turn the unit ON. Press and hold to turn the unit OFF. Press momentarily to activate the MUTE function. -
Page 6: Remote Control
Before Using Remote Control 1. Return to the home menu 2. Eject the disc 3. Access to tuner source 4. Access to disc source 5. - Search an available radio station by decreasing tuning frequency - Select the previous chapter/track for playback 6. -
Page 7: Notes On Remote Control Usage
Before Using Notes on Remote Control Usage Uninstall Battery Install Battery Slide out the battery compartment tray Use button-shaped lithium battery at the bottom on the back of the remote CR2025 (3V)” only. Insert the battery control. to the battery tray with proper direction according to the (+) and (-) poles. -
Page 8: Basic Operations
Basic Operations Parking Brake Inhibit Playing Source Selection hen the BRA E cable is connected to Press the [ ] button on the front panel to the brake switch, the display on the TFT change between available playing sources. monitor will display video only when the The playing mode is displayed on the screen. -
Page 9: Select Preset Equalizer
Basic Operations Select Preset Equalizer fader range: 0 to 20. fader range: 0 to 20. 0 to 20. 0 to 20. Note: Adjust EQ Parameters Adjust Fader/Balance... -
Page 10: Set Date /Time
Basic Operations Set Date /Time 1. Touch [ 2. Touch [ Time ]. The date/time setup menu is displayed. · Set Date 1. Touch [ Date ]. 2. Touch the date information on the screen . A submenu is displayed. 3. -
Page 11: Radio Mode
Radio Mode Tuner TFT Display Select Radio as Playing Source Open the Source Menu and then touch [Radio]. Select One Radio Band Press the [BAND] button on remote control or touch the [ ] icon on the user interface to select one radio band from FM1, FM2, FM3, AM1 and AM2. -
Page 12: Preset Station
Radio Mode Preset Station RDS Basics The unit has 5 bands, such as FM1, FM2, RDS transmits data to the radio which FM3, AM1, AM2, and each band can store 6 displays information such as station stations; hence the unit can store 30 stations identi cation, song artist, and song title. -
Page 13: Af Function
Radio Mode AF Function CT (Clock Time) Some stations broadcast the time and date within the encoded RDS signal. The clock time is automatically adjusted when ‘CT’ is set to ‘ON’. PTY Function Note: PTY is the abbreviation for Program Type During auto switching radio frequency, which is a code defining the type of program some interference could be heard. -
Page 14: Playback Mode
Playback Mode Load a Disc You can play video, audio or images stored on the following discs: DVD Video, DVD-R, DVD-RW Audio CD, CD-R, CD-RW Note: Ensure that the disc contains playable content. Connect a USB Device Eject a Disc 1. -
Page 15: Play/Pause
Playback Mode Play/Pause Repeat 1. Once a disc, USB is inserted, play starts For DVD/VCD movie disc: automatically. 1. Touch bottom half of the screen to display For DVD movie, if a menu appears, press menu on the screen, if necessary. ] to start play. -
Page 16: Shuf E (Random) Play
Playback Mode 4. To exit A-B repeat mode, touch A-B repeatedly, [Repeat A-B off] is displayed. You can play audio tracks/files in random order. 1. Touch the screen to display control menu, if necessary. 2. Touch [ ] to display the 2nd menu, if You may set the brightness, contrast, necessary. -
Page 17: Direct Track Entry
Playback Mode Direct Track Entry To select a track directly, touch the [ icon on screen control to display the direct entry menu. Enter the desired track using the on-screen number pad. Press [ OK ] to the selected track. Rotate Pictures 1. -
Page 18: Bluetooth Mode
Bluetooth Mode You can make or receive phone calls with Disconnect Bluetooth Device Bluetooth-enabled phones through the To disconnect one device, touch [ unit. You can also listen to music from a Bluetooth-enabled device. Pair the Bluetooth-enabled Devices To connect your Bluetooth device to the unit, you need to pair the device to the unit. -
Page 19: Adjust Bluetooth Settings
Bluetooth Mode connect” function. [Auto Answer]: To turn on or off “Auto answer” function. [Pair Password]: To set paring code. [Phone Book]: To synchronize phone book, touch [ Download ] on the sub-menu popped out. Phonebook sync may take several minutes to load on initial setup. -
Page 20: Settings
Settings Display System 1. Touch the upper left corner to display the main menu. 2. Touch [ Settings ]. The settings menu is displayed. 3. Touch the upper left corner of the screen to exit. Adjust General Settings 1. Touch [ General ], if necessary. 2. -
Page 21: Adjust Sound Settings
Settings Adjust Sound Settings 1. Touch [Sound]. 2. Touch an option repeatedly to select. Sound settings Options Description Sub Woofer On/Off Turn on/off the sub woofer. 80Hz Sub Woofer Filter 120Hz Touch to select a crossover frequency. 160Hz GPS mixed sound Rear reduction/Rear normal/Rear mute Select one of the sound mode. Adjust Time Settings 1. -
Page 22: Adjust Volume Settings
Settings Kid safe Acceptable for children. Acceptable for general viewers. Parental guidance suggested. PG-13 Unsuitable for children under age 13. Rating Level PG-R Recommend parents to restrict viewing for children under 17. Restricted re parental guidance is advised for children under the age of NC-17 Unsuitable for children under age 17. -
Page 23: Other Modes
Other Modes Listen to Other Devices You can connect an external audio/video device to the unit. 1. Connect the external device with the supplied AV cable. 2. Touch the upper left corner to display the main menu. 3. Touch [Ori-AUX IN]/[AV-IN] to access external device. - Page 24 General Reference Supply Voltage..............12V(DC) Operating Voltage Range............10.5 - 16V(DC) Max Operating Current..................15A Maximum Output Power............50W x 4 channels RMS Power Output ............... 25W x 4 channels Grounding System............. Car Battery Negative Pole Dimensions(LxWXH) ............Weight(main unit) ................... Signal Noise Ratio ................55dB Residual Noise Sensitivity (S/N=30dB) ..........
-
Page 25: Region Code
Supported Formats: USB or memory le format: FAT16, FAT32 ·Mp3 bit rate(date rate): 32-320 Kbps and variable bit rate ·WMA v9 or earlier ·Directory nesting up to a maximum of 8 levels ·Number of albums/folders: maximum 99 ·Number of tracks/titles: maximum 999 ·ID3 tag v2.0 or later ·File name in Unicode UTF8(maximum length:128 bytes) Unsupported Formates:... -
Page 26: Troubleshooting
Troubleshooting What appears to be a problem is not always serious. Please check the following points before calling a service center. Problem Cause Corrective action General Unit fuse blown. Install new fuse with correct rating. Unit does not power on Car battery fuse blown. -
Page 27: Installation
Installation Disconnecting the Battery Note: Remove Transport Screws WARNING! Replacing the Fuse... -
Page 28: Wire Connections
Wire Connections GPS Antenna Radio Antenna CAMERA-IN PARKING AV-IN L REVERSE AGND TV-R AV-IN R VIDEO IN LINE OUT RL DGND SUB OUT R LINE OUT RR TV-L SUB OUT L VIDEO-OUT KEY 1 KEY 2 TV-CVBS LINE OUT FR LINE OUT FL P.ANT... -
Page 29: Quick Start Guide
Quick Start Guide GPS WIRE Remote control & battery Clear cloth CAM+VOUT CAM+SWC+VIDEO TRIM... - Page 30 Quick Start Guide USB Jack Brown Green Green with white POWER P ANT ILLUMI BATT...
- Page 31 Quick Start Guide...
- Page 32 Quick Start Guide Do not supplied the connect line.
- Page 33 Quick Start Guide Brown Green...
- Page 38 RESET...
- Page 54 RESET...
- Page 60 AV-IN L AV-IN R VIDEO IN LINE OUT RL SUB OUT R LINE OUT RR SUB OUT L LINE OUT FR LINE OUT FL P.ANT...
- Page 66 P/N:1270750 6051...
Need help?
Do you have a question about the NA5501 and is the answer not in the manual?
Questions and answers