Fujitsu aoyg18lac2 Installation Manual
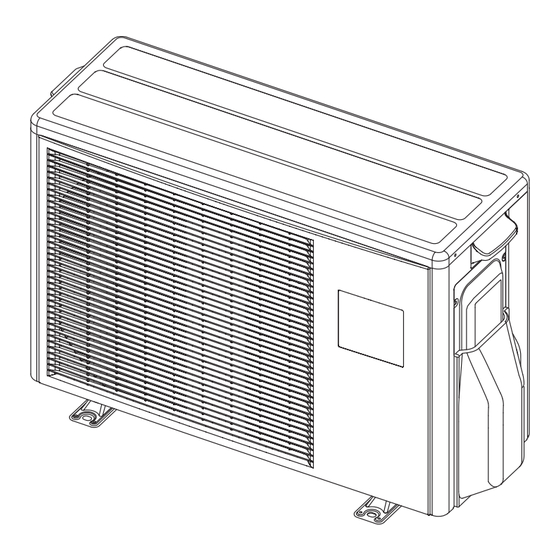
Outdoor unit
Hide thumbs
Also See for aoyg18lac2:
- Service manual (80 pages) ,
- Service manual (73 pages) ,
- Service manual (165 pages)
Table of Contents
Advertisement
AIR CONDITIONER
OUTDOOR UNIT
INSTALLATION MANUAL
For authorized personnel only.
INSTALLATIONSANLEITUNG
Nur für autorisiertes Personal.
MANUEL D'INSTALLATION
Pour le personnel agréé uniquement.
MANUAL DE INSTALACIÓN
Solo para personal autorizado.
MANUALE D'INSTALLAZIONE
Ad uso esclusivo del personale autorizzato.
ΕΓΧΕΙΡΙΔΙΟ ΕΓΚΑΤΑΣΤΑΣΗΣ
Για εξουσιοδοτημένο προσωπικό σέρβις.
MANUAL DE INSTALAÇÃO
Apenas para técnicos autorizados.
РУКОВОДСТВО ПО УСТАНОВКЕ
Для уполномоченного персонала.
MONTAJ KILAVUZU
Yetkili servis personeli içindir.
PART NO. 9379342070-02
En-1
Advertisement
Table of Contents

Related Manuals for Fujitsu aoyg18lac2


Summary of Contents for Fujitsu aoyg18lac2
-
Page 1: Installation Manual
AIR CONDITIONER OUTDOOR UNIT INSTALLATION MANUAL For authorized personnel only. INSTALLATIONSANLEITUNG Nur für autorisiertes Personal. MANUEL D'INSTALLATION Pour le personnel agréé uniquement. MANUAL DE INSTALACIÓN Solo para personal autorizado. MANUALE D'INSTALLAZIONE Ad uso esclusivo del personale autorizzato. ΕΓΧΕΙΡΙΔΙΟ ΕΓΚΑΤΑΣΤΑΣΗΣ Για εξουσιοδοτημένο προσωπικό σέρβις. MANUAL DE INSTALAÇÃO Apenas para técnicos autorizados. -
Page 2: Table Of Contents
INSTALLATION MANUAL Using the same vacuum pump for different refrigerants may damage the vacuum pump or the unit. PART NO. 9379342070-02 Use a clean gauge manifold and charging hose for R410A exclusively. Contents During the pump-down operation, make sure that the compressor is turned off before SAFETY PRECAUTIONS ………………………………………………………………... -
Page 3: Special Tools For R410A
2. 4. 1. CONNECTABLE INDOOR UNIT CAPACITY TYPE 2. 2. Special tools for R410A CAUTION Contents of change Tool name The total capacity of the indoor units connected must be between 14,000 and 24,000BTU. Pressure is high and cannot be measured with a conventional gauge. -
Page 4: Installation Work
INSTALLATION WORK Please obtain the approval of the customer when selecting the location of installation and installing the unit. 3. 1. Selecting an installation location WARNING Securely install the outdoor unit at a location that can withstand the weight of the unit. Otherwise, the outdoor unit may fall and cause injury. -
Page 5: Drain Installation
3. 3. 1. Single outdoor unit installation 3. 2. Drain installation • When there are obstacles at the back side. (Unit : mm) CAUTION Perform drain work in accordance with this Manual, and ensure that the drain water is properly drained. If the drain work is not carried out correctly, water may drip down from the unit, wetting the furniture. -
Page 6: Transportation Of The Unit
3. 4. Transportation of the unit PIPE INSTALLATION I WARNING 4. 1. Flare connection (pipe connection) Do not touch the fi ns. Otherwise, personal injury could result. CAUTION Do not use mineral oil on a fl ared part. Prevent mineral oil from getting into the system as this would reduce the lifetime of the units. -
Page 7: Electrical Wiring
Detach the caps and plugs from the pipes. WARNING Center the pipe against the port on the outdoor unit, and then turn the fl are nut by hand. Be sure to install a breaker of the specifi ed capacity. When selecting breaker, please comply with the laws and the regulations of each country. -
Page 8: Unit Wiring
5. 3. Unit wiring • When stripping off the coating of a lead wire, always use a special tool such as a wire Power cable stripper. If there is no special tool available, carefully strip the coating with a knife etc. Connection cable 20 mm Power cable or... -
Page 9: Additional Charging
Check that the compound pressure gauge reads -0.1 MPa (76 cmHg), operate the CAUTION vacuum pump for 30 minutes or more in each valve. (10) At the end of pump down, close the valve of the gauge manifold fully and stop the vacuum pump.
Need help?
Do you have a question about the aoyg18lac2 and is the answer not in the manual?
Questions and answers