Advertisement
Quick Links
Assembly and Use
Instructions for Model:
25317, 25319
Instrucciones de armado y uso
para el modelo:
25317, 25319
VER. 1, 7/1/2010
!
PLEASE READ ALL RULES FOR SAFE OPERATION
AND HELPFUL HINTS BEFORE USING.
POR FAVOR LEA TODAS LAS REGLAS DE SEGURIDAD OPERACIONAL
Y CONSEJOS ÚTILES ANTES DE USAR.
Advertisement

Subscribe to Our Youtube Channel
Related Manuals for Landmann Haywood 25317


Summary of Contents for Landmann Haywood 25317
- Page 1 Assembly and Use Instructions for Model: 25317, 25319 Instrucciones de armado y uso para el modelo: 25317, 25319 VER. 1, 7/1/2010 PLEASE READ ALL RULES FOR SAFE OPERATION AND HELPFUL HINTS BEFORE USING. POR FAVOR LEA TODAS LAS REGLAS DE SEGURIDAD OPERACIONAL Y CONSEJOS ÚTILES ANTES DE USAR.
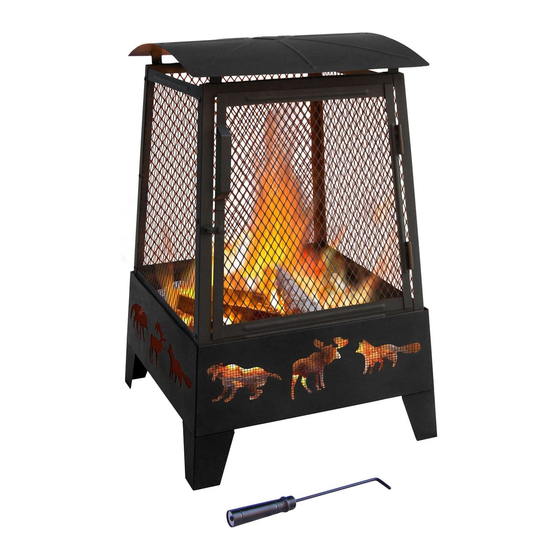
- Page 2 PAGE 2 PARTS LIST LISTA DE PIEZAS When unpacking the fireplace from the carton, make sure you find and become familiar with all the parts listed below: Al desembalar la chimenea de la caja, asegúrese de buscar todas las piezas mencionadas a continuación y familiarizarse con ellas: (1) FIREBOX (1) CAJA DE FUEGO UNDERSIDE TAB...
- Page 3 PAGE 3 ASSEMBLY INSTRUCTIONS A Phillips screwdriver and an INSTRUCCIONES DE ARMADO adjustable wrench is needed for assembly. Se necesitan un destornillador Phillips y STEP 1: ASSEMBLE LEGS TO THE FIREBOX una llave ajustable para el armado. PASO 1: ENSAMBLE LAS PATAS A LA CAJA DE FUEGO Assemble each leg [ C ] to the firebox [ A ] Assembly time: 15 minutes using (3) 10MM bolts [ J ] and flange hexnuts...
- Page 4 ¡CALIENTE! DEBE ESTAR COMPLETAMENTE FRÍA AL TACTO. WARNING! Congratulations on your purchase of the Haywood Outdoor Fireplace! At Landmann USA, we strive ¡ADVERTENCIA! to provide you with an easy to use, easy to HOT SURFACES DURING assemble product. However, in the unlikely event...
Need help?
Do you have a question about the Haywood 25317 and is the answer not in the manual?
Questions and answers