
Related Manuals for PROMARKS TC-420

Summary of Contents for PROMARKS TC-420
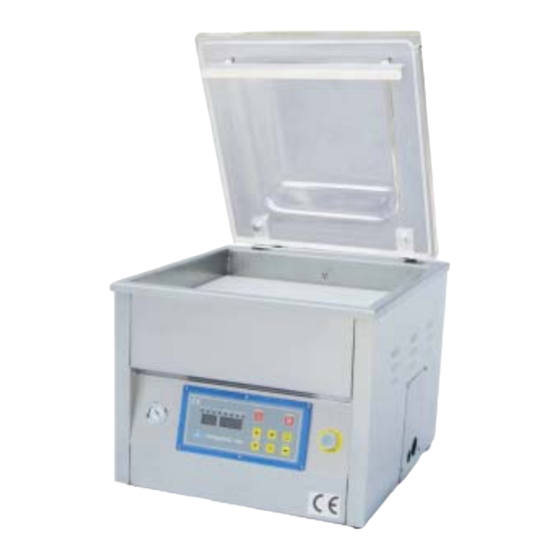
- Page 1 ISO 9001:2000 TC-420 Table Top Vacuum Packaging Machine Operation Manual PROMARKS INC U.S.A. 1599 Monte Vista Ave., Claremont CA 91711 U.S.A TEL:(909)482-1133 FAX:(909)482-1633...
-
Page 2: Table Of Contents
1. Applications ……………………………………………………………………………………….……4 1.1 Why we need vacuum packaging ……………………………………………………………….4 1.2 Recommendation of vacuum pouch …………………………………………………………..… 4 2. Transportation instruction …………………………………………………………………………..…4 3. TC-420 Specification ………..……………..……………………………………..…… ……………...5 4. Installation ………………………………………………………………………………………..5-6 4.1 Environment requirements ………………………………………………………………………. 5 4.2 Check oil level ……………………………………………………………………………………... 6 4.3 Plug-up power Cord …………………………………………………………………………….. - Page 3 8. Replacement parts ………………………………………………………………………………. 20-30 8.1 Lid diagram ……………………………………………………….………………………….. 21-22 8.2 Vacuum chamber diagram ………. ……………… ……………………………………… . 23-28 8.3 Body diagram ……………………………….…………………………………………..…… 29-30 8.4 Electrical box diagram ….. .…………….……………………………………………..……. 31-32 8.5 Electrical box diagram for gas .………………..……………………………………..…….. 33-34...
-
Page 4: Safety Recommenations
SAFETY RECOMMENDATION CERTAIN PRACTICES OR MINOR MODIFICATIONS ON THE PART OF THE USER MAY INCREASE THE RISK OF DAMAGE AND/OR ACCIDENTS. IN THE INTERESTS OF SAFE INSTALLATION, HANDLING AND MAINTENANCE, THE FOLLOWING RECOMMENDATIONS SHOULD BE STRICTLY FOLLOWED: 1) Do not attempt to start or handle the machine until all safety topics, installation instructions, operator’s guide and maintenance procedures have been fulfilled and understood. -
Page 5: Applications
1. APPLICATIONS Frozen food, sea food, prepared food, meat, soaked foods, herbal medicine, tea leaves, hardware parts and accessories, and electronic products … etc. 1.1 WHY WE NEED VACUUM PACKAGING Maintaining food’s freshness and flavor; antiseptic, and mold resistant. Extend storage period and shelf life for packed goods. Prevents electronic and hardware parts from rusting and dampening. -
Page 6: Tc-420 Specification
3. TC-420 SPECIFICATION 4. INSTALLATION 4.1 Environmental requirement Due to oil stiffening in cold working environment, the machine is hard to started if the air temperature is very low. Machine, therefore, ought to be set up in: Room with air temperature around 5~40 Working elevation between 0~1000 meter. -
Page 7: Check Oil Level
4.2 CHECK OIL LEVEL Check oil level (see oil level in view glass) on vacuum pump, add if necessary. 4.3 PLUG-UP POWER CORD Before plug-up the power cord make sure you have right power source to hook up the pump. Please look at the back of the machine for the current requirement. -
Page 8: Operation
5. OPERATION: Storage life when Products Vacuum time/Sec stored at 2~6 C/day Fresh meat Pork Beef Meat with liquid 15~30 Pasta Sliced sausage Cold cuts 10~21 Turn on the main switch and see LCD display showed operation menu on screen, machine is now ready for operation. -
Page 9: Led Control Panel Function
LED CONTROL PANEL FUNCTIONS 5.2.1 PV-01 control panel ○ ○ ○ 1 Control panel 6 Program number up 10 Edit ○ ○ ○ 2 Program number 7 Program number down 11 Shift / Save value ○ ○ ○ 3 Function value 8 Increase value 12 Vacuum gauge ○... -
Page 10: Control Panel
Increase value : Increase any value by pressing this button. ● Decrease value : Decrease any value by pressing this button. ● Emergency stop : Stop current function and skip to ventilation. ● Stop vacuum : Stop vacuuming and skip to sealing. ●... - Page 11 soft air, cooling time. ○ display 3 : Second function allows you to adjust time for each given ● function of Vacuum, GAS, SEAL1, SEAL2, SOFTAIR, COOLING, and other required parameter setting . ○ Program number up 4 : Program number goes up by pressing button.
- Page 12 Gas (optional): To adjust the gas time first press shift button to GAS then press adjust the desire gas time after adjusting press Shift again to save the value How to bring the gas into the package: Pull the pouch over the gas nozzle. (Be sure that there are not wrinkles in pouch because it causes defective seals).
- Page 13 Sealing 1 : You can increase or decrease sealing value by pressing button with Sealing 1 lamp lighting(The sealing time is from 0.1 to 10 Sec). After setting the best value, to press SHIFT button for saving value and move it to next function. Note: The best sealing time is around 2~4 sec, it is depends on the thickness of the vacuum pouch.
-
Page 14: Maintenance
6. MAINTENANCE 6.1 DAILY MACHINE CLEANING The TC-420 double chamber vacuum packaging machine should be cleaned every day. Use special care to clean seal bar and seal back-up strip. We recommend cleaning by hand with a mild detergent. Do not directly hose down machine. - Page 15 If you are only replacing the sealing wire and Teflon tape, check the spring retainer. The spring must be filled into the end side of the sealing bar otherwise the sealing wire will be easily broken during heat deliver. (FIG.B) SET SCREW FIG.B Feed new sealing wire through one of seal bar and secure, leaving about 3/4”...
-
Page 16: Maintenance Time And Item Chart
6.4 MAINTENANCE TIME AND ITEM CHART Every Every Every Three Footnotes Maintenance time Daily four Yearly to five space and item months months years years Let vacuum pump running for about 15 minutes with vacuum lid open after work finished Check the oil level Check the sound of motor... -
Page 17: Trouble Shooting
7. TROUBLE SHOOTING 7.1 Possible problems and remedies are identified as below: Problem Possible cause Possible remedy Control panel is under normal The KM1,QM1, MCB1, MCB2 Check each parts and turn function, but vacuum pump protector are disconnect. on the switch. will not start. - Page 18 Problem Possible cause Possible remedy None or bad sealing. Sealing wire is broken. Replace. Sealing wire is loosen. Tighten up a sealing wire. Insufficient pressure. Pressure bar defective: replace. Sealing transformer defective. Replace. Teflon tape or silicone rubber Replace. is damage. Note: Please do not adjust sealing time longer than Sealing time and cooling time...
-
Page 19: Pneumatic Diagram
7.2 PNEUMATIC DIAGRAM ○ ○ 1 Vacuum Gauge 5 Y5 : Soft Air Valve ○ ○ 2 Y1: Ventilation Valve 6 Gas Tank ○ 3 Y2: Sealing Valve P. Vacuum Pump ○ 4 Y3 : Gas Valve... -
Page 20: Electrical Diagram
7.3 Electrical diagram 7.3.1PV-01standard 7.3.2 PV-02 standard... - Page 23 Part List Pos. Name Quantity Parts No Note 1 Lid gasket PA0420504200 2 Sealing silicone PA0317084200 3 Screw NA0106002501 Flat head 4 Cushion bar AA100043160D A Cushion bar set(2-4) HA0230020200 5 Spacer PA100001280D 6 Vacuum lid PA200142250D 7 O-ring PA1000900000 8 Binding post screw NA2008001601 9 Screw...
- Page 25 Vacuum Chamber Part List Note Note Pos. Name Quantity Parts No Pos. Name Quantity Parts No NA0406002501 Hex head 1 Vacuum chamber SA200147040D 26 Screw 2 Hexagon bushing block holder AA200009290D 27 Washer NA0706000001 3 Hexagon bushing block holder AA200008290D 28 Screw nut NA1003000001 NA0004001001 Round head...
- Page 26 Sealing Bar-Standard DIagram...
- Page 27 Sealing Bar-Standard:HA0145006010(Set) Part List Pos Name Quantity Part No. Note 1 Sealing bar PA200141000D 2 Sealing wire holder GA100005290D 3 Spring QA1410058193 4 Teflon tape PA0803116011 5 Sealing wire QA0506003003 6 Teflon tape PA0802540011 7 Screw NA0004000601 Round head...
- Page 28 Sealing Bar(Cut off)-Optional Diagram...
- Page 29 Sealing Bar(Cut off)-Optional:HA0145012000(Set) Part List Pos Name Quantity Part No. Note 1 Sealing bar PA200141000D 2 Sealing wire holder GA100016010D 3 Screw NA0004000601 Round head 4 Sealing wire QA0503000005 Single curve 5 Teflon tape PA0803116011 6 Teflon tape PA0802540011 7 Sealing wire QA0501200004 Cut wire...
- Page 31 Body Part List Pos. Name Quantity Parts No Note 1 Machine case SA300141270D 2 Hose coupling angled CA1201008000 3 Vacuum gauge QA0404000000 4 Screw NA0004001001 Round head 5 Control panel HA1303020100 6 Main switch EA2012224000 7 Screw NA0104001501 Flat head 8 Washer NA0704000001 9 Track...
- Page 32 Electrical-Standard Diagram...
- Page 33 Electrical-Standard Part List Pos. Name Quantity Parts No Note 1 Track PA300001250D 2 Electric wire trough EA7803204500 3 Cable gland holder SA300961260D 4 Transformer EA1504601011 For heater 5 Transformer EA1504231010 For panel 6 Ground block holder XA2002000000 7 Contact EA1602112100 For vacuum pump 8 Contact EA1602125100 For heater 9 Overload...
- Page 34 Electrical(Gas)-Optional Diagram...
- Page 35 Electrical Part List Pos. Name Quantity Parts No Note 1 Track PA300001250D 2 Electric wire trough EA7803204500 3 Cable gland holder SA300961260D 4 Transformer EA1504601011 For heater 5 Transformer EA1504231010 For panel 6 Ground block holder XA2002000000 7 Contact EA1602112100 For vacuum pump 8 Contact EA1602125100 For heater 9 Overload...
Need help?
Do you have a question about the TC-420 and is the answer not in the manual?
Questions and answers