Advertisement
Table of Contents
- 1 Set 12/24 Hour, Temperature Units, Time
- 2 Fahrenheit/Celsius
- 3 Get Started
- 4 Settings Order
- 5 View/Reset Min/Max Readings
- 6 Outdoor Temperature Reception Icon/Channel Indicator
- 7 Setup with Multiple Sensors
- 8 Position Outdoor Sensor
- 9 Specifications
- 10 Battery Life
- 11 Care and Maintenance
- 12 Warranty and Support Information
- 13 Fcc Statement
- Download this manual
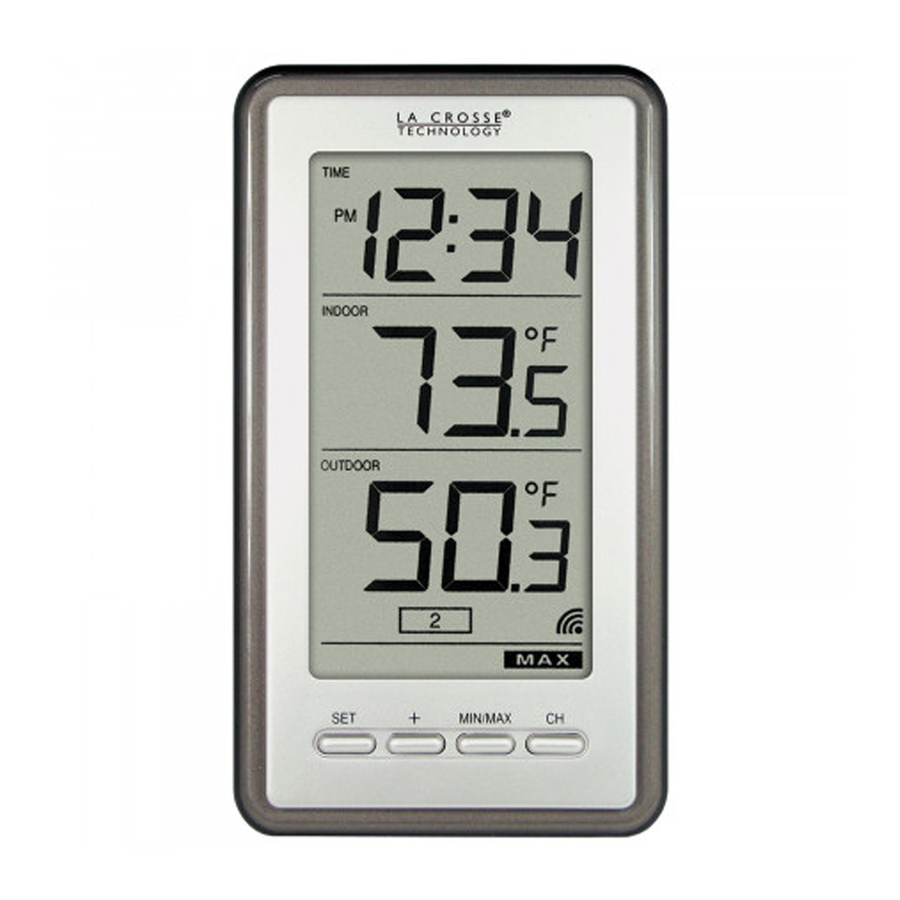
Time
12/24hr
Indoor
Temp.
ºF/ºC
Outdoor
Temp.
ºF/ºC +
Channel
Indicator
Buttons
WS-9160U-IT
WIRELESS THERMOMETER
TX29U-IT
Temperature
Sensor
compartment
batteries
www.lacrossetechnology.com/support
Battery
2 "AA"
Model: WS-9160U-IT
Instruction Manual
DC: 081815
Page | 1
Hanging
hole
Battery
compartment
2 "AAA"
Alkaline
batteries.
Foldout
stand
Advertisement
Table of Contents

Related Manuals for La Crosse WS-9160U-IT


Summary of Contents for La Crosse WS-9160U-IT
- Page 1 Model: WS-9160U-IT Instruction Manual DC: 081815 WIRELESS THERMOMETER Hanging Time hole 12/24hr Battery compartment Indoor 2 “AAA” Temp. Alkaline ºF/ºC batteries. Outdoor Temp. ºF/ºC + Channel Foldout Indicator stand Buttons TX29U-IT Temperature Sensor Battery compartment 2 “AA” batteries WS-9160U-IT www.lacrossetechnology.com/support...
-
Page 2: Set 12/24 Hour, Temperature Units, Time
1. Hold the SET button to enter time set mode. 2. 12h or 24h will flash. 3. Press the + button to change the time format (temperature display). 4. Press the SET button to confirm. Note: 12h = ºFahrenheit & 24h = ºCelsius WS-9160U-IT www.lacrossetechnology.com/support Page | 2... -
Page 3: View/Reset Min/Max Readings
5. Keep wireless thermometer and all sensors together for 15 minutes. Low Battery Icon When the TX icon is displayed replace Battery batteries in the outdoor sensor. Icons When the RX icon is displayed replace batteries in the wireless thermometer . WS-9160U-IT www.lacrossetechnology.com/support Page | 3... -
Page 4: Position Outdoor Sensor
Wireless thermometer Over 12 months TX29U-IT Sensor: Over 12 months Dimensions: 3.3” x 0.89” x 5.86” Wireless thermometer : (84 x 22.6 x 149mm) 1.5” x 0.83” x 5.05” TX29U-IT Sensor: (38.2 x 21.2 x 128.3mm) WS-9160U-IT www.lacrossetechnology.com/support Page | 4... -
Page 5: Care And Maintenance
Remove expired batteries promptly. Warranty and Support Information La Crosse Technology, Ltd. provides a 1-year limited time warranty (from date of purchase) on this product relating to manufacturing defects in materials & workmanship. View full warranty details online at: www.lacrossetechnology.com/warranty_info.pdf... -
Page 6: Fcc Statement
This booklet may contain errors or misprints. The information it contains is regularly checked and corrections are included in subsequent editions. We disclaim any responsibility for any technical error or printing error, or their consequences. All trademarks and patents are recognized. WS-9160U-IT www.lacrossetechnology.com/support Page | 6...
Need help?
Do you have a question about the WS-9160U-IT and is the answer not in the manual?
Questions and answers
why can't the thermometer find the sensor?
The La Crosse WS-9160U-IT thermometer may not find the sensor due to the following reasons:
1. Battery Issues – Ensure the sensor has fresh batteries and they are installed correctly. The sensor uses two “AAA” batteries, and the thermometer uses two “AA” batteries.
2. Startup Sequence – Follow the correct setup order:
- Insert batteries into sensor 1.
- Insert batteries into the wireless thermometer.
- Wait for the outdoor temperature to appear before adding additional sensors.
3. Signal Obstruction – Walls, windows, or other obstacles can reduce the 330 ft range of the wireless signal. Try placing the sensor closer to the thermometer.
4. Interference – Other electronic devices can interfere with the signal. Move the sensor away from such devices.
5. Sensor Placement – Ensure the sensor is placed in a shaded area, preferably on a north-facing wall, as per the manual's recommendation.
If the thermometer still does not find the sensor, try resetting both devices by removing and reinserting the batteries following the correct startup sequence.
This answer is automatically generated
Screen is blank after changing the batteries?