
Related Manuals for Zoom UAC-8


Summary of Contents for Zoom UAC-8
- Page 1 USB 3.0 Operation Manual © 2015 ZOOM CORPORATION Copying or reprinting this manual in part or in whole without permission is prohibited.
-
Page 2: Table Of Contents
Setting Input and Output Devices ........... 12 Troubleshooting ................24 Playback .................... 13 Specifications ................... 25 Introduction Thank you very much for purchasing a ZOOM USB 3.0 Built-in high-performance mic preamps Audio Converter. The high-performance mic preamps are based on those developed has the following features. -
Page 3: Usage And Safety Precautions
Cont act the store Safety Precautions Caution to suppress interference from external where you bought the unit or ZOOM Warning In this operation manual, symbols electromagnetic waves. However, service with the following information:... -
Page 4: Names Of Parts
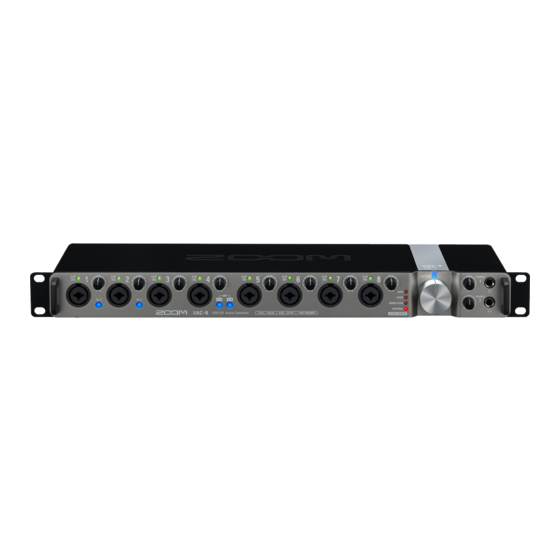
Names of Parts Front Panel Level indicators Input gain knobs INPUT jacks Power indicator The LED lights red when the Use to adjust the input gain of These analog signal input jacks have mic preamps. This lights when the signal clips. the mic preamp. -
Page 5: Rear Panel
Rear Panel POWER switch DC 12V AC adapter MIDI IN/OUT jacks ADAT OPTICAL IN/OUT jacks Turns the connector Connect a MIDI keyboard or Connect optical cables that comply with ON/OFF . Connect the included MIDI controller to the MIDI IN the ADAT Optical standard. -
Page 6: Basic Connections
Basic Connections Bass guitar Drum set Guitar amp Headphones Synthesizer Master clock generator Computer Monitor speakers Monitor speakers DAT deck Mic preamp that supports ADAT optical connection... -
Page 7: Installing The Driver
Do not connect the until installation completes. Download the "ZOOM UAC-8 Driver" from http://www. Launch the installer and install the driver. zoom.co.jp/downloads/ to the computer. Follow the instructions that appear on screen to install the ZOOM UAC-8 Driver. NOTE NOTE above website. -
Page 8: Turning The Power On And Off
Turning the Power On and Off Turning the Power On Minimize the volume of output devices connected to Use a USB cable to connect the and the computer. P l u g t h e A D - 19 a d a p t e r designed for this unit into an outlet. - Page 9 Turning the Power Off Minimize the volume of devices connected to the Confirm that the power indicator is lit. NOTE Turn off connected amps and monitor speakers, for startup and connection with the computer takes time, example. and the power indicator might blink longer sometimes. If it continues to blink even after waiting some time, try turning the power off and on again.
-
Page 10: Independent Mic Preamp Function (Standalone Mode)
Independent mic preamp function (standalone mode) NOTE Minimize the volume of output devices connected to detects the USB connection status and switches the mode automatically as follows. · When connected to a computer: → The will function as an audio interface. (→ P .08) P l u g t h e A D - 19 a d a p t e r ·... -
Page 11: Ipad Connection (Class Compliant Mode)
iPad connection (class compliant mode) Minimize the volume of output devices connected to Connect the and the iPad using an Apple iPad Camera Connection Kit or Lightning to USB Camera Adapter. P l u g t h e A D - 19 a d a p t e r designed for this unit into an outlet. -
Page 12: Setting Input And Output Devices
Settings must be made in DAW software to use the with it for recording and playback. Input device Select the as the computer sound device. Device name Port name Corresponding input ZOOM UAC-8 INPUT1 NOTE INPUT2 INPUT3 INPUT4 procedures to set the sound device in different operating INPUT5 systems. -
Page 13: Playback
Adjusting Headphone and Speaker Volume Adjusting Headphone Volume Adjusting Speaker Volume Connect headphones to PHONES 1 or PHONES 2. Connect monitor speakers to the MAIN OUTPUT jacks. Headphones Monitor speakers Turn the for PHONES 1 or PHONES 2 to adjust the Turn the to adjust the speaker volume. -
Page 14: Recording
Using Instruments and Mics Connecting Instruments Connecting Mics Connect instruments to INPUTS 1 to 8 using TRS/mono Using XLR cables, connect mics to INPUTS 1 to 8. phone cables. Dynamic mic (XLR cable) NOTE Using Phantom Power for the connected INPUT so that it lights. Phantom Keyboard Guitar Bass guitar... - Page 15 Adjusting the Input Gain You can adjust the gain of each INPUT. Check to see the status of an input signal. Turn to adjust the input gain. Lit green: Input signal present. Lit red: Input signal is clipping. HINT Set it so that the level indicator does not light red.
-
Page 16: Using Digital Audio Equipment
Using Digital Audio Equipment About Digital Audio Clock Connecting S/PDIF Devices When the is connected to other digit al audio Minimize the volume of output devices connected to equipment, audio clock must be synchronized in order to transfer audio data between them. If they are not synchronized, noise and various other problems will occur. - Page 17 ►Inputting an S/PDIF signal to the ►Outputting a S/PDIF signal from the to set CLOCK SOURCE to S/PDIF . U s e t o s e t C L O C K S O U R C E t o INTERNAL.
-
Page 18: Connecting Adat Optical Devices
Using Digital Audio Equipment (continued) Connecting ADAT Optical Devices ►Inputting an ADAT optical signal to the to set CLOCK SOURCE to ADAT. Minimize the volume of output devices connected to The ADAT CLOCK SOURCE indicator will blink. HINT When connected, noise might occur until clock synchronizes. Connect the ADAT optical device to the ADAT OPTICAL Set the same sampling rates for the and the... - Page 19 ►Outputting an ADAT Optical signal from the NOTE U s e t o s e t C L O C K S O U R C E t o and the connected INTERNAL. device must have the same sampling rate settings. The INTERNAL CLOCK SOURCE indicator will blink.
-
Page 20: Connecting The Word Clock Connectors
Using Digital Audio Equipment (continued) Connecting the WORD CLOCK Connectors ►Using the connected device as the master clock Use the WORD CLOCK connectors when you want to to set CLOCK SOURCE to WORD synchronize with a master clock generator, for example. CLOCK. - Page 21 ►Using the as the master clock NOTE U s e t o s e t C L O C K S O U R C E t o and the connected INTERNAL. device must have the same sampling rate settings. synchronization with the connected device is not possible, the The INTERNAL CLOCK SOURCE CLOCK SOURCE indicator will blink.
-
Page 22: Connecting Midi Devices
When using a MIDI port with a DAW, for example, follow the IN and OUT jacks. instructions below when making settings. might not function properly otherwise. <Windows> Use [ZOOM UAC-8 MIDI]. Do not use [MIDI IN/OUT 2 (ZOOM UAC-8 MIDI)]. MIDI OUT jack MIDI IN jack <Mac> MIDI IN jack MIDI OUT jack Use [ZOOM UAC-8 MIDI I/O Port]. -
Page 23: Restoring Factory Default Settings
Restoring Factory Default Settings Follow these instructions to initialize settings, restoring them to the factory defaults. P l u g t h e A D - 19 a d a p t e r Initialize the settings. designed for this unit into Execute: Press INPUT 1 an outlet. -
Page 24: Troubleshooting
USB hub. Cannot play or record Cannot use with an iPad is set to "ZOOM UAC-8". power off, and set the CLASS COMPLIANT MODE is set for input and output in the software switch to ON. Then, turn the power on again. -
Page 25: Specifications
Specifications ANALOG INPUT INPUT 1–8 Connectors XLR/TRS combo jacks (XLR: 2 hot, TRS: TIP hot) Input gain 0–60 dB (1 dB steps) Input impedance 5 kΩ 1 MΩ (When IN1/IN2 Hi-Z on) Maximum input level +13 dBu (XLR at 0 dBFS) +21 dBu (TRS at 0 dBFS) Phantom power +48 V... - Page 26 Specifications (continued) Number of recording Audio interface/ Recording: 18 channels (ANALOG: 8, S/PDIF: 2, ADAT Optical: 8) and playback channels standalone mode Playback: 20 channels (ANALOG: 10, S/PDIF: 2, ADAT OPTICAL: 8) at 44.1 kHz and 48 kHz Recording: 14 channels (ANALOG: 8, S/PDIF: 2, ADAT Optical: 4) Playback: 16 channels (ANALOG: 10, S/PDIF: 2, ADAT OPTICAL: 4) at 88.2 kHz and 96 kHz Recording: 12 channels (ANALOG: 8, S/PDIF: 2, ADAT Optical: 2)
- Page 28 For more detailed information about recycling of this product, connected. please contact your local city office, your household waste disposal service or the shop where you purchased the product. ZOOM CORPORATION 4-4-3 Kanda-Surugadai, Chiyoda-ku, Tokyo 101-0062 Japan http://www.zoom.co.jp Z2I-2338-01...
Need help?
Do you have a question about the UAC-8 and is the answer not in the manual?
Questions and answers