Table of Contents
Advertisement
Quick Links
Installation, Operation and
Cast Iron Boiler
B*C-3 sections
B*C-4 sections
B*C-5 sections
B*C-6 sections
B*C-7 sections
B*C-8 sections
*Designates Brand Name
INSTALLATIONS MUST MEET ALL LOCAL AND FEDERAL
CODES THAT MAY DIFFER FROM THIS MANUAL
Please read the manual in its entirety before beginning installation.
This manual must be kept with the boiler for future reference.
GRANBY FURNACES INC.
PO Box 637
12118 Hwy 209
Parrsboro Nova Scotia Canada
B0M 1S0
www.granbyindustries.com
Service Manual
SERIES
30-10-2015
B*C, 3 sections illustraded
G2012-E5 Rev. D
*
*
Advertisement
Table of Contents

Subscribe to Our Youtube Channel
Related Manuals for Granby B*C-3

Summary of Contents for Granby B*C-3
- Page 1 Installation, Operation and Service Manual Cast Iron Boiler SERIES B*C-3 sections B*C-4 sections B*C-5 sections B*C-6 sections B*C-7 sections B*C-8 sections *Designates Brand Name B*C, 3 sections illustraded INSTALLATIONS MUST MEET ALL LOCAL AND FEDERAL CODES THAT MAY DIFFER FROM THIS MANUAL Please read the manual in its entirety before beginning installation.
-
Page 2: Table Of Contents
TABLE OF CONTENTS B*C – Oil IMPORTANT SAFETY ADVICE PRODUCT INFORMATION UNIT INSTALLATION 3.1 PLACEMENT & LEVELING OF THE UNIT 3.2 JACKET ASSEMBLY & CONTROL INSTALLATION PIPING ELECTRIC WIRING CHIMNEY INFORMATION FUEL SYSTEM ACCESSORY INSTALLATION BURNER INSTALLATION & SETTING 10.0 TECHNICAL INFORMATION 11.0 BOILER START UP &... -
Page 3: Important Safety Advice
1.0 IMPORTANT SAFETY ADVICE Please read and understand this manual before installing, operating or servicing the boiler. To ensure you have a clear understanding of the operating procedures of the appliance please take the time to read section IMPORTANT SAFETY ADVICE of this manual. CAUTION DO NOT START THE BURNER UNTIL ALL FITTINGS, COVERS AND DOORS ARE IN PLACE. -
Page 4: Product Information
2.0 PRODUCT INFORMATION PHYSICAL DIMENSIONS Length : ( 3 sections 18 7/8 ‘’ ) ( 4 sections 22 1/2’’ ) ( 5 sections 26 ¼’’ ) ( 6 sections 31 1/8’’ ) ( 7 sections 35 ½’’) ( 8 sections 39 ¼’’) CLEARANCE Proper clearances must be maintained not only from combustible materials but also to provide adequate access for servicing. -
Page 5: Unit Installation
FLUE PIPE CONNECTION CHIMNEY or Direct Vent System DVS Granby kit (3, 4, 5 sections) CLEANOUTS Rear removable smoke hood cover & Combustion Front Door Opening FUEL Not heavier than No.2 fuel oil ELECTRICAL CANADA:120 Volts, 60Hz, 15 amps. fuse or breaker USA: 13.3A, circuit protection 20A,... - Page 6 STEP 1: VERIFY CONTENTS OF JACKET ASSEMBLY PACKAGE. Your jacket assembly will contain two (2) manifolds with gaskets, a fastening package which includes all necessary bolts, screws, nuts and washers for assembly along with burner studs, nuts and washers, block insulation, rear of block insulation, aluminum faced tape, leveling frame rails, two (2) side panels, a rear panel top panel and re-insulated top and bottom front panels.
- Page 7 STEP 4: INSULATION INSTALLATION Drape the large piece of block insulation directly over the block taking care to provide adequate clearance from frame rails. Using the aluminum faced tape attach the preshaped rear inslulation to the block insulation. The process is simply taping the two pieces together. The front panels come pre-insulated.
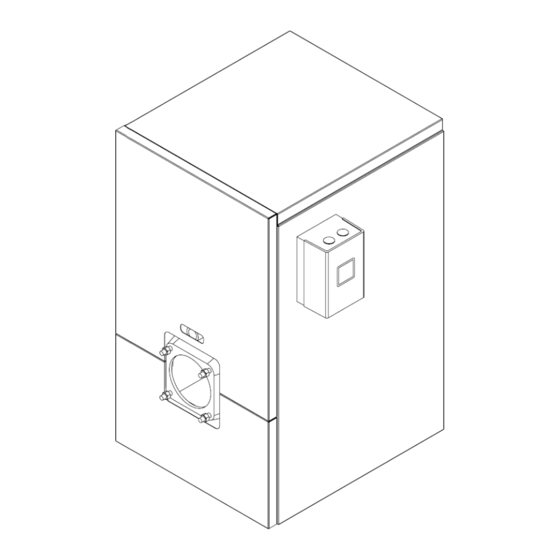
- Page 8 STEP 6: CONTROL SENSOR ATTACHMENT Prior to jacket top and front panel installation the control sensor must be inserted into the brass well located on the top of the boiler and secured by a clip. Feed the sensor through the hole on the front of the right side panel from the outside.
-
Page 9: Piping
Honeywell L7248 Aquastat or Fuel Smart HydroStat 3250 boiler control. B*C-3 sections boiler illustrated The boiler is now ready for piping and connection to the fuel system, heating and domestic hot water, thermostat and 110 Volt 60 cycle AC current. - Page 10 Circulation Pump A calculation for proper pump selection must be performed for all installations. The pump(s) should not be operated at maximum working pressures above 30 psi or maximum working temperatures above 200° F and within limits advised by the manufacturer. The pump must not be operated unless the system has been bled of all air and completely filled with water.
- Page 11 Figure 2 A typical installation with no domestic hot water and with a by-pass loop installed. Figure 3 A typical installation with domestic hot water supplied by an indirect heater and with no by-pass loop installed.
-
Page 12: Electrical Wiring
Figure 4 A typical installation with domestic hot water supplied by an indirect heater and with a by-pass loop installed. 5.0 ELECTRICAL WIRING All external wiring must be performed in compliance with existing electrical codes within the local jurisdiction. In Canada the CSA, STANDARD C22-1 and the Canadian Electrical Code. Connections should be carried out in accordance with this manual and only by qualified individuals. - Page 13 Typical wiring for line voltage oil burner with Honeywell L7248 and one heating zone. Typical wiring for line voltage oil burner with Fuel Smart HydroStat 3250 and one heating zone Insert sensor ALL THE WAY into well through the knockout (A or B) you have chosen WARNING For Canadian application, see page 15 &...
-
Page 14: Chimney Information
If the masonry, brick, block chimney or tile chimney liner is in poor condition a new chimney liner rated for oil may have to be installed. In the event the condition still exists after installation of a new liner consult Granby Industries. -
Page 15: Fuel System
7.0 FUEL SYSTEM The fuel system piping must comply with the pump manufacturers’ specifications which are included with the burner. In addition, all fuel system piping must comply with local codes and ordinances. • The quality of your fuel oil is of great importance. For most instances your burner is designed to burn clean water free #2 fuel oil. -
Page 16: Accessory Installation
5) Insert the threaded tube end into the pierced hole of the flue vent pipe. 6) Install the securing nut on the safety switch tube, which protrudes into the flue vent pipe. Tighten the nut securely. Figure 1- Figure 2- BVSO wiring diagram with L7248 Illustration Granby Industries Aquastat... -
Page 17: Burner Installation & Setting
Thermostat Figure 3- BVSO wiring diagram with Fuel Smart HydroStat 3250 control Wiring BVSO (Figure 2 or figure 3) Caution: Disconnect the electrical power when wiring the unit. Wire the blocked vent switch in accordance with The National Electrical Code and applicable local codes. - Page 18 SELECT NOZZLE Select oil input, nozzle and burner configuration as shown on boiler operating decal. INSTALL NOZZLE Install selected nozzle, check for clean seating and tighten in nozzle adaptor. ELECTRODES See burner manufacturer’s instructions for correct setting INSERTION MOUNT BURNER Tighten top nut first so burner tips down slightly.
- Page 19 SAMPLING HOLE On smoke/vent pipe, drill a 3/8” round opening. The hole should be at least 2 flue pipe diameter from breeching or elbow of the boiler. REAR FLUE BOILER ILLUSTRATION DRAFT PRESSURE Using an accurate draft meter; adjust the draft control to obtain -0.03” w.c.
- Page 20 1. Take a CO2 test and note the result CO2 test can be done mechanically or electronically 18 full slow steady pump action 2. Open the air band adjustment on the burner to reduce your CO2 reading by 1% You now have a perfect “slight trace” of smoke. Relation between % of CO and O Excess Air (%)
-
Page 21: Technical Information
In the Unit Model number, is specific information of the product for administration only. ** = 3H for Honeywell control L7248 (high limit only, cold start application) ** = 3L for Fuel Smart HydroStat 3250 (high limit cold start operation or low limit operation) GRANBY B*C CAST IRON SERIES Shipping Appliance No. -
Page 22: Boiler Start Up & Operation
11.0 BOILER START UP AND OPERATION 11.1 START UP PROCEDURE • Prior to start up make sure the service switch is in the OFF position. • Check all fittings and wiring. • Insure that the boiler and the entire heating system are completely filled with water and that all air has been purged from the system resulting that proper system pressure is achieved. -
Page 23: L7248 Honeywell Aquastat
TROUBLE SHOOTING THE HONEYWELL L7248 AQUASTAT When attempting to diagnose system performance, reference to the LED display can help to identify specific areas not working properly. The LED display will scroll ERR, followed by a digit (1-8). Refer to the information inside the cover of the control L7248. Error Codes Err 1 Sensor fault... -
Page 24: Fuel Smart Hydrostat 3250 Boiler Control
11.3 HydroStat 3250 Control Setting the control DIAGNOSTIC LEDs and Test Button Thermostat ZONE/Indirect switch DYNAMIC DISPLAY (B) JUMPER Temperature / Setting Indicator Light Heat Call (C) Low Temperature Limit Setting (OFF or 110F-200F (A) High temp. limit setting Factory OFF 100F-220F Factory set at 190F (D) Economy Dial (OFF or... - Page 26 Trouble Shouting the HydroStat 3250...
-
Page 27: Maintenance And Service
12.0 MAINTENANCE / SERVICE Your heating appliance is designed to be maintained and serviced only by your heating professional. The following sections provide information on maintenance and service related activities. In the event a problem occurs consult your heating professional. •... -
Page 28: Cleaning The Boiler
12.1 CLEANING THE BOILER Section cleaning should only be performed by a service technician and must only be performed when the boiler is out of service. The following steps should be followed: • Remove the 2 front panels by sliding it upwards to release and then pull to remove. •... -
Page 29: Exploded Parts View
13.0 EXPLODED PARTS VIEW Exploded Parts View... - Page 30 Part List G*C FRONT SECTION GC PNA - POCKET FOR SENSING BULBS G*C INTERMEDIATE SECTION TAPPING WITH AIR RELIEF VALVE G*C REAR SECTION REAR CASING NIPPLE SPECIAL PIN FOR CASING ASSEMBLY STAYBOLTS FIBRE-GLASS ROPE DIA. 10 BODY INSULATION HINGE PIN FRONT DOOR (MONOBLOCK) HINGE - LEFT HAND SIDE FRONT INSULATION...
-
Page 31: Start Up Test Results
14.0 START-UP TEST RESULTS Model: Serial Number: Boiler, # sections Date of installation: Installer (name & address): TEST RESULTS Size of unit (Btu/h): Nozzle: Oil Pressure (psi): Chimney size ____________ Direct vent system (DVS) _________ Burner adjustments: RIELLO F3___ BF3___ RIELLO F5___ BF5___ RIELLO F10____ Turbulator:... - Page 32 Granby Furnaces Inc. manufactures a full line of oil and gas-fired boilers in its 70,000 square feet facility. Granby products are sold across Canada and the United States through a distribution network. Our team of engineers, designers and technicians continually research and develop products to go beyond the demanding specifications of today’s certifications.
Need help?
Do you have a question about the B*C-3 and is the answer not in the manual?
Questions and answers