Table of Contents
Advertisement
Quick Links
Advertisement
Table of Contents

Subscribe to Our Youtube Channel
Related Manuals for Vivitar VIV-DF-3000


Summary of Contents for Vivitar VIV-DF-3000
- Page 1 24-105 Zoom Speedlite DSLR AF Flash VIV-DF-3000 User’s Manual...
- Page 2 To obtain Warranty Service and Troubleshooting information: Call 1-800-592-9541 in the U.S. or 0-800-917-4831 in the UK or Visit our website at www.vivitar.com. To receive Warranty service along with the name and address of an authorized product service center, the original consumer purchaser must contact us for problem determination and service procedures.
- Page 3 Vivitar One year Warranty (continued) NO WARRANTIES, WHETHER EXPRESS OR IMPLIED, INCLUDING, BUT NOT LIMITED TO, ANY IMPLIED WARRANTIES OF MERCHANTABILITY OR FITNESS FOR A PARTICULAR PURPOSE, OTHER THAN THOSE EXPRESSLY DESCRIBED ABOVE SHALL APPLY. DISTRIBUTOR FURTHER DISCLAIMS ALL WARRANTIES AFTER THE EXPRESS WARRANTY PERIOD STATED ABOVE. NO OTHER EXPRESS WARRANTY OR GUARANTY GIVEN BY ANY PERSON, FIRM OR ENTITY WITH RESPECT TO THE PRODUCT SHALL BE BINDING ON DISTRIBUTOR.
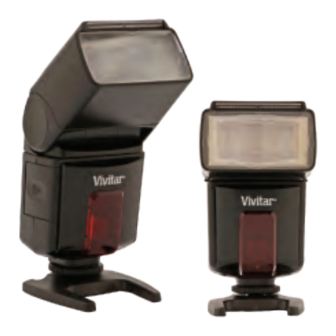
- Page 4 Introduction Congratulations on your purchase of the Vivitar VIV-DF-3000 flash unit. This electronic flash is innovatively designed for digital cameras, with advanced technology used to control the correct amount of light output. Please kindly take a few minutes to read this instruction manual before using.
- Page 5 Important Notes for Flash Photography and Maintenance 1. After taking a picture, wait for at least 4-5 seconds for the flash to be fully charged before taking the next shot even though the ready light is on. This will help prolong the lifespan of the flash tube and also to attain the full charging capacity of the flash capacitor for precise flash photography.
- Page 6 Important Notes for Flash Photography and Maintenance (cont.) 6. Bounce should only be used on lighter color ceilings or white walls with the zoom head set at the 35mm position. Note that when using this feature, 2-3 f/stops of light will be lost due to reflection.
-
Page 7: Installing Batteries
Installing Batteries In order to power on your flash, you will first need to install batteries. To do so, first ensure that the ON/OFF switch is in the OFF position. Next, open the battery compartment, and insert 4 new AA batteries with the correct polarity (+,-) as indicated inside the battery compartment. - Page 8 Mounting the Flash Onto Your Camera Once batteries are inserted into your flash, you can proceed to mount it onto your camera. To do so, first ensure that the ON/OFF swtch is in the OFF position. Next, slide the flash’s hotshoe base onto the camera’s hot shoe then rotate the lock ring until it is fastened securely.
-
Page 9: Power Saving Function
Auto Check Light The Green Auto Check Light (OK) located on the back of the flash is used to confirm that your subject is within the effective TTL range of the flash unit. If your subject is within the effective TTL flash range after shooting, the green Auto Check Light will illuminate for approximately 2 seconds. - Page 10 PROGRAM TTL (P) / AUTO MODE This flash unit provides automatic Through-The-Lens (TTL) control of the flash exposure when used with dedicated digital cameras. When using this mode, the flash unit will automatically emit the flash output for a balanced illumination of the subject and background.
- Page 11 TTL AV, TV AND M MODES When this flash unit is used with your camera set to AV, TV or M modes, the flash exposure will be automatically controlled by the camera based on the combination of shutter speed and aperture value. *For TV mode, do not exceed the camera’s maximum flash synchronization speed.
- Page 12 SECOND/REAR CURTAIN SYNCHRONIZATION This mode permits you to fire the flash just before your camera’s shutter closes during slow shutter speed shooting. This will create a trail of lighting that will be appear behind the main subject when a slow shutter speed is being used. *For more information on rear curtain synchronization settings, refer to your camera’s instruction manual.
-
Page 13: Red-Eye Reduction
RED EYE REDUCTION When red eye reduction is activated on the DSLR body, the flash unit will activate a series of preflashes before the main flash to reduce the possibility of red eye occurrence during shooting. -12-... - Page 14 USING THE BOUNCE HEAD Various combinations of bounce angles can be used to cut off unwanted shadows or for special soft effect purposes. Direct Flash Indirect Flash USING THE ZOOM HEAD For proper angle coverage, set the flash zoom head position so that it corresponds with the zoom position of the camera’s lens.
-
Page 15: Specifications And Features
SPECIFICATIONS AND FEATURES • Guide Number 59m at 85 zoom position • Auto Focus / TTL Metering • Focus Beam to Assist in • Automatic Shutter Speed Setting Low Light Conditions • 6 Way Flash • Bounce Up/Down • Zoom In/Out •...
Need help?
Do you have a question about the VIV-DF-3000 and is the answer not in the manual?
Questions and answers