Table of Contents
Advertisement
Quick Links
A
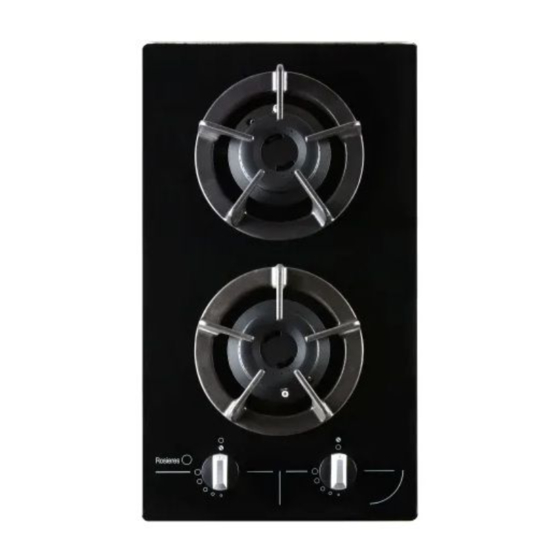
Gas Built-in Domino
Model –RVG1TG
RVG2TG
INSTALLATION INSTRUCTIONS
(FOR REGISTERED GAS INSTALLER ONLY)
&
USER AND OPERATOR INSTRUCTIONS
Installation must be in accordance with manufacturers' instruction, relevant
Gas Fitting Regulations, AGA Installation Code for Gas Burning Appliances
and Equipment and any codes and regulations.
These instructions should be read carefully prior to initial use and retained in
a safe place in order that full advantage can be taken of the features of your
DOMINO
ANY SERVICING OF THE DOMINO & INSTALLATION MUST
BE CARRIED OUT BY A REGISTERED GAS INSTALLER.
YOUR HOB IS DELIVERED PRE-SET FOR TOWN GAS USE
1
Advertisement
Table of Contents

Related Manuals for ROSIERES RVG1TG


Summary of Contents for ROSIERES RVG1TG
- Page 1 Gas Built-in Domino Model –RVG1TG RVG2TG INSTALLATION INSTRUCTIONS (FOR REGISTERED GAS INSTALLER ONLY) & USER AND OPERATOR INSTRUCTIONS Installation must be in accordance with manufacturers’ instruction, relevant Gas Fitting Regulations, AGA Installation Code for Gas Burning Appliances and Equipment and any codes and regulations.
-
Page 2: Installation Instructions
INSTALLATION INSTRUCTIONS DATA PLATE DETAILS: The data plate is located on the front side of the tray. According to the Gas Safety Regulations of Hong Kong, any gas installation works including the installation of appliances and connection tubing, must be undertaken by registered gas installers who are registered for that appropriate classes and be employed by registered gas contractors. - Page 3 Diagram C Overall dimension description 3. Remove the Domino from the carton. The protection must extend a minimum distance of 450mm above the burner. Horizontal surfaces less than 750mm vertically above the Domino must also be protected. Keep all natural air-vents open or have a mechanical ventilation system installed (a mechanically ventilated hood).
- Page 4 6. Test the appliance: Depress the control knob and turn to full flame setting. • The burner will ignite. Adjust control knob to desired setting. Normally, • no adjustment should be necessary. If any problems occur, refer to the fault isolation chart. •...
-
Page 5: Burner Operation
The Domino is unique in its burner design and layout. It is fitted with the ultra hi-speed burner. The model RVG1TG is specifically designed for WOK COOKING. It delivers up to one and a half times the flame heat and spreads compared to normal hi-speed burners. All burners retain normal simmer cooking facilities. - Page 6 Do not wash burner caps in a dishwasher For ease of cleaning, remove spillage from the bowls as soon as possible. Control knobs may be pulled off for cleaning beneath them, but take care not to allow water to enter the holes in the glass plate. When re-assembling the spillage bowl always ensure that it is correctly located over the spark electrode.
-
Page 7: Safety Hints
SAFETY HINTS Always turn pan handles to the side or back of the Domino – not out into the kitchen where they can easily be knocked. Do not wear loose fitting garments while the burners are in operation, due to the possibility of fabric ignition, which may result in personal injury. - Page 8 WARNING: Do not spray aerosols in the vicinity of this Domino while it is in operation. Some propellant gases can break down when heated and produce corrosive vapors, which will attack some materials. Do not store any flammable materials, sprays or pressurized containers inside the stove cabinet.
-
Page 9: Servicing Instructions
SERVICING INSTRUCTIONS (For registered gas installer only!) MINOR ADJUSTMENTS Access to By Pass Screw Access to manifold, gas taps and burner assembly Light the burner and turn to minimum Remove glass hob and control knobs. setting (marked small flame). To remove gas cocks. Unscrew the The flame should be stable on minimum locking (between... -
Page 10: Specification Table
SPECIFICATION TABLE I t e m s I t e m s U n i t U n i t M o d e l n o M o d e l n o M o d e l n o M o d e l n o I t e m s I t e m s... - Page 12 1. RVG1TG 2. RVG2TG 安裝和操作說明書 安裝和操作說明書 安裝和操作說明書 安裝和操作說明書...
- Page 13 安裝說明 安裝說明 安裝說明 安裝說明 數 據 標 示 詳 情 數 據 標 示 詳 情 : : : : 數 據 標 示 詳 情 數 據 標 示 詳 情 2 . 2 . 2 . 2 .
- Page 14 3 . 3 . 3 . 3 . 5.0kW X 2 = 10 m3/h 4.8kW X 2 = 9.6 m3/h 4 . 4 . 4 . 4 . 5 . 5 . 5 . 5 . ½...
- Page 15 6 . 6 . 6 . 6 . 7 . 7 . 7 . 7 . 8 . 8 . 8 . 8 . 9 . 9 . 9 . 9 . 1 0 . 1 0 . 1 0 . 1 0 . 1 1 .
- Page 16 操 操 操 操 作說明 作說明 作說明 作說明 點 火 點 火 點 火 點 火 ¼ 控 制 器 控 制 器 控 制 器 控 制 器 爐 頭 的 操 作 爐 頭 的 操 作 爐 頭 的 操 作 爐...
- Page 17 盡 可 能 早 點 除 去 爐 碟 的 湯 料 和 食 物 。 控 制 旋 鈕 可 以 拉 出 , 便 於 清 潔 下 面 , 但 是 要 小 心 勿 使 水 進 入 玻 璃 面 上 的 孔 中 。 當...
- Page 18 安 全 提 要 安 全 提 要 安 全 提 要 安 全 提 要 將 鑊 柄 轉 到 側 面 或 爐 具 的 背 面 , 而 不 是 朝 向 在 廚 戶 易 於 碰 撞 到 的 方 向 。 在...
- Page 19 警 告 警 告 警 告 警 告 : : : : 爐 具 在 使 用 的 過 程 中 , 請 勿 在 附 近 噴 氣 溶 膠 。 在 高 溫 時 , 有 些 壓 縮 燃 氣 會 發 生 化 學 變 化 , 產 生 一 些 侵 蝕 某 些 材 料 的 腐 蝕...
- Page 20 維修資料 維修資料 維修資料 維修資料 ( ( ( ( 所有程序 所有程序 所有程序必須由註冊氣體裝 所有程序 必須由註冊氣體裝 必須由註冊氣體裝置技工進行 必須由註冊氣體裝 置技工進行 置技工進行 置技工進行) ) ) ) 細 火 調 節 細 火 調 節 細 火 調 節 細 火 調 節 點 燃 爐 頭 , 旋 轉 至 最 小 設 定 ( 標 有 小 火 焰 ) 在...
- Page 21 故 障 檢 索 表 故 障 檢 索 表 故 障 檢 索 表 故 障 檢 索 表 故 障 故 障 故 障 故 障 原 因 原 因 原 因 原 因 解 決 方 法 解...
- Page 22 爐 具 規 格 表 爐 具 規 格 表 爐 具 規 格 表 爐 具 規 格 表 R V G 1 T G R V G 2 T G D C 1 . 5 D C 1 . 5 2 .
Need help?
Do you have a question about the RVG1TG and is the answer not in the manual?
Questions and answers