
Related Manuals for Samsung SCH-R312 Series


Summary of Contents for Samsung SCH-R312 Series
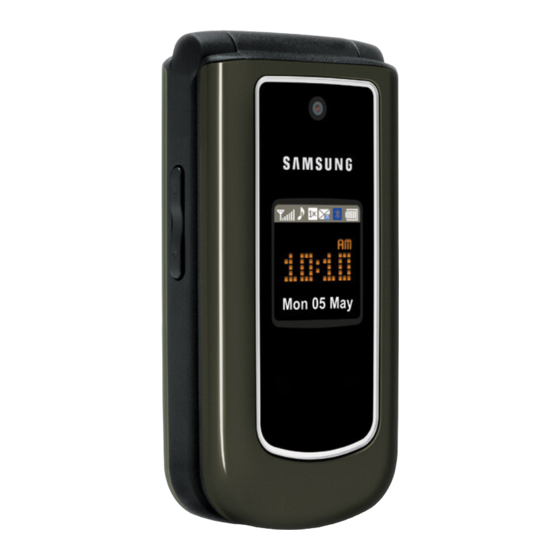
- Page 1 SCH-R312 Series P O R T A B L E D U A L - B A N D M O B I L E P H O N E User Manual Please read this manual before operating your phone, and keep it for future reference.
-
Page 2: Intellectual Property
Intellectual Property All Intellectual Property, as defined below, owned by or which is otherwise the property of Samsung or its respective suppliers relating to the SAMSUNG Phone, including but not limited to, accessories, parts, or software relating thereto (the “Phone System”), is proprietary to Samsung and protected under federal laws, state laws, and international treaty provisions. - Page 3 Certain activities, including downloads or transfer by any means (including, via cable, Bluetooth® or otherwise) of such content may be an infringement of privacy or copyright law. Neither Samsung Electronics Canada Inc. nor any of its affiliates shall be liable or responsible for any data or content disclosed, reproduced, downloaded or distributed by the user of this equipment.
-
Page 4: Table Of Contents
Table of Contents Section 1: Getting Started ..........4 Section 4: Menu Navigation ..........27 Understanding this User Manual ......4 Menu Navigation . - Page 5 Section 12: Multimedia ............ 73 Chat View ......... 47 Message Boxes .
- Page 6 Section 17: Voice Service ..........98 Section 18: Health and Safety Information ....103 Getting the Most Out of Your Reception ....103 UL Certified Travel Adapter ......104 Caring for the Battery .
-
Page 7: Section 1: Getting Started
Section 1: Getting Started This section explains how to start using your Samsung Important — Points out important information about the current feature • SCH-R312 phone by activating your service, setting up your that could affect performance, or even damage your phone. -
Page 8: Removing The Battery
Place the battery over the battery (1) and press lightly Important!: You must fully charge the battery the first time you use your upward (2) until it clicks into place. phone, otherwise you could damage the battery. Removing the Battery Insert the top end of the battery first, matching the gold Press and hold to turn off the phone (if on). -
Page 9: Charging The Battery
Charging the Battery Your phone is powered by a rechargeable standard Li-Ion battery. Only use Samsung-approved charging devices and batteries. Samsung accessories are designed to maximize battery life. Use of other accessories may invalidate your warranty and may cause damage. -
Page 10: Activating Your Phone
Low Battery Indicator Turning Your Phone On If closed, open your phone, as The battery indicator ( ) in the upper-right corner of the display indicates power level. Monitor the battery strength and shown. ensure your battery is adequately charged. Press . - Page 11 Listen to Voicemail Press and hold for two or more seconds. Your phone powers off. In standby mode, press and hold or dial your own mobile number to dial Voicemail. After connecting, you will Note: If your phone is on and you press for less than one second, the hear your voice greeting.
-
Page 12: Section 2: Understanding Your Phone
Section 2: Understanding Your Phone Closed View of Your Phone This section outlines some key features of your phone. It also describes the screen format and the icons that will be displayed when the phone is in use. Features of Your Phone Domestic and international voice and text messaging service (available •... -
Page 13: Open View (Front) Of Your Phone
Open View (Front) of Your Phone Front Display — Indicates the status of your phone, including status icons, message indicators, signal strength, and so on. Camera Key — Launches the Camera feature of your phone and takes photos. Power / Accessory Connector — Used to connect an optional headset (for hands free operation), or optional TTY device, charging accessories, or optional accessory cables to your phone. -
Page 14: Command Keys
Navigation Key — In Menu mode, lets you scroll through the CLR Key — Deletes characters from the display when you phone menu options. In Standby mode, lets you access are in text entry mode. Press this key to return to the preset functions and one user-defined function. -
Page 15: Right Soft Key
Left Soft Key Send Key Some functions of the Left soft key ( ) are as follows: The Send key ( ) is used to answer calls, dial calls, and to recall the last number(s) dialed, received, or missed. In standby mode, press the Msgs soft key ( ) to launch the •... -
Page 16: Understanding The Display Screen
Navigation Key The sample screen shows that pressing the Left (Msgs) soft key will launch the Messages menu, pressing OK ( ) will Use the directional keys on the Navigation key ( ) to browse menus, sub-menus, and lists. Each directional key also acts as a display the Main Menu, and pressing the Right (Contacts) shortcut to launch applications. -
Page 17: Your Phone's Modes
Placing Calls in Standby Mode – Example: “Message Saved” Information • To place a call while in standby mode, enter a phone – Example: “New Message” number, and press Error • To return to standby mode, press – Example: “System Error!” Receiving Messages in Standby Mode Warning •... - Page 18 To enter Silent Mode: When you are satisfied with the setting, press SET. Your phone returns to standby mode. In standby mode, press and hold . “Entering Silent Mode” briefly appears in the display and your phone returns Tip: You can also enter the Volume > Voice Calls sub-menu by pressing Menu ➔...
- Page 19 To exit Speakerphone Mode: Note: You can also enter Camera mode by pressing Menu ( ) and selecting During a call, press the Options soft key, then select Speaker ➔ Multimedia Camera. Off. Choose the Yes or No from the pop-up menu. Input mode Handsfree Mode Input mode determines how you enter text, numbers, and...
-
Page 20: Section 3: Call Functions
Section 3: Call Functions This section explains how to make and answer calls. This section Important!: Because of various transmission methods, network parameters, also includes the features and functionality associated with making and user settings necessary to complete a call from your wireless or answering calls. -
Page 21: Manual Pause Calling
Call Another Country — Shortcut Method 2-Sec Pause — P pause — A two-second pause stops the calling • sequence for two seconds and then automatically sends the remaining In standby mode, press and hold digits. until a plus sign (+) appears in Wait —... -
Page 22: Making A Call - Speed Dialing
Making a Call — Speed Dialing Three-Touch Dialing You can store phone numbers and contact names in your phone’s Memory locations 100 through 999 are special Three-Touch Contacts list. Speed Dialing lets you quickly and easily dial any dialing locations. contact in your Contacts list by using that contact’s location number in the list. -
Page 23: Making A Call - Voice Dialing
Quick Search Dialing a Contact Voice Dialing Tips: Wait for the beep before speaking. • To find and dial a Contact, do the following: Speak clearly at a normal volume, as if you were talking to someone on • In standby mode, press the number keys that correspond to the phone. - Page 24 Say “Yes” to confirm the name or “No” to hear the next Say “Call”. name, or use the keypad to select the correct name from the VoiceSignal prompts you to “Say the name or #”. list. (For more information, refer to “Choice Lists” on Speak clearly and say the telephone number of the person page 99.) you want to call.
-
Page 25: Answering A Call
Answering an Incoming Call If you voice dial a contact that contains (hard) P pause(s), wait for the • appropriate prompt(s) from the number you are calling (credit card Open the flip on your phone, if closed, and/or press number, bank account number, and so on) and enter the appropriate The ring tone and/or vibration stop and the caller’s voice response(s). -
Page 26: Ignoring A Call
Review the Calls Log • Speaker On / Off — Enables/disables Speakerphone mode during this call. (For more information, refer to “Speakerphone In standby mode, press Menu ( ), then select Calls. The Mode” on page 15.) following Calls logs and options appear in the display: Do one of the following: •... - Page 27 Incoming Calls At the Calls menu, select Outgoing Calls. A list of your outgoing calls appears in the display. Your phone retains information about the last 90 Incoming calls and stores them in the Incoming call log. You can review the Highlight a call, then press OPEN ( ) to view the Name Incoming call log for the time and date of the call, as well as other...
-
Page 28: Missed Calls
Press the Msgs soft key to launch Create Txt Msg. Press the Msgs soft key to launch Create Txt Msg. Missed Calls All Calls Your phone retains information about the last 90 missed calls You can review all of the calls log entries (outgoing, incoming, and (calls that were never picked up) and stores them in the Missed missed calls) for the time and date of a call, as well as other call log. -
Page 29: Call Timer
Call Timer To exit the Call Timer list, press View the duration of your last call, total calls, and calls made Note: Although most call timers can be erased, the Lifetime call timer can during the life cycle of you phone using the Call Timer feature. never be erased. -
Page 30: Section 4: Menu Navigation
Section 4: Menu Navigation Return to the Previous Menu This section explains the menu navigation for your phone. It also includes an outline of all the available menus associated with your Press the Back soft key to return to a previous menu. •... -
Page 31: Navigate Using A Shortcut
Navigate Using a Shortcut You can also access menus and sub menus using menu numbers. After pressing Menu ( ), press the menu number to go directly to the menu or sub menu of your choice. Before you can navigate using a shortcut, you’ll need the menu or sub-menu number that you wish to access. -
Page 32: Section 5: Entering Text
Section 5: Entering Text This section outlines how to select the desired text entry mode • Symbols — Using the phone keypad, enter a symbol into your message when entering characters using the phone keypad. This section by pressing the number above the symbol in the Symbols pop-up also describes how to use the T9 predictive text entry system to window. -
Page 33: Using T9® Mode
Enter characters while in Abc mode by pressing a key then select T9Word. repeatedly until the desired character appears in the display. For practice, enter the word “Samsung” by pressing each of the following keys only once: Example: Press once for “G” and twice for “H”. -
Page 34: Entering Symbols
Entering Symbols Enter symbols such as “@” or “%” into a text message. While composing a text message, press the Left soft key, then select Symbols. The first of three symbol screens appears in the display. Use the Prev and Next soft keys to page through the other symbols, if desired. -
Page 35: Section 6: Understanding Your Contacts
Section 6: Understanding Your Contacts This section details how you can manage your daily contacts by The following options appear in the display: storing their names and numbers in your Contacts list. You can • Find — Find a Contacts entry by name. have your Contacts entries sorted by name. -
Page 36: Finding A Contacts Entry
Finding a Contacts Entry • Press to dial the number associated with the name. • Press the Edit soft key to add or change information for this entry. Shortcut Key Method • Press VIEW ( ) to show information about the entry. If you’ve stored a name entry in Contacts, Find allows you to find it •... - Page 37 To look up information for a specific contact: The contact information for the name you selected appears In standby mode, press and hold to launch in the display. VoiceSignal. • To dial the number associated with the name, press • To remove this entry from your Contacts list, press the Erase soft “Say a Command”...
-
Page 38: Adding A New Contacts Entry
Press the Up navigation key. A list of The Create New screen appears in the display showing the Contact names that begin with letters following icons: corresponding to the number keys Mobile Home Work you pressed appears in the display. Pager Highlight the searched for Contact. -
Page 39: Editing A Contacts Entry
Highlight one of the following fields: Use the Navigation key to review the information for the entry that you wish to change, then press EDIT ( ). The • Mobile Edit Contact screen appears in the display. • Home • Work Use the Navigation key to highlight the particular •... - Page 40 • To discard your changes, press . You are prompted to confirm Press Options. The following pause options appear in the exiting without saving your changes. Press the Yes soft key to display: discard your changes. • 2-Sec Pause — A 2-second pause after which dialing resumes. Add Pauses to Contacts Numbers •...
-
Page 41: Saving A Number After A Call
Highlight the desired Contacts entry, then press the Edit soft • My Sounds Select the desired option. The My Ringtones or the My key. Sounds file list appears in the display. The Edit Contact screen appears in the display. Select the ringtone or sound that you wish to assign to the Highlight the Email field. -
Page 42: Speed Dial
• Update Existing — Lets you add the number you entered to an Contacts list with the Go To field and the first Contacts entry existing Contacts entry. highlighted. Follow the instructions in the upcoming sections depending Find the Contacts entry to which you want to add the new on whether the number is a new entry or you wish to add it number. - Page 43 • Wait — A hard pause (waits for input from you). Example: To speed dial the Contacts entry assigned to Speed Dial 5, press • 2-Sec Pause — A 2-second pause after which dialing resumes. and hold , (1-touch dialing). (For more information, refer to “Add Pauses to Contacts To speed dial the Contacts entry assigned to Speed Dial 35, press Numbers”...
-
Page 44: Contacts Groups
Assignment to an Existing Entry • Set as default — Set the number the phone will dial when Contacts dialing, speed dialing, or voice dialing. Find the Contacts entry you want to edit. (For more • Wait — A hard pause (waits for input from you). information, refer to “Finding a Contacts Entry”... - Page 45 Create a Contacts entry (see “Adding a New Contacts In standby mode, press Menu ( ), then select Contacts ➔ Entry” on page 35) or find a Contacts entry (see “Finding a Group. Contacts Entry” on page 33) that you want to add to a The Group List screen appears in the display showing Group.
- Page 46 Do one of the following: Press the Remove soft key. You are prompted to confirm the removal of the selected Contact. • Use the Navigation key to highlight an entry you want to add to the group, then press MARK ( ).
-
Page 47: Memory Info
Add a New Group To confirm erasure of the Group, press the Yes soft key. To retain the Group, press the No soft key. The New option lets you add Groups. In standby mode, press Menu ( ), then select Contacts ➔... -
Page 48: Section 7: Messaging
Section 7: Messaging This section explains how to send or receive different types of Enter the phone number or Email address of the recipient, messages. This section also describes the features and or press the Add soft key and select a Contact entry, a functionality associated with messaging. -
Page 49: Receive Text Messages
• Add To Contacts — Save the recipient’s number or Email View Now — Opens the message, where you have the option to • address as a Contacts list entry. Forward, Reply With Copy, Save Quick Text, Lock, Add To Contacts, Once you’re finished entering your message, press SEND Message Info, or Extract. -
Page 50: Chat View
Select an option to perform its function. The following icons indicate which responses are incoming and outgoing: Note: For more information on received message options, see “Inbox” on Incoming Message page 47. Outgoing Message View a Text Message Later In standby mode, press the Msgs soft key, then select Inbox. Message Boxes The Inbox screen appears in the display. - Page 51 • Chat view: To access other options, press the Options soft key. The – View Last Message — Displays the most recent message following options appear in the display: exchanged with this sender/addressee in Normal mode. • Reply — Compose and send a reply message to the originator of –...
-
Page 52: Draft Box
Review Messages in the Outbox Managing Outbox Messages In standby mode, press the Msgs soft key, then select In standby mode, press the Msgs soft key, then select Outbox. Your list of sent messages appear in the display. Outbox. Your list of sent messages appear in the display. Highlight a message that you wish to review, then press Highlight a message, then press Erase to remove the OPEN (... - Page 53 Create a Draft Message Press the Options soft key to complete the message text and set message send options. The following options In standby mode, press the Msgs soft key, then select Send appear in the display: Message. The Create Text Msg screen screen appears in the display showing the To: list.
- Page 54 Managing Draft Messages Voicemail In standby mode, press the Msgs soft key, then select New messages in your voice mailbox are indicated by the Drafts. A list of any draft messages that you’ve composed voicemail icon ( ) and are logged in the Voicemail box of the Messages menu.
-
Page 55: Erase Messages
Message Settings Note: You can also press and hold to dial your voice mailbox. Use the Msg Settings sub-menus to define general settings and Erase Messages text message settings. General Message Settings Using Erase Messages, you can erase all of the messages in each of your boxes from one convenient location. -
Page 56: Text Message Settings
Select the desired option to enter the highlighted option’s Note: You cannot change or erase pre-loaded Quick Texts. sub-menu. • Enter/change the text content of your Quick Text using the Editing and Entering Quick Text keypad. (For more information, refer to “Entering Text” on In standby mode, press the Msgs soft key, then select Msg page 29.) To erase a Quick Text:... -
Page 57: Section 8: Alarm Clock
Section 8: Alarm Clock Your phone has an alarm clock that can be set to go off once, or Highlight the options you wish to daily at a specified time. Once set, the alarm clock is easy to change, then select values for the change or turn off completely. - Page 58 • If the alarm was set as a Weekends only alarm, the alarm icon • On / Off — Enables or disables the highlighted Alarm, using remains in the top of the display. current settings. • If the alarm was set as a Once only alarm, the alarm icon •...
-
Page 59: Section 9: Changing Your Display Settings
Section 9: Changing Your Display Settings Wallpaper This section shows you how to change your phone’s menu appearance, display brightness and contrast, and display content Wallpaper lets you choose the images that appear in the to better meet your needs. background of your phone’s front and main displays while your Accessing the Display Menu phone is closed or in standby mode. -
Page 60: Clock Format
• Samsung • Front Clock Select the Clock you wish to reformat. The following options appear in the display: • Samsung — Main Clock only • Digital • Analog — Main Clock only • Off Note: The Clock Format setting for the Front Clock automatically changes to Off when you change the Wallpaper setting for the Front Display. -
Page 61: Dialing Font Size
Banner • Plush Create your own personalized greeting that appears in the display while your phone is in standby mode. At the Display menu, select Banner Tip: Press and hold to erase an existing banner, if necessary. Enter a word or short phrase to appear in your phone’s display while in standby mode (Up to 13 characters). -
Page 62: Front Contrast
• Keypad — Sets the amount of time the keypad backlight remains on after a period of inactivity. Optional settings are: 10 seconds, 15 seconds, 30 seconds, Always On, and Always Off. • Charging — Sets the amount of time the keypad backlight remains on when the phone is charging. -
Page 63: Section 10: Changing Your Sound Settings
Section 10: Changing Your Sound Settings This section shows you how to customize your phone’s audio • Messages — Lets you set your phone to be silent, play a sound, and/or vibrate in response to incoming messages. properties, such as ringers, keypad tones, alerts, shut down sounds, and more. -
Page 64: Alerts
Alerts • Messages – Text Message You can set your phone to sound an alert whenever you enter or – Voicemail leave your service area, connect or disconnect a call, and other Select the desired Ringer Type. The following options options. - Page 65 The following options appear in the display: • Tone Level • Tone Length Select the desired option. • If you select Tone Level: – To set the keypad Tone Level, use the Volume key or Navigation key. – To save your Tone Level setting, press .
-
Page 66: Section 11: Camera
Section 11: Camera Taking Snap Shots (Single Pictures) Use your R312 phone to take full color digital pictures, display them on your phone’s vivid color display, and instantly share them To take a single picture using the current camera settings, do the with family and friends. - Page 67 To erase the photo, press the Cancel soft key. Press the Options soft key. The options menu bar appears at the top Tip: You can change a number of the camera’s settings to suit particular uses of the camera screen. for your pictures.
-
Page 68: Camera Screen Layout
A Series Shot progress bar ( ) or • Divided Shot: – To save the picture to memory, press the a Divided Shot icon ( (2x2) or (3x3)) (which acts Save soft key. as a progress bar while pictures are being taken) appears in Cancel –... -
Page 69: Picture Options
Camera Screen Icons Quality — Indicates camera’s picture quality setting. (You can change the picture quality setting. For more information, Camera — Indicates the camera is active. refer to “Quality” on page 69.) White Balance — Indicates camera’s white balance Single Shot in use —... -
Page 70: Camera Options
Pictures are stored in the My Images folder, which is part of the phone’s Self Timer (also , or memory and/or card memory devoted to storing, browsing, and viewing saved pictures. (See “My Images” on page 71 for more information.) Quality (also , or Discard the picture by pressing the Cancel soft key. -
Page 71: Night Shot
• Frame Shot — Lets you select a colorful frame to include around . The following options appear in the display: your photos (use the Left and Right navigation keys to preview • Off available frames). • On Note: The None frame is a blank frame. Select the Night Shot setting of your choice. -
Page 72: White Balance
The next time you press , the countdown Self Timer The following values appear in the camera screen: indicates the time remaining before the camera takes the • Auto — The camera automatically adjusts picture quality to available light. picture. The phone reads the countdown timer value to you •... - Page 73 Icon Display In camera mode, press the Options soft key, then highlight . The following values appear in the display: In camera mode, press the Options soft key, highlight then select Icon Display. The following values appear in the • Normal — Subjects and pictures appear with a normal hue. •...
-
Page 74: My Images
Shutter Sound Reset Settings In camera mode, press the Options soft key, highlight Choose from four different sounds whenever you take a picture. Aside from being a cool sound effect, Shutter Sounds acts as an then select Reset Settings. You are prompted to confirm audible reminder that your camera has taken a picture. - Page 75 • Set As — Assign the currently displayed or highlighted picture to be standby screen Main Wallpaper, as a Picture ID for someone in your Contacts list, or as Front Wallpaper. • Rename — Rename the currently displayed or highlighted picture.
-
Page 76: Section 12: Multimedia
Section 12: Multimedia My Images This section outlines your phone’s multimedia functions and key features associated with multimedia. My Images lets you choose the pictures that appear in your Accessing Multimedia phone’s display while in standby mode (Wallpaper) and as picture IDs for your contacts. -
Page 77: My Ringtones
My Ringtones A pop-up menu containing the following options appears in the display: My Ringtones lets you assign ringtones (preloaded and downloaded) for Ringtone, • Send — Send a copy of the highlighted picture by text message Contact Id, and as Alert Tone. or Bluetooth. -
Page 78: My Sounds
• Contact ID — Lets you assign the selected ringtone as the Use the navigation keys to highlight the Record New distinctive ringer for a Contact. option, then press to record a voice memo. (See • Alert Tone — Lets you assign the selected ringtone to All Msg, “Record New Voice Memo”... -
Page 79: Record A Voice Memo
Select the desired option. Press , then start speaking. As it is recording the phone displays a To return to the previous menu, press . To return to countdown timer that shows the standby mode, press seconds remaining for the recording. Record New Voice Memo •... - Page 80 Press to play the voice memo. • To stop the memo, press . Press again to restart playing the memo. When the voice memo finishes playing, the selected voice memo remains highlighted in the list of sound files. Erase a Voice Memo At the Multimedia menu, select My Sounds.
-
Page 81: Section 13: Tools
Section 13: Tools This section explains how to use your phone’s digital assistant • Tip Calculator — Lets you quickly calculate service gratuities with a minimum of keypresses. functionality to schedule events, set reminders, perform calculations, and more. Tip: To launch the Tools menu using a voice command — In standby mode, Tools Menu press and hold until the phone prompts, “Say a command.”... -
Page 82: World Time
World Time Enter memo text using the keypad. (For more information, refer to “Entering Text” on page 29.) World Time lets you view the time of day or night in another part of the world. World Time displays time in the 24 different time zones When you’re finished entering memo text, press to save around the world. -
Page 83: Calculator
• To discard the displayed time zone and close the World Time For nested operations [such as (1.81 + 9.34) / 5.22] and to screen, press . You are returned to the Tools menu. calculate powers (such as 3 ), press the Operator soft key. Calculator The following options appear in the display: You can perform calculations, including... -
Page 84: Converter
Press the Record soft key at the start Use the Left and Right navigation of each succeeding event/lap to keys to select the unit to be converted record the completion time for the From. previous event/lap. Highlight the From quantity field. Press the Reset soft key to erase all Use the keypad to enter the quantity stop watch (lap) times recorded. - Page 85 Press the Rate soft key. The Exchange Rate list for the Use the Left and Right navigation keys to select the Base CAD (Canadian Dollars) currency appears in the display. currency to be converted from. Highlight the currency exchange rate you want to review or Highlight the Currency field.
-
Page 86: Tip Calculator
Currency — Erasing Exchange Rates At the Tools menu, select Tip Calculator. The Tip Calculator screen appears in the display with the Bill field You cannot erase the preloaded currencies from the Exchange Rate list. You can erase a currency that you have added to the list highlighted. -
Page 87: Section 14: Changing Your Call And Phone Setting
Section 14: Changing Your Call and Phone Setting Call Settings This section explains how to customize your call and phone settings to suit your needs and preferences. The Call Settings options let you select how your phone handles Accessing Your Call and Phone Settings voice calls. -
Page 88: Auto Retry
Auto Retry • Send Key — Press to answer an incoming call. • Flip Open — Open the flip to answer an incoming call. Auto Retry automatically re-dials a number if the connection fails. Depending upon your location, the number of times your phone Tip: You can set your phone to answer calls automatically, without any input automatically dials the number may vary. -
Page 89: Phone Settings
Phone Settings Mode must be enabled before you can use your phone with a TTY device. The Phone Settings options let you tailor your phones basic At the Call Settings sub-menu, select TTY Mode. You are operations. To access the Phone Settings sub-menu, do the following: prompted to confirm you want to change the current TTY At the Settings menu, select Phone Settings. - Page 90 Shortcut Key At the Phone Settings sub-menu, select Language. The following options appear in the display: Shortcut Key lets you set which feature, function, or application launches when you press the Up navigation key while in standby • English mode. •...
- Page 91 phone to lock automatically when it is turned on. With the phone in Note: Your phone does not allow you to view the lock code for obvious security lock mode, you can answer incoming calls, but you must unlock reasons. If you change the lock code, be sure to write down or the phone to place outgoing calls (except to emergency and secret memorize the new code.
- Page 92 Store Emergency Numbers At the Security sub-menu, select Erase All Entries. At the Security sub-menu, select Emergency #. Note: The default lock code is the last four digits of your mobile phone number. Select from the three emergency number entries. The “Erase All Entries?”...
-
Page 93: Nam Selection
Select the desired setting. For Set Date, the Set Date screen appears in the display. NAM Selection The Network menu allows you to select NAM (Number Assignment Module) settings for your phone. You can store two NAM settings, which are essentially telephone numbers, for your phone. -
Page 94: Memory Info
Select the desired Quick Search setting. Press the Up navigation key. The Find screen appears in the display showing the Contacts entries with names that Searching for a Menu Item correspond to your key entries. In standby mode, press the first few numeric keys that Highlight the desired Contacts entry. -
Page 95: Phone Info
My Images Tip: You cannot review your recorded Voice Memos and sound files from this files list. To review your recorded Voice Memos and sound files, press My Images lets you review a list of the pictures you have stored on ➔... - Page 96 Phone Number At the Settings menu, select Phone Info Version. ➔ This option causes the Phone Number screen to appear in the Your phone’s software (S/W), preferred roaming list (PRL), display and show the ten-digit number assigned to your phone by and hardware-related information (H/W, MEID, and pESN) your service provider.
-
Page 97: Section 15: Calendar
Section 15: Calendar Calendar – Go to Date — Lets you jump to any date you specify. – Go to Today — Lets you jump to today’s date. Calendar lets you view the current, past, or future month in a –... - Page 98 Press the Add soft key. The New Event screen appears in Highlight the Reminder field, and set the Reminder to Off or the display. to select a reminder interval using the Left and Right navigation keys. To select and enter details of the event, use the Navigation key and the keypad.
-
Page 99: Section 16: Bluetooth
Section 16: Bluetooth Add New Device Bluetooth is a short-range wireless communications technology capable of exchanging information over a distance of about 30 feet To search for available Bluetooth devices: without requiring a physical connection. In standby mode, press Menu ( ), then select Bluetooth Unlike infrared, you don't need to line up the devices to beam Registered List... -
Page 100: Connecting To A Bluetooth Device
Connecting to a Bluetooth Device Press PAIR ( ) to pair the selected device with the phone. You are prompted to enter the passkey or PIN for From the Registered List, the selected device. (For more information, refer to the Select the desired device. -
Page 101: Section 17: Voice Service
Section 17: Voice Service VoiceSignal is state-of-the-art voice recognition software for your Note: You can also set your phone to start VoiceSignal when you open the mobile phone that lets you dial numbers, lookup contact phone. (For more information, refer to “Voice Launch” on page 101..) information, and open applications using your voice. - Page 102 Voice Settings Note: Speaking clearly, say the command that you want to use. Choice Lists If, after a few seconds, the device has not recognized a command, it VoiceSignal uses choice lists when it is not confident it has prompts you to repeat the command. correctly recognized a name or number.
- Page 103 Sensitivity Speak clearly, and say each digit distinctly. • If you make a mistake while recording a sequence of digits, or if there is • At the Voice SVC menu, select Voice Settings ➔ an unexpected noise that spoils the recording, re-record that sequence. Sensitivity.
- Page 104 Sound If you say “No,” the phone prompts you to pronounce the digits again. Wait for the beep and then say the digits. Sound lets you specify what (if any) text prompts you want your phone to read to you through the earpiece. Repeat this step until you’re satisfied with the recording.
- Page 105 • Key/Flip — Press and hold or open the flip to activate VoiceSignal for one call. Select the Voice Launch option you want. About VoiceSignal This option causes the About Nuance screen to appear in the display, showing version and build information about the VoiceSignal software included on your phone.
-
Page 106: Section 18: Health And Safety Information
Section 18: Health and Safety Information Getting the Most Out of Your Reception Knowing Radio Frequency Safety Keeping Tabs on Signal Strength The design of your phone complies with updated NCRP standards described below. In 1991-92, the Institute of Electrical and The quality of each call you make or receive depends on the signal Electronics Engineers (IEEE) and the American National strength in your area. -
Page 107: Ul Certified Travel Adapter
Avoid exposing your phone and accessories to rain or liquid spills. If FAILURE TO FOLLOW THE INSTRUCTIONS OUTLINED MAY • your phone does get wet, immediately turn the power off and remove LEAD TO SERIOUS PERSONAL INJURY AND POSSIBLE the battery. If it’s inoperable, return it to a dealer store or call Customer PROPERTY DAMAGE. - Page 108 Let the person you are speaking to know you are driving; if necessary, systems in motor vehicles. Check with the manufacturer or their • suspend the call in heavy traffic or hazardous weather conditions. representative to determine if these systems are adequately shielded from external RF signals.
-
Page 109: Caring For The Battery
Areas where the air contains chemicals or particles such as grain, dust • or metal powders. Use only Samsung approved batteries and travel adapters. These • chargers are designed to maximize battery life. Using other batteries or Any other area where you would normally be advised to turn off your •... -
Page 110: Acknowledging Special Precautions And Industry Canada Notice
It’s best to replace the battery when it no longer provides acceptable Although your phone is quite sturdy, it is a complex piece of • performance. When used correctly, the battery can be recharged hardware and can be broken. Use common-sense guidelines to hundreds of times before it needs replacing. -
Page 111: Owner's Record
cause harmful interference to radio or television reception, which All phones must meet the federal standard, which incorporates a can be determined by turning the equipment off and on, the user is substantial margin of safety. As stated above, variations in SAR encouraged to try to correct the interference by one or more of the values between different model phones do not mean variations in following measures:... -
Page 112: User Guide Proprietary Notice
User Guide Proprietary Notice CDMA Technology is licensed by QUALCOMM Incorporated under one or more of the following patents: 4,901,307 5,109,390 5,267,262 5,416,797 5,506,865 5,544,196 5,657,420 5,101,501 5,267,261 5,414,796 5,504,773 5,535,239 5,600,754 5,778,338 5,228,054 5,337,338 5,710,784 5,056,109 5,568,483 5,659,569 5,490,165 5,511,073 T9 Text Input is licensed by Tegic Communications and is covered by U.S. -
Page 113: Section 19: Warranty Information
Limited Warranty does not cover any battery if: (i) the battery has been charged by a battery charger not specified or approved by SAMSUNG for charging the battery; (I) any of the seals on the battery are broken or show evidence of tampering; or (IA) the battery has been used in equipment other than the SAMSUNG phone for which it is specified. - Page 114 What are SAMSUNG's Obligations? During the applicable What Are the Limits On SAMSUNG's Liability? EXCEPT AS warranty period, SAMSUNG will repair or replace, at SAMSUNG's SET FORTH IN THE EXPRESS WARRANTY CONTAINED sole option, without charge to Purchaser, any defective component HEREIN, PURCHASER TAKES THE PRODUCT "AS IS,"...
- Page 115 PURCHASER OF THIS PRODUCT AND SHALL BE LIMITATION MAY NOT APPLY TO YOU. IN ADDITION, PURCHASER'S EXCLUSIVE REMEDY. IF ANY PORTION OF SAMSUNG SHALL NOT BE LIABLE FOR ANY DAMAGES OF THIS LIMITED WARRANTY IS HELD ILLEGAL OR ANY KIND RESULTING FROM THE PURCHASE, USE, OR...
- Page 116 Limited Warranty. The agents, employees, distributors, and dealers of SAMSUNG are not authorized to make modifications to this Limited Warranty, or make additional warranties binding on SAMSUNG. Accordingly, additional...
-
Page 117: Index
Index Numerics Answering a Call Auto Save Call Log Icon Display 2-Sec Pause Making a Call — Number Entry Reset Settings Dialing Shutter Sound Activating Your Phone Making a Call — Speed Dialing Camera Shot Type Adding Contacts Making a Call — Voice Dialing Charging the Battery Dial Method Call Settings... - Page 118 Create a Draft Message Text Create and Send Text Messages Messages Finding Contacts Create a Draft Message Shortcut Key Method Create and Send Dialing Font Size Voice Method Message Boxes Display Setting Fun Tools Receive Dialing Font Color Tones Settings Display Settings Types Backlight...
- Page 119 Memo Pad Ringer Types, Assigning One-Touch Dialing World Time Three Touch Dialing Phone Two-Touch Dialing Security Settings Command Keys Change Lock Display Screen Emergency # Taking Pictures Display Screen Icons Lock Phone Text Features Resetting Your Phone Entering Numbers Modes Restriction Entering Symbols View, Closed...
- Page 120 Voice Memo Record Memos Review Memos Voicemail Listen Setup VoiceSignal About VoiceSignal Wallpaper Warranty Information Your Phone Turning Off Turning On...
Need help?
Do you have a question about the SCH-R312 Series and is the answer not in the manual?
Questions and answers