Belkin Wireless G User Manual
Desktop card
Hide thumbs
Also See for Wireless G:
- User manual (228 pages) ,
- Network adapter (44 pages) ,
- Specifications (2 pages)
Table of Contents
Advertisement
Quick Links
Download this manual
See also:
User Manual
Belkin Ltd.
Express Business Park, Shipton Way
Rushden, NN10 6GL, United Kingdom
+44 (0) 1933 35 2000
+44 (0) 1933 31 2000 fax
Belkin B.V.
Boeing Avenue 333
1119 PH Schiphol-Rijk, The Netherlands
+31 (0) 20 654 7300
+31 (0) 20 654 7349 fax
Belkin Tech Support
Europe: 00 800 223 55 460
© 2005 Belkin Corporation. All rights reserved. All trade names are registered trademarks of
respective manufacturers listed. Mac, Apple, and AirPort are trademarks of Apple Computer,
Inc., registered in the U.S. and other countries. The mark Wi-Fi is a registered mark of the
Wi-Fi Alliance.
Wireless G
Desktop Card
Belkin GmbH
Hanebergstrasse 2
80637 Munich, Germany
+49 (0) 89 143405 0
+49 (0) 89 143405 100 fax
Belkin SAS
130 rue de Silly
92100 Boulogne-Billancourt, France
+33 (0) 1 41 03 14 40
+33 (0) 1 41 31 01 72 fax
P74685uk-B-uk
Advertisement
Table of Contents

Related Manuals for Belkin Wireless G


Summary of Contents for Belkin Wireless G
- Page 1 Belkin Tech Support Europe: 00 800 223 55 460 © 2005 Belkin Corporation. All rights reserved. All trade names are registered trademarks of respective manufacturers listed. Mac, Apple, and AirPort are trademarks of Apple Computer, Inc., registered in the U.S. and other countries. The mark Wi-Fi is a registered mark of the Wi-Fi Alliance.
-
Page 2: Wireless Network
Wireless G Desktop Card Connect your desktop computer to a wireless network ����� ������� � �� ����� � � � ������ � User Manual ������� ������� F5D7000... -
Page 3: Table Of Contents
Step 3: Configure ........11 4 Using the Belkin Wireless Networking Utility ....12 Accessing the Belkin Wireless Networking Utility from the Windows System Tray . -
Page 4: Introduction
• Store, retrieve, and copy files from one computer to another • Simultaneously play games online, check Internet email, and chat Advantages of a Wireless Network Here are some of the advantages of setting up a Belkin wireless network: • Mobility – you no longer need a dedicated “computer room”—you can work on a networked laptop or desktop... -
Page 5: Placement Of Your Wireless Networking Hardware For Optimal Performance
10 feet from the wireless router (or access point) in order to see if distance is the problem. If difficulties persist even at close range, please contact Belkin Technical Support. Note: While some of the items listed below can affect network performance, they will not prohibit your wireless network from functioning;... - Page 6 Introduction Avoid Obstacles and Interference Avoid placing your wireless router (or access point) near devices that may emit radio “noise”, such as microwave ovens. Other objects that can inhibit wireless communication can include: • Refrigerators • Washers and/or dryers • Metal cabinets •...
- Page 7 For more Belkin wireless networking products, use the detailed site survey and wireless channel information included in your User Manual. Secure Connections, VPNs, and AOL Secure connections typically require a user name and password, and are used where security is important.
-
Page 8: Overview
Overview Product Features The Card complies with the IEEE 802.11g standard in order to communicate with other 802.11g-compliant wireless devices at 54Mbps. The Card is compatible with all 802.11g devices as well as other 802.11b products at 11Mbps. 802.11g products operate on the same 2.4GHz frequency band as 802.11b Wi-Fi ®... -
Page 9: Applications And Advantages
Overview Applications and Advantages Wireless roaming with a laptop around the home or office • Offers the freedom of networking—without cables • Connection rates of up to 54Mbps Provides immediate wireless connectivity at home, work, and hotspot locations without compromising the use of existing 802.11b and 802.11g products Compatibility with 802.11b products •... -
Page 10: System Requirements
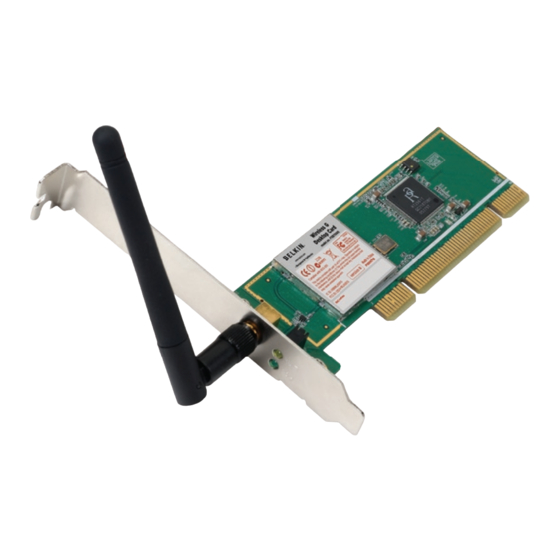
System Requirements • PC-compatible desktop computer with one available PCI slot and CD-ROM drive • Windows ® 98SE, Me, 2000, or XP Package Contents • Wireless G Desktop Card • Quick Installation Guide • Installation Software CD • User Manual... -
Page 11: Installing And Setting Up The Card
Important Note: Install the Software before Inserting the Card. Insert the Installation Software CD into your CD-ROM drive. The Belkin Setup Utility screen will automatically appear. (This may take 15–20 seconds.) Click “install” to start the installation. Note: If the Belkin Wireless Networking Utility screen does not appear within 20 seconds, access your CD-ROM by double-clicking on the “My... -
Page 12: Step 2 Insert
Installing and Setting up the Card Step 2 Insert Insert the Card into an Available PCI Slot on your Desktop Computer Shut down your computer and disconnect your power cord. Remove the screws behind your computer case that secure the computer cover and remove cover. - Page 13 Installing and Setting up the Card Installing and Setting up the Card Carefully screw the antenna onto the threaded connector on the Card. Turn the antenna until it is vertical and pointing up. Replace the computer’s cover. Now that the Card is installed, you can reconnect the power cord and turn the computer back on.
-
Page 14: Step 3 Configure
Utility installation is now complete. Click “Finish” to close the Wizard and restart your computer. Step 3 Configure Use the Belkin Wireless Networking Utility After restarting your computer, double-click the Belkin Wireless Networking Utility icon on the desktop screen. The Wireless Networking Utility screen will appear. -
Page 15: Using The Belkin Wireless Networking Utility
To access the WNU, simply place your mouse pointer and right-click over the WNU icon on the Windows system tray on the lower right-hand corner of your computer’s desktop. If the icon is not present, click on “Start > Programs > Belkin > Wireless Networking Utility”. - Page 16 Using the Belkin Wireless Networking Utility The WNU’s default screen is the “Current Status” tab. The “Current Status” tab displays the current network status and available networks. Network Status This window displays the connectivity status of the current network, between the computer and router, and between the router and the Internet.
- Page 17 Using the Belkin Wireless Networking Utility Using the Belkin Wireless Networking Utility Connection Failure Other options will appear during attempts to reconnect. To stop connecting, click “Stop” and to reattempt connection, click “Retry”. Network Status and Solution Tips To further understand the current Network Status, click “Open Wireless Utility”.
-
Page 18: Setting Wireless Network Profiles
Using the Belkin Wireless Networking Utility The WNU also features a “Solution Tips” section that provides troubleshooting guidelines. Setting Wireless Network Profiles The “My Connections” tab on the WNU allows you to add, edit, and delete connection profiles. It also displays signal strength, security, and network type. - Page 19 Using the Belkin Wireless Networking Utility Using the Belkin Wireless Networking Utility Note: When you select a network using encryption, you will first see the simple security screen. Click the “Advanced” button to see other security options (below). Wired Equivalent Privacy (WEP) is a less secure, but more widely adopted wireless security protocol.
- Page 20 Using the Belkin Wireless Networking Utility security level (64- or 128-bit), the user will be asked to input a 10- or 26-character hex key. A hex key is a combination of letters, a–f, and numbers, 0–9. Wireless Protected Access (WPA) is the new standard in the wireless security.
- Page 21 Most of the new wireless equipment in the market today supports both 64-bit and 128-bit WEP encryption, but you might have older equipment that only supports 64-bit WEP. All Belkin wireless products will support both 64-bit and 128-bit WEP. Encryption Keys After selecting either the 64-bit or 128-bit WEP encryption mode, it is critical that you generate an encryption key.
- Page 22 WPA2 requires Advanced Encryption Standard (AES) for encryption of data, which offers much greater security than WPA. For a list of Belkin wireless products that support WPA, please visit our website at www.belkin.com/networking. Most Wi-Fi products ship with security turned off. So once you have your network working, you need to activate WEP or WPA and make sure all your wireless devices are sharing the same network key.
-
Page 23: Configuring Your Belkin Wireless G Desktop Card To Use Security
At this point, you should already have your wireless router (or access point) set to use WPA or WEP. In order for you to gain a wireless connection, you will need to set your Wireless G Desktop Card to use the same security settings. -
Page 24: Wep Setup
Using the Belkin Wireless Networking Utility WEP Setup 64-Bit WEP Encryption Select “WEP” from the drop-down menu. After selecting your WEP encryption mode, you can enter your key by typing in the hex key manually, or you can type in a passphrase in the “Passphrase”... - Page 25 Using the Belkin Wireless Networking Utility Using the Belkin Wireless Networking Utility Click “Save” to finish. Encryption in the wireless router (or access point) is now set. Each of your computers on your wireless network will now need to be configured with the same security settings.
- Page 26 Using the Belkin Wireless Networking Utility Click “Save” to finish. Encryption in the wireless router (or access point) is now set. Each of the computers on your wireless network will now need to be configured with the same security settings.
- Page 27 Using the Belkin Wireless Networking Utility Using the Belkin Wireless Networking Utility WPA-PSK (no server) Choose this setting if your network does not use a radius server. WPA-PSK (no server) is typically used in home and small office networking. From the “Network Authentication” drop-down menu, select “WPA-PSK (no server)”.
- Page 28 Using the Belkin Wireless Networking Utility Click “Save” to finish. You must now set all clients (network cards) to match these settings. Wireless Networking Utility Options The “Options” tab on the WNU provides the user the ability to customize his or her WNU settings.
- Page 29 Using the Belkin Wireless Networking Utility Using the Belkin Wireless Networking Utility Wireless Networking Utility Help The WNU “Help” tab provides users with access to online and telephone support, as well as advanced diagnostic tools. Advanced Diagnostic Tools The “Advanced Diagnostic Tools” section is the central control panel for all the settings of the hardware and software components of the wireless network.
- Page 30 Using the Belkin Wireless Networking Utility...
-
Page 31: Troubleshooting
Open your Wireless Networking Utility software by clicking on the icon in the system tray at the bottom right-hand corner of the screen. If you’re using a Belkin Wireless Card, the tray icon should look like this (the icon may be red or green): The exact window that opens will vary depending on the model of wireless card you have;... - Page 32 If you are still unable to access the Internet after connecting to the wireless network, please contact Belkin Technical Support. The name of your wireless network DOES NOT appear in the list of “Available Networks”.
- Page 33 Networks” screen. Click “Add” if you do not see the network you are trying to connect to and type in the SSID. For more information about setting up an SSID, please refer to your router manufacturer’s user manual. If issues persist even at close range, please contact Belkin Technical Support.
- Page 34 For more information about encryption, please see the “Securing your Wi-Fi Network” section of this User Manual. If issues persist even at close range, please contact Belkin Technical Support. Data transfer is sometimes slow. Wireless technology is radio-based, which means connectivity and the throughput performance between devices decreases when the distance between devices increases.
- Page 35 Troubleshooting Please see the section titled “Placement of your Wireless Networking Hardware for Optimal Performance” in this manual. If issues persist even at close range, please contact Belkin Technical Support. Why are there two wireless utilities in my system tray?
- Page 36 Troubleshooting 2. Touch any metal part of the case to discharge static electricity, which could damage your product or your computer. 3. Remove the Card. 4. Locate a different empty PCI expansion slot. It is usually white in color. 5. Confirm that the Card will fit into the slot you have chosen. Keep in mind that the included antenna needs to be oriented with the top pointing up.
- Page 37 Troubleshooting What’s the difference between 802.11b, 802.11g, 802.11a, and Pre-N? Currently there are four levels of wireless networking standards, which transmit data at very different maximum speeds. Each is based on the designation for certifying network standards. The most common wireless networking standard, 802.11b, transmits information at 11Mbps;...
- Page 38 Troubleshooting Technical Support www.belkin.com/ You can find technical support information at networking . If you want to contact technical support by phone, please call: US: 877-736-5771 Europe: 00 800 223 55 460 Australia: 1800 235 546 New Zealand: 0800 235 546...
-
Page 39: Information
Information Information Wi-Fi ® Interoperability Certificate...
Need help?
Do you have a question about the Wireless G and is the answer not in the manual?
Questions and answers