Table of Contents
Advertisement
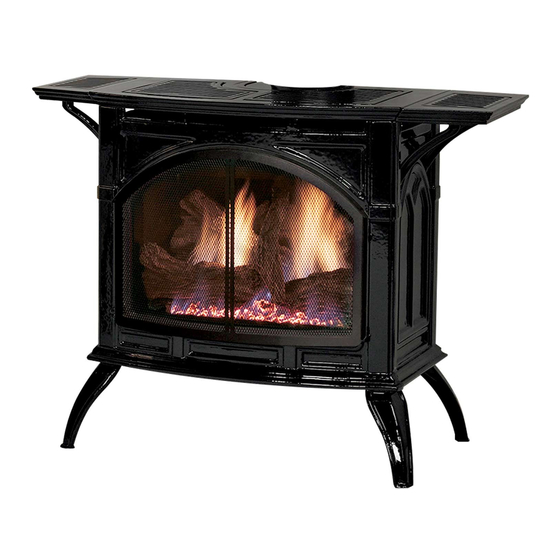
The Empire Cast Iron Stoves
WARNING
Installer:
Leave this manual with the appliance.
Consumer: Retain this manual for future reference.
If the information in these instructions are not fol-
lowed exactly, a fire or explosion may result caus-
ing property damage, personal injury or loss of life.
— Do not store or use gasoline or other flammable
vapors and liquids in the vicinity of this or any
other appliance.
— WHAT TO DO IF YOU SMELL GAS
•
Do not try to light any appliance.
•
Do not touch any electrical switch; do not use
any phone in your building.
•
Immediately call your gas supplier from a
neighbor's phone. Follow the gas supplier's
instructions.
•
If you cannot reach your gas supplier, call the
fire department.
— Installation and service must be performed by a
qualified installer, service agency or the gas sup-
plier.
HOT GLASS
WILL
CAUSE BURNS.
DO NOT TOUCH
GLASS
UNTIL COOLED.
NEVER
ALLOW CHILDREN
TO TOUCH GLASS.
WARNING
INSTALLATION INSTRUCTIONS
OWNER'S MANUAL
DIRECT VENT STOVE
DVP20CC(30,70)(B,F,M)(N,P)-1
DVP30CC(30,70)(B,F,M,S,W)(N,P)-1
This appliance may be installed in an aftermarket
permanently located, manufactured home (USA only) or
mobile home, where not prohibited by local codes.
This appliance is only for use with the type of gas
indicated on the rating plate. This appliance is not
convertible for use with other gases, unless a certified
kit is used.
Improper installation, adjustment, alteration, service
or maintenance can cause injury or property damage.
Refer to this manual. For assistance or additional in-
formation consult a qualified installer, service agency,
or the gas supplier.
AND
CAST IRON
MODELS:
GAS-FIRED
WARNING
Page 1
Advertisement
Table of Contents
Troubleshooting

Subscribe to Our Youtube Channel
Related Manuals for Empire DVP30CC


Summary of Contents for Empire DVP30CC
-
Page 1: Installation Instructions
INSTALLATION INSTRUCTIONS OWNER'S MANUAL CAST IRON The Empire Cast Iron Stoves DIRECT VENT STOVE MODELS: DVP20CC(30,70)(B,F,M)(N,P)-1 DVP30CC(30,70)(B,F,M,S,W)(N,P)-1 GAS-FIRED WARNING HOT GLASS WILL CAUSE BURNS. DO NOT TOUCH GLASS UNTIL COOLED. NEVER ALLOW CHILDREN TO TOUCH GLASS. Installer: Leave this manual with the appliance. -
Page 2: Table Of Contents
CASTING PARTS LIST ........................ 42 CASTING PARTS VIEW ......................43 ACCESSORY SIDE SHELVES INSTALLATION INSTRUCTIONS ..........44 CIB3-1 OPTIONAL BLOWER INSTALLATION INSTRUCTIONS - DVP30CC .......45-47 CIB4-1 OPTIONAL BLOWER INSTALLATION INSTRUCTIONS - DVP20CC .......48-50 WARRANTY ..........................51 APPLIANCE SERVICE HISTORY ..................52-53 QUICK REFERENCE GUIDE ....................54-55... -
Page 3: Important Safety Information
• Installation and repair should be done by a should be replaced only with a complete glass QUALIFIED SERVICE PERSON. The appliance frame assembly from Empire. See parts list on should be inspected before use and at least Pages 38 and 40 for ordering. -
Page 4: Safety Information For Users Of Lp-Gas
SAFETY INFORMATION FOR USERS OF LP-GAS Propane (LP-Gas) is a flammable gas which can cause fires and explosions. In its natural state, propane is odorless and col- orless. You may not know all the following safety precautions which can protect both you and your family from an accident. Read them carefully now, then review them point by point with the members of your household. -
Page 5: Requirements For Massachusetts
REQUIREMENTS FOR MASSACHUSETTS For all side wall horizontally vented gas fueled equipment installed SIGNAGE. A metal or plastic identification plate shall be per- in every dwelling, building or structure used in whole or in part for manently mounted to the exterior of the building at a minimum residential purposes, including those owned or operated by the height of eight feet above grade directly in line with the exhaust Commonwealth and where the side wall exhaust vent termination... -
Page 6: Introduction
• Modification of the stove or direct vent system. (a) the installation or replacement of gas piping or (b) the connection, • Installation other than as instructed by Empire Comfort Systems, installation, repair or servicing of equipment, who is experienced in Inc. -
Page 7: Specifications
Width 21-1/2" 28-1/16" Depth 16-1/2" 18" Venting Accessories (Special Vent Kits - Simpson Duravent Can be purchased from Empire Comfort Systems Inc.) DVKHP Horizontal Vent Kit for DVP30CCLP Only (46DVA-24B, 46DVA-09B, 46DVA-08AB, 46DVA-DC, (requires SD46DVAE45B) 46DVA-WT, 46DVA-HC, 46DVA-E90B) DVK45LP Horizontal Direct-Vent 45-Deg kit for DVP20CC LP Only (SD46DVAE45B, SD09261TB (adaptor... -
Page 8: Gas Supply
GAS SUPPLY Installing a New Main Gas Cock Consult the current National Fuel Gas Code, ANSI Z223.1 CAN/ Each appliance should have its own manual gas cock. CGA-B149 (.1 or .2) installation code. A manual main gas cock should be located in the vicinity of the unit. Recommended Gas Pipe Diameter Where none exists, or where its size or location is not adequate, contact your local authorized installer for installation or relocation. -
Page 9: Clearances
CLEARANCES In selecting a location for installation, it is necessary to provide adequate accessibility clearances for servicing and proper opera- tion. Locating and Venting the Direct Vent Stove Clearances: When facing the front of the direct vent stove the minimum clearances to combustible construction (material) are the following: Top of appliance (ceiling) 36"... -
Page 10: Clearances
CLEARANCES (cont.) Special Vent Systems The following vent systems are acceptable for use with the DVP(20,30)CC stoves: Simpson Duravent® GS 4" - 6 5/8" American Metal® 4" - 6 5/8" Selkirk Direct-Temp® 4" - 6 5/8" Security Secure Vent® 4" - 6 5/8" ICC Inc. -
Page 11: Venting Stove
46DVA-GCL). DVP20CC (LP,NAT) - can use a 14" short snorkel or 36" tall snorkel. VENT CAP DVP30CC NAT - CAN NOT be vented horizontally, straight out the back. An initial 1' vertical rise is required before turning horizontal or ROUND CO-LINEAR use of the Simpson Duravent 36"... - Page 12 Maximum vertical rise and horizontal run is a combined total of 25 feet (7.62 m). Maximum elbows = two 90°, for the second elbow subtract 5 feet from a horizontal run. "A" Dimension DVP20CC 24" (610mm) DVP30CC 27" (686mm) Figure 8 - Snorkel Installation Page 12 30794-5-0314...
- Page 13 The maximum number of 45 degree elbows permitted per side 11 feet with one 90° elbow. wall installation is two. These elbows can be installed in either the vertical rise or horizontal run. Figure 9a - DVP20CC Figure 9b - DVP30CC 30794-5-0314 Page 13...
-
Page 14: Termination Clearances
TERMINATION CLEARANCES Termination clearance for buildings with combustible and noncombustible exteriors. Figure 10 Vertical Sidewall Installations Important! Minimum clearance between vent pipes and combustible between the combustion air intake and the flue gas exhaust, certain materials is one inch (25 mm) on, bottom and sides and three inches limitations as to vent configurations apply and must be strictly (51 mm) on top. -
Page 15: Vent Clearances
VENT CLEARANCES Figure 11 *Clearance above grade, veranda, porch, deck or balcony Clearance to non-mechanical air supply inlet to building [*12 inches (304.8 mm) minimum] or the combustion air inlet to any other appliance [*12 inches (304.8 mm) minimum for appliances ≤ 100,000 Btuh Clearance to window or door that may be opened [*9 inches (30 kW) (228.6 mm) minimum for appliances <... -
Page 16: Vent System Identification
VENT SYSTEM IDENTIFICATION Installing Vent Components Begin the vent system installation by installing the first Simpson Duravent component on the top of the appliance with a 45° elbow and rotate the vent elbow to the desired position then add horizontal and vertical pipe lengths and then a horizontal or vertical termination kit. -
Page 17: Framing And Finishing
FRAMING AND FINISHING Installing Support Brackets A horizontal pipe support MUST BE used for each 3 feet of horizontal run. The pipe supports should be placed around 6 5/8 inch diameter pipe and nailed in place to framing members. There MUST BE a 2 inch clearance to combustibles above 6-5/8 inch diameter pipe and elbows and 1 inch clearance on both sides and bottom of 6-5/8 inch to combustibles on all horizontal pipe sections and elbows. -
Page 18: Horizontal Termination
FRAMING AND FINISHING (continued) Figure 17 Figure 18 HORIZONTAL TERMINATION Attach and secure the termination to the last section of horizontal venting by sliding cap over the last section of horizontal venting to ensure proper location. Note: Termination cap should pass through the wall firestop from the exterior of the building. -
Page 19: Vertical Termination
VERTICAL TERMINATION Vertical Terminations Note that for steep roof pitches, the vent height must be increased. Locate and mark the center point of the venting pipe. Using a nail In high wind conditions, nearby trees, adjoining roof lines, steep on the underside of the roof and drive this nail through this center pitched roofs, and other similar factors can result in poor draft, or point. - Page 20 VERTICAL TERMINATION (continued) Installing Support Brackets Note: When installing this vent system in a chase, it is always good A horizontal pipe support MUST BE used for each 3 feet of horizontal building practice to insulate the chase as you would the outside run.
-
Page 21: Log Identification
LOG IDENTIFICATION Part Number Log Photo (Front Views) Description DVP20CC DVP30CC REAR LOG 29790 29795 RIGHT LOG 29792 29797 LEFT LOG 29791 29796 (DVP20CC shown) TOP BRANCH 29793 TOP BRANCH 29798 30794-5-0314 Page 21... -
Page 22: Log & Ember Placement
4a. For DVP20CC Logsets: Place the Top Branch on the pin on the Rear Log with the "fork" resting on the Left and Right Logs. 4b. For DVP30CC Logsets: Place the Top Branch on the Pins on the Rear Log and Left Log. -
Page 23: Operating Instructions
OPERATING INSTRUCTIONS 750 Millivolt System The OWNER should carefully read and follow these operating The standing pilot (750 millivolt system) is a continuous burning instructions at all times. Lower the door assembly to view the gas pilot. The pilot remains ON even when the main burner is OFF. controls for the stove. -
Page 24: Main Burner Flame Characteristics
MAIN BURNER FLAME CHARACTERISTICS Figure 29 shows a correct main burner flame pattern. Figure 30 Cleaning the Log Set and Firebox shows an incorrect main burner flame pattern. Do NOT handle these logs with your bare hands. Always wear gloves to prevent skin irritation. During the annual inspection and If main burner flame pattern is incorrect, as shown in Figure 28: maintenance appointment, the service person should clean dust, lint, •... -
Page 25: Wiring
WIRING DVP(20,30)CC ON/OFF/REMOTE Switch 1. Connect one wire from the 750 millivolt wall thermostat and one DVP(20,30)CC is equipped with an ON/OFF/REMOTE switch which wire from appropriate accessory to the GREEN, stripped and is located on the wire channel located on the top, left side of the bare wire from the ON/OFF/REMOTE wire harness. -
Page 26: Millivolt Lighting Instructions
MILLIVOLT LIGHTING INSTRUCTIONS FOR YOUR SAFETY READ BEFORE LIGHTING WARNING: If you do not follow these instructions exactly, a fire or explosion may result causing property damage, personal injury or loss of life. A. This appliance has a pilot which must be lighted by hand. •... -
Page 27: Millivolt Wiring
MILLIVOLT WIRING Optional Wall Switch For Standing Pilot Ignition Wiring Position the wall switch in the desired position on a wall. Run a Appliance Requirements maximum of 25 feet (7.8m) or less length of 18 A.W.G. minimum wire and connect it to the stove valve pigtails. WARNING DO NOT CONNECT 110-120 VAC TO THE GAS CONTROL WARNING... -
Page 28: Millivolt Troubleshooting
MILLIVOLT TROUBLESHOOTING With proper installation and maintenance, your new Direct Vent Stove should provide years of trouble-free service. If you do ex- perience a problem, refer to the Trouble Shooting Guide below. This guide will assist a qualified service person in the diagnosis of problems and the corrective action to be taken. -
Page 29: Ip Operating Instructions
IP OPERATING INSTRUCTIONS Attention: For shipping purposes, the Electronic Control Follow the SAFETY and LIGHTING INSTRUCTIONS for In- Module and Receiver Plate assembly is loosely packaged termittent Pilot controls found in this manual, and on labels near the left side of the appliance. It is necessary that the re- found in the control compartment located in the lower cavity ceiver plate assembly be secured to the left front flange of the of the appliance. -
Page 30: Ip Electronic System Wiring Diagram
IP ELECTRONIC SYSTEM WIRING DIAGRAM If any of the original wire as supplied with this unit must be replaced, it must be replaced with equivalent gauge and temperature rated wire. This appliance is only for use with the type of gas indicated on the rating plate and may be installed in an aftermarket, permanently located, manufactured (mobile) home where not prohibited by local codes. -
Page 31: Intermittent Pilot Lighting Instructions
INTERMITTENT PILOT LIGHTING INSTRUCTIONS FOR YOUR SAFETY READ BEFORE LIGHTING WARNING: If you do not follow these instructions exactly, a fire or explosion may result causing property damage, personal injury or loss of life. A. This appliance has a pilot which can be lighted with the manual C. -
Page 32: Intermittent Control System Troubleshooting
INTERMITTENT CONTROL SYSTEM TROUBLESHOOTING Brief Description of the Components The gas valve is fitted with a manual HI/LO knob to allow for man- ual modulation of the gas outlet pressure to the appliance burner. The controls are designed to be used with either LPG or Natural Gas and can be converted by use of an OEM supplied conversion kit. - Page 33 INTERMITTENT CONTROL SYSTEM TROUBLESHOOTING If the DFC giving signal lock out: Verify the electrical connections’ integrity and The board should be unlocked to make sure they are in accordance with the relevant reinitiate a pilot flame ignition (for Is the DFC board in system wiring diagram.
-
Page 34: Intermittent Control System Troubleshooting
INTERMITTENT CONTROL SYSTEM TROUBLESHOOTING Replace DFC board. Main burner lights when the pilot only Replace the gas valve. should light. Verify the pilot flame fully engulfs the tip of the sense electrode. If not replace the pilot assembly. Replace the pilot assembly. Carefully clean the electrical connections of the sense cable, and the DFC board sense cable connection. -
Page 35: Maintenance
General Glass Information Only glass approved for use in Empire Comfort Systems Inc. fireplaces may be used for replacement. The glass replacement should be done by a licensed or qualified service person. -
Page 36: Maintenance And Service
MAINTENANCE AND SERVICE Although the frequency of servicing and maintenance will depend Cleaning on use and the type of installation, you should have a qualified Use a soft brush attachment on a vacuum cleaner to gently remove service technician perform an appliance checkup at the beginning dust or soot deposits from liners and burner. -
Page 37: Master Parts Distributor List
MASTER PARTS DISTRIBUTOR LIST To Order Parts Under Warranty, please contact your local Empire dealer. See the dealer locator at www.empirecomfort.com. To provide warranty service, your dealer will need your name and address, purchase date and serial number, and the nature of the problem with the unit. -
Page 38: Dvp20Cc(30,70)Parts List
DVP20CC(30,70)PARTS LIST PART NUMBER INDEX DESCRIPTION DVP20CC30 DVP20CC30 DVP20CC70 DVP20CC70 R9672 R9672 R9672 R9672 INLET VENT COLLAR M178 M178 M178 M178 INLET COLLAR GASKET 30602 30602 30602 30602 AIR DROP ASSEMBLY M163 M163 M163 M163 FLUE OUTLET GASKET 30392 30392 30392 30392 BLOW PLATE BRACKET... -
Page 39: Dvp20Cc(30,70)Parts View
DVP20CC(30,70)PARTS VIEW PLEASE NOTE: When ordering parts, it is very important that part number and description of part coincide. IP ONLY DVP20 IP ONLY DVP30 USE ONLY MANUFACTURER'S REPLACEMENT PARTS. USE OF ANY OTHER PARTS COULD CAUSE INJURY OR DEATH. 30794-5-0314 Page 39... -
Page 40: Dvp30Cc(30,70) Parts List
DVP30CC(30,70) PARTS LIST PART NUMBER INDEX DESCRIPTION DVP30CC30 DVP30CC30 DVP30CC70B DVP30CC70B R9672 R9672 R9672 R9672 INLET VENT COLLAR M178 M178 M178 M178 INLET COLLAR GASKET 30892 30892 30892 30892 AIR DROP ASSEMBLY M163 M163 M163 M163 FLUE OUTLET GASKET 30392... -
Page 41: Dvp30Cc(30,70) Parts View
DVP30CC(30,70) PARTS VIEW PLEASE NOTE: When ordering parts, it is very important that part number and description of part coincide. IP ONLY DVP20 IP ONLY DVP30 USE ONLY MANUFACTURER'S REPLACEMENT PARTS. USE OF ANY OTHER PARTS COULD CAUSE INJURY OR DEATH. -
Page 42: Casting Parts List
PLEASE NOTE: When ordering parts, it is very important that part number and description of part coincide. PART NO. INDEX PART NO. INDEX DESCRIPTION DESCRIPTION DVP20CC DVP30CC DVP20CC DVP30CC COMMON PARTS PORCELAIN BLACK INSERT TAB VENT OPENING INSERT R9671 R9671... -
Page 43: Casting Parts View
CASTING PARTS VIEW PLEASE NOTE: When ordering parts, it is very important that part number and description of part coincide. USE ONLY MANUFACTURER'S REPLACEMENT PARTS. USE OF ANY OTHER PARTS COULD CAUSE INJURY OR DEATH. 30794-5-0314 Page 43... -
Page 44: Accessory Side Shelves Installation Instructions
ACCESSORY SIDE SHELVES INSTALLATION INSTRUCTIONS Installing Accessory Side Shelves: Remove cast iron or stone inlay inserts from casting top and carefully set them aside. Remove cast iron top from stove and place upside down on a flat, soft smooth surface to avoid damage. Remove four ¼-20 hex head bolts from the outer edges of cast iron top. -
Page 45: Cib3-1 Optional Blower Installation Instructions - Dvp30Cc
CIB3-1 OPTIONAL BLOWER INSTALLATION INSTRUCTIONS - DVP30CC Installing Optional CIB3 Blower CAUTION Loosen, but do not remove, four hex-head screws located on Sharp edges, use protective gloves when installing. the exterior, bottom of the appliance. Position the blower assembly at the rear of the appliance. - Page 46 CIB3-1 OPTIONAL BLOWER INSTALLATION INSTRUCTIONS - DVP30CC Fan Control Wiring The fan control is a non-adjustable automatic type The fan control The appliance, when installed, must be electrically grounded in will require between 5 and 10 minutes of main burner operation accordance with local codes or, in the absence of local codes, with before the fan control "closes"...
- Page 47 CIB3-1 OPTIONAL BLOWER INSTALLATION INSTRUCTIONS - DVP30CC PARTS LIST INDEX NUM- PART NUM- DESCRIPTION R1454 BRASS BUSHING R1499 RUBBER GROMMET 31739 BLOWER HOUSING R1410 STRAIN RELIEF BUSHING R9927 BLOWER ASSEMBLY 24225 BLOWER COVER R6159 CORD SET R10363 WIRE HARNESS R2503...
-
Page 48: Cib4-1 Optional Blower Installation Instructions - Dvp20Cc
CIB4-1 OPTIONAL BLOWER INSTALLATION INSTRUCTIONS - DVP20CC Fan Control CAUTION The fan control is a non-adjustable automatic type The fan control Sharp edges, use protective gloves when installing. will require between 5 and 10 minutes of main burner operation before the fan control "closes" and activates the blower. The blower Carton Contents will continue to run between 5 and 10 minutes after the main burner shuts off, before the fan control "opens"... - Page 49 CIB4-1 OPTIONAL BLOWER INSTALLATION INSTRUCTIONS - DVP20CC Wiring CAUTION The appliance, when installed, must be electrically grounded in accordance with local codes or, in the absence of local codes, with Label all wires prior to disconnection when servicing controls. the National Electrical Code, ANSI/NFPA 70 or Canadian Electrical Wiring errors can cause improper and dangerous operation.
-
Page 50: Cib4-1 Optional Blower Installation Instructions - Dvp20Cc
CIB4-1 OPTIONAL BLOWER INSTALLATION INSTRUCTIONS - DVP20CC PARTS LIST INDEX NUMBER PART NUMBER DESCRIPTION R1454 Brass Bushing (4 Required) R1499 Rubber Grommet (4 Required) CI002 Blower Housing R1517 Tinnerman Clip (4 Required) R2804A Blower Assembly CI003 Blower Housing Cover R2099 Cord Set R3767A Wire Harness... -
Page 51: Warranty
WARRANTY Empire Comfort Systems Inc. warranties this hearth product to be free from defects at the time of purchase and for the pe- riods specified below. Hearth products must be installed by a qualified technician and must be maintained and operated safely, in accordance with the instructions in the owner’s manual. -
Page 52: Appliance Service History
APPLIANCE SERVICE HISTORY Date Dealer Name Service Technician Name Service Performed/Notes Page 52 30794-5-0314... - Page 53 APPLIANCE SERVICE HISTORY Date Dealer Name Service Technician Name Service Performed/Notes 30794-5-0314 Page 53...
-
Page 54: Quick Reference Guide
Web Site: www.empirecomfort.com Empire Comfort Systems 918 Freeburg Avenue Belleville, Illinois 62220-2623 The Empire Cast Iron Stoves Models: GAS-FIRED DVP20CC(30,70)(B,F,M)(N,P)-1 DVP30CC(30,70)(B,F,M,S,W)(N,P)-1 Model DVP20CC DVP30CC Gas Type Natural Gas Natural Gas Input BTU/HR (KW/H) Max 19,500 26,500 26,500 Input BTU/HR (KW/H) Min... - Page 55 Web Site: www.empirecomfort.com Empire Comfort Systems 918 Freeburg Avenue Belleville, Illinois 62220-2623 The Empire Cast Iron Stoves Models: GAS-FIRED DVP20CC(30,70)(B,F,M)(N,P)-1 DVP30CC(30,70)(B,F,M,S,W)(N,P)-1 CLEARANCES In selecting a location for installation, it is necessary to provide adequate accessibility clearances for servicing and proper operation.
- Page 56 Empire Comfort Systems Inc. EMPIRE EMPIRE 918 Freeburg Ave. Belleville, IL 62220 If you have a general question about our products, please e-mail us at info@empirecomfort.com. If you have a service or repair question, please contact your dealer. Comfort Systems www.empirecomfort.com...
Need help?
Do you have a question about the DVP30CC and is the answer not in the manual?
Questions and answers