Table of Contents
Advertisement
Quick Links
Advertisement
Table of Contents

Related Manuals for Luma MF24B

Summary of Contents for Luma MF24B
- Page 1 Because you’re not like everyone else. ISTING MF24B ’ WNER ANUAL...
- Page 2 Our goal is to ensure that every Luma Comfort customer is 100% satisfied with their product. If you have any questions or concerns regarding your product, or if you would simply like to share an idea with us, please feel free to contact us.
-
Page 3: Table Of Contents
ONTENTS Important Safety Information ................4 Get To Know Your Misting Fan ................ 5 Product Benefits ..................5 Parts List...................... 5 Assembly Instructions..................6 Step 1: Assembling the Stand Pole ............... 6 Step 2: Connecting the Back Panel .............. 7 Step 3: Connecting the Water Line ............... -
Page 4: Important Safety Information
14. If the fan will not be in use, empty the tank of any remaining water. 15. If the fan’s plug or power cord is damaged, do not attempt to repair the components yourself. Please contact Luma Comfort’s customer service hotline at 1-866-737-6390 or have the fan examined by an authorized service provider. -
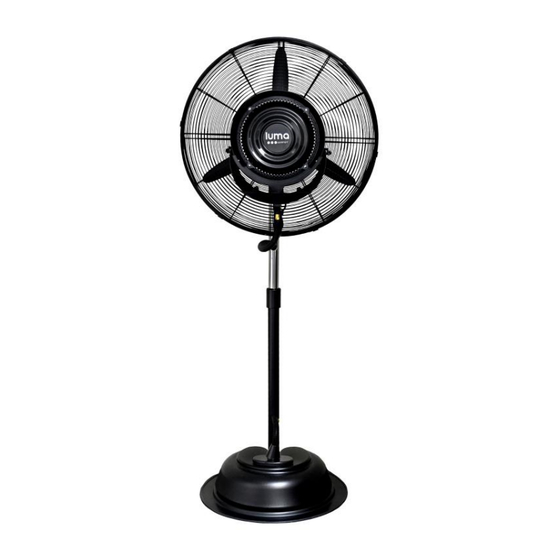
Page 5: Get To Know Your Misting Fan
ISTING RODUCT ENEFITS Designed for cooling large areas such as patios, factories, manufacturing facilities, garages, athletic fields, greenhouses and more Centrifugal misting system means there’s no clogged nozzles and no need to use filtered water Constructed of heavy-gauge, anticorrosive metal for safety and durability ... -
Page 6: Assembly Instructions
SSEMBLY NSTRUCTIONS It is strongly recommended that a second person be available to assist during the assembly process. DO NOT plug in the fan before assembly. This misting fan comes in two separate boxes. Carefully remove all packaging materials and retain for future storage/use. -
Page 7: Step 2: Connecting The Back Panel
2: C ONNECTING THE ANEL Refer to diagram 2. Find the rectangular panel located on the back of the stand pole. Remove this back panel from the stand pole by completely unscrewing it from the stand pole. Set it aside. 2. -
Page 8: Step 3: Connecting The Water Line
3: C ONNECTING THE ATER Refer to diagram 3. Locate the metal pipe and fan head and attach the fan head onto the pipe. The fan head should have 2 water hoses (1 large and 1 small) and 1 electric wire with male connector plug connected to it. 2. -
Page 9: Step 4: Connecting The Fan Head To The Stand Pole
4: C ONNECTING THE EAD TO THE TAND Refer to diagram 4. Place the stand pole/base on a level surface. 2. Take the water hoses and electric wire from the fan head/pipe and thread them through the top of the stand pole. Do not attach the fan head to the stand pole yet. -
Page 10: Step 5: Assembling The Water Tank
5: A SSEMBLING THE ATER Refer to diagram 5. Take the water pump and place it in the pump slot. 2. Locate the water tank and place it on the fan base, making sure to line up the pump opening with the pump slot so that they fit together. Place any protruding hoses or wires into the tank. -
Page 11: Operating Instructions
PERATING NSTRUCTIONS This misting fan can operate with optimal output in temperatures up to 104°F. 2. Lift up the tank cover and fill the tank with clean water. Connect the fan to a power supply. 4. Turn on the fan by pressing the red power switch. This misting fan has 3 different fan speeds. -
Page 12: Maintenance
6. To start the misting function, press the misting button located on the stand pole. The misting function will only work if the fan speed is set. The pump and misting plate should power on at this time. To adjust the misting volume, turn the misting switch dial located near the top of the fan head. - Page 13 Use a soft cloth and a solution of mild soap and warm water to clean the fan’s exterior. Do not use harsh cleaners, gasoline, paint thinner, benzene, etc., as these substances can damage the misting fan. Thoroughly dry all of the fan’s parts with a soft cloth before reconnecting the unit to a power supply.
-
Page 14: Technical Support
ECHNICAL UPPORT Luma Comfort is committed to providing a premier service experience. If you are experiencing any technical issues with your product related to either setup or operation, please contact our product support team at 1-866-737-6390 or support@lumacomfort.com. RODUCT PECIFICATIONS... -
Page 15: Warranty
Luma Comfort products are warranted to be free from defects in workmanship or materials for one (1) year from the date of purchase. If the product is found to be defective within this period, Luma Comfort, at its sole option, will repair or replace any components that fail during normal operation.
Need help?
Do you have a question about the MF24B and is the answer not in the manual?
Questions and answers
Need a LUMA replacement cover for front of my ****. Mine has broken tabs and cover doesn't work properly. Luma Model MF24B, I tried to upload a picture of it in .jpeg but it is showing a RedX when I try to upload it.
The documents do not provide specific information about purchasing a replacement cover for the Luma MF24B model. However, you can contact Luma Comfort customer support by calling 1-866-737-6390 or emailing support@lumacomfort.com to inquire about replacement parts, including the cover.
This answer is automatically generated