Raritan Dominion SX II User Manual
Hide thumbs
Also See for Dominion SX II:
- Quick setup manual (3 pages) ,
- Administrator's manual (272 pages)

Subscribe to Our Youtube Channel
Related Manuals for Raritan Dominion SX II


Summary of Contents for Raritan Dominion SX II
- Page 1 Dominion SX II User Guide 2.0.0 Copyright © 2015 Raritan, Inc. DSX2-v2.0.0.-0A-E August 2015 255-62-0001-00...
- Page 2 Raritan, Inc. © Copyright 2015 Raritan, Inc. All third-party software and hardware mentioned in this document are registered trademarks or trademarks of and are the property of their respective holders.
-
Page 3: Table Of Contents
Contents CS03 Certification - DSX2-16 and DSX2-48 Chapter 1 Features and Benefits Package Contents .......................... 8 SX II Models ........................... 9 SX II Appliance Diagram ........................ 9 Supported Serial Devices ......................10 SX II Access Clients ........................11 Chapter 2 Access and Use Remote Console Features Allow Pop-Ups .......................... - Page 4 Standalone Raritan Serial Console Requirements ..............44 Set Windows OS Variables and Install Standalone Raritan Serial Console (RSC) ..44 Set Linux OS Variables and Install Standalone Raritan Serial Console (RSC) for Linux . 47 Setting UNIX OS Variables ....................48 Launching RSC on Windows Systems ................
- Page 5 Contents Chapter 5 Connect a Rack PDU to SX II and Configure Power Control Options Connecting the SX II to the PX2 Serial Port ................67 Connecting the SX II to the PX2 FEATURE Port ................ 68 Appendix A Specifications SX II Dimensions and Physical Specifications ................
- Page 6 CS03 Certification - DSX2-16 and DSX2-48 To avoid potentially fatal shock hazard and possible damage to Raritan equipment: • Do not use a 2-wire power cord in any product configuration. • Test AC outlets at your computer and monitor for proper polarity and grounding.
-
Page 7: Chapter 1 Features And Benefits
Chapter 1 Features and Benefits Next-Generation Console Server The Dominion SX II is Raritan's next-generation Serial Console Raritan's Next-Generation Serial Server (also known as Terminal Server) that provides IT and network Console Server administrators secure IP access and control of serial devices, anytime, anywhere. - Page 8 Dual stack IPv4 and Models IPv6 networking. The Dominion SX II has four USB 2.0 ports, three on the back panel Five USB Ports and one on the front panel. These are available for local keyboard/mouse, 3G/4G cellular modem and for automatic configuration via USB drive.
- Page 9 Access disaster recovery. With the Dominion SX II, you get multiple types of local access at- Innovative At-the-Rack Access the-rack. This includes: (1) Traditional RJ45 serial port, (2) Mini- USB port for laptop connection, and (3) DVI & USB-based KVM console for connection to a rackmount keyboard tray or even a KVM switch.
- Page 10 US-ASCII (ISO 646); ISO 8859-1 (Latin-1); ISO 8859-15 (Latin-9); UTF-8 and others. Raritan rack PDU's (PX, PX2, PX3, RPC) can be connected to the Remote Power Control of Raritan Dominion SX II for remote power control of the equipment connected PDU’s (With Power Control...
- Page 11 TACACS protocols. This allows Dominion SX II to use pre-existing Directory username/password databases for security and convenience. SecureID is supported via RADIUS for added security. Customers can upload to the Dominion SX II digital certificates (self- Upload Customer-Provided SSL signed or certificate authority provided) for enhanced authentication Certificates and secure communication.
- Page 12 Multiple User Interfaces freedom to use the interface best suited for the job at hand. This includes remote access via Raritan or third party serial client via CLI, Raritan graphical user interface (GUI), at-the-rack access or via CommandCenter. Convenient direct port access methods available.
- Page 13 Logging user activity and user administration. These can be selectively delivered to: SNMP, Syslog, email (SMTP) as well as stored on the SX II in the audit log. Support for SNMP v2 and v3, Raritan CommandCenter® Management and Scalability...
-
Page 14: Package Contents
Raritan’s CommandCenter complete CommandCenter Secure Gateway integration, allowing Centralized Management users to consolidate all Dominion SX II and other Raritan devices into a single logical system, accessible from a single IP address, and under a single remote management interface. When deployed with CommandCenter Secure Gateway, hundreds of... -
Page 15: Sx Ii Models
Chapter 1: Features and Benefits SX II Models The following SX II models are available. Models with an M include an internal modem in addition to the standard features that are provided on all SX II models. For a list of standard features, see Introduction (see... -
Page 16: Supported Serial Devices
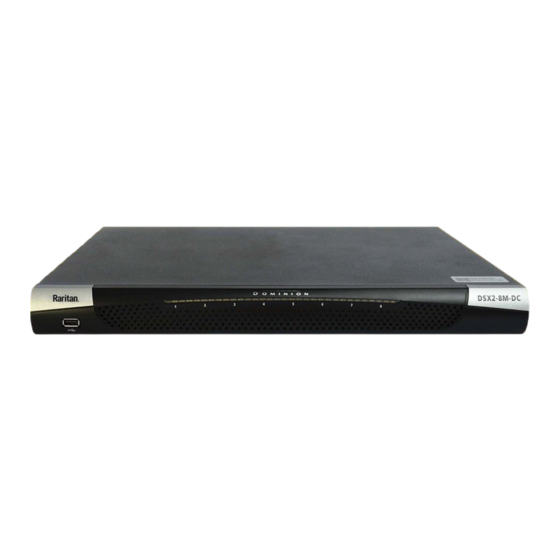
Chapter 1: Features and Benefits Appliance diagram key USB port LED port indicators Power status (Note SX II 48 port models have their power status located above the front-panel USB port.) Supported Serial Devices • Routers • LAN switches • Rack PDUs •... -
Page 17: Sx Ii Access Clients
Chapter 1: Features and Benefits SX II Access Clients Raritan Serial Console (RSC) (RSC) Access RSC by connecting from the Remote Console or use standalone RSC to access targets directly. Raritan Serial Console (RSC) Help (on page 43) Direct Port Access Direct Port Access allows users to bypass having to use the SX II's Login dialog and Port Access page. -
Page 18: Chapter 2 Access And Use Remote Console Features
Chapter 2 Access and Use Remote Console Features The Remote Console is a browser-based interface accessed when you log in to SX II via a network connection. Administrator Functions in the Remote Console Administrators perform SX II configuration and maintenance functions from the Remote Console, such as configuring network access, adding and managing users, managing device IP addresses and so on. -
Page 19: Allow Pop-Ups
Chapter 2: Access and Use Remote Console Features Allow Pop-Ups Regardless of the browser you are using, you must allow pop-ups in order to launch the SX II Remote Console. Security Warnings and Validation Messages When logging in to SX II, security warnings and application validation message may appear. -
Page 20: Java Validation And Access Warning
When logging in to SX II, Java prompts you to validate SX II, and to allow access to the application. Raritan recommends installing an SSL certificate in each SX II device in order to reduce Java warnings, and enhance security. See SSL Certificates... -
Page 21: Additional Security Warnings
Chapter 2: Access and Use Remote Console Features Additional Security Warnings Even after an SSL certificate is installed in the SX II, depending on your browser and security settings, additional security warnings may be displayed when you log in to SX II. It is necessary to accept these warnings to launch the SX II Remote Console. -
Page 22: Connect A Laptop To Sx Ii Using A Cross-Over Cable (Optional)
Note: Check the pin definition of the RJ45 port on the target. It should match the pin definition on SX II. If needed, connect a Raritan Nulling Serial Adapter to the serial port on your target, then plug a standard Cat5 cable into the adapter. -
Page 23: Example 1: Import The Certificate Into The Browser
Chapter 2: Access and Use Remote Console Features Example 1: Import the Certificate into the Browser In this example, you import the Certificate into the browser. 1. Open an IE browser, then log in to SX II. ™ 2. Click More Information on the first Java security warning. - Page 24 Chapter 2: Access and Use Remote Console Features Note: If you are not prompted by the browser, manually select Tools > Internet Options to open the Internet Options dialog. 1. Click the Content tab. 2. Click Certificates. The Certificate Import Wizard opens and walks you through each step.
-
Page 25: Example 2: Add The Sx Ii To Trusted Sites And Import The Certificate
Chapter 2: Access and Use Remote Console Features Example 2: Add the SX II to Trusted Sites and Import the Certificate In this example, the SX II's URL is added as a Trusted Site, and the Self Signed Certificate is added as part of the process. 1. - Page 26 Chapter 2: Access and Use Remote Console Features Next, import the Certificate. 1. Open an IE browser, then log in to SX II. 2. Click More Information on the first Java ™ security warning. 3. Click View Certificate Details on the More Information dialog. You are prompted to install the certificate.
-
Page 27: Converting A Binary Certificate To A Base64-Encoded Der Certificate (Optional)
Chapter 2: Access and Use Remote Console Features Converting a Binary Certificate to a Base64-Encoded DER Certificate (Optional) SX II requires an SSL certificate in either Base64-Encoded DER format or PEM format. If you are using an SSL certificate in binary format, you cannot install it. However, you can convert your binary SSL certificate. - Page 28 Chapter 2: Access and Use Remote Console Features 3. Click "Copy to File...". 4. The Certificate Export Wizard opens. Click Next to start the Wizard. 5. Select "Base-64 encoded X.509" in the second Wizard dialog. 6. Click Next to save the file as a Base-64 encoded X.509. You can now install the certificate on your SX II.
-
Page 29: Log In To Sx Ii
Chapter 2: Access and Use Remote Console Features Log In to SX II 1. Launch a supported web browser. 2. Enter the SX II HTTP, HTTPS or DNS address provided to you by your Administrator. Note: You are always redirected to the IP address from HTTP to HTTPS. -
Page 30: Sx Ii Port Access Page
Chapter 2: Access and Use Remote Console Features SX II Port Access Page After a successful login, the Port Access page opens listing all ports along with their status and availability. -
Page 31: Sx Ii Left Panel
Chapter 2: Access and Use Remote Console Features Ports are numbered from 1 up to the total number of ports available for the SX II. For example, Port_1 - Port_64, Port_1 - Port_32. "SerialPort"_"Port #" are what make up the default name the physical port until a name is configured for the port. - Page 32 Chapter 2: Access and Use Remote Console Features Information Description Displayed when? State The current state of the application, either idle or Always active. If idle, the application tracks and displays the amount time the session has been idle. Your IP The IP address used to access SX II.
- Page 33 Chapter 2: Access and Use Remote Console Features Collapse the left panel and then expand it again by clicking on the blue arrow located along the right edge of the panel.
-
Page 34: Enable Favorites
Chapter 2: Access and Use Remote Console Features Enable Favorites Enable the Favorites feature and display a list of favorite, frequently accessed SX II devices by clicking Enable in the Favorite Devices section of the left panel of the SX II interface. Accept security warnings if they are displayed. -
Page 35: Discover Devices Product Subnet
The SX II Remote Console automatically discovers the SX II devices, and any other Raritan device, in the subnet of the SX II. To discover devices on the device subnet: 1. Choose Manage > Discover Devices - SX II Subnet. - Page 36 Chapter 2: Access and Use Remote Console Features To add devices to your Favorites List: 1. Select the checkbox next to the device name/IP address. 2. Click Add. To access a discovered device: • Click the device name or IP address for that device. A new browser opens to that device.
-
Page 37: Chapter 3 Access Targets
From the Port Access page, use the Port Action menu to connect, disconnect, or control power of targets and power strips that are connected to SX II. Once connected, you can manage a target with the Raritan Serial Console (RSC). See Raritan Serial Console (RSC) Help (on page 43). - Page 38 Strip" on page 37) You can then connect via Raritan Serial Console (RSC). When you connect to a target, the RSC opens in a new window. See Raritan Serial Console (RSC) Help. Alternatively, you can connect via Direct Port Access, if SX II is configured for Direct Port Access.
-
Page 39: Connect To A Target
Connect to a Target Creates a new connection to the target device. From the SX II Remote Console, Raritan Serial Console (RSC) opens in a new window and you manage the target from there. If you are connected to the target from the Local Console port, you access the target via command line interface. -
Page 40: Disconnect From A Target Or Power Strip
Disconnect menu option is available in the Port Action menu. Clicking on the Disconnect option disconnects from a target or power strip, and closes the Raritan Serial Console (RSC) window. You can also click the X icon on the window or use the Exit menu option. -
Page 41: Power On A Target Or Power Strip
This option is visible only when there are one or more power associations to the target, and when you have permission to manage the target's power. You can also perform these actions through Raritan Serial Console (RSC) and command line interface. See Raritan Serial Console (RSC) -
Page 42: Power Off A Target Or Power Strip
• you have permission to manage the power You can also perform these actions through Raritan Serial Console (RSC) and command line interface. See Raritan Serial Console (RSC) -
Page 43: Power Cycle A Target Or Power Strip
• you have permission to manage the power You can also perform these actions through Raritan Serial Console (RSC) and command line interface. See Raritan Serial Console (RSC) - Page 44 Chapter 3: Access Targets Connect a keyboard tray or KVM console to the DVI-D and USB ports. Connect a laptop to the Mini-USB Admin port.
- Page 45 1280x1024@60Hz. Note that you can connect to targets using the Remote Console and manage them using Raritan Serial Console (RSC). See Raritan Serial Console (RSC) Help (on page 43) and...
-
Page 46: Command Line Interface Protocols
Chapter 3: Access Targets Send a break to the connected target. admin > [portname] > sendbreak Lock write access to this port. admin > [portname] > writelock Unlock write access to this port. admin > [portname] > writeunlock Query Power status of this port. admin >... -
Page 47: Command Line Interface Partial Searches
Chapter 3: Access Targets Command Line Interface Partial Searches Enter the first few characters of command and press the Tab key on your keyboard in order to locate a specific command. The command line interface (CLI) completes the entry if the characters form an exact match. -
Page 48: Command Line Interface High-Level Commands
Chapter 3: Access Targets Command Line Interface High-Level Commands The CLI is menu based. Some commands move to a menu with a different command set. The following common commands can be used at all levels of the command line interface (CLI): •... -
Page 49: Chapter 4 Raritan Serial Console (Rsc) Help
Chapter 4 Raritan Serial Console (RSC) Help Use Raritan Serial Console (RSC) to connect to serial targets from the SX II Remote Console. Alternatively, install RSC as a standalone-client. The RSC stand-alone client uses the SX II IP address and the target's port number to connect directly to the target, so you do not have to connect to the Remote Console and then connect to the target. -
Page 50: Standalone Raritan Serial Console Requirements
Chapter 4: Raritan Serial Console (RSC) Help Standalone Raritan Serial Console Requirements The following requirements must be met to support the Raritan Serial Console (RSC): • Minimum 1 GHz PC with 512 MB RAM. • ™ Java See SX II release notes for the required version. - Page 51 Chapter 4: Raritan Serial Console (RSC) Help 3. In the System variables section, click New. 4. Write down the installed Java path. 5. In the Variable value block field of the New System Variable dialog, add JAVA_HOME to the Variable name block and the Java path you wrote down earlier.
- Page 52 4. Click Next. The installation path page opens. 5. Change the path, if desired. 6. Click Next. The installation progress page opens. Note: The standalone version of RSC is available from the Raritan Support website: http://www.raritan.com/support/sup_upgrades.aspx (http://www.raritan.com/support/sup_upgrades.aspx)
-
Page 53: Set Linux Os Variables And Install Standalone Raritan Serial Console (Rsc) For Linux
PATH to include it by adding the following lines: export JAVA_HOME=/home/username/j2sdk1.6/ export PATH=$PATH:$JAVA_HOME/bin 3. Save the file. You must have administrative privileges to install Raritan Serial Console (RSC). 1. Log in to your Linux ™ machine. 2. Download, or copy from a known location, the RSC-installer.jar installation file. -
Page 54: Setting Unix Os Variables
Chapter 4: Raritan Serial Console (RSC) Help Setting UNIX OS Variables ™ ™ To check the latest JRE version on Sun Solaris 1. Launch a terminal window on the Sun Solaris desktop. 2. Type java-version in the command line and press Enter. The ™... -
Page 55: Launching Rsc On Windows Systems
1. Double-click the shortcut or use Start Programs to launch the standalone Raritan Serial Console (RSC). The RSC Login connection properties dialog appears. 2. Enter the Dominion SX II IP address, account information, and the desired target (port). 3. Click Start. RSC opens with a connection to the port. - Page 56 Chapter 4: Raritan Serial Console (RSC) Help Change the default Idle Timeout setting and then launch the RSC. See Login Limitations for details on changing the Idle Timeout setting. Access Emulator Options 1. Select the Emulator drop-down menu to display a list of options.
- Page 57 Chapter 4: Raritan Serial Console (RSC) Help Note: An Administrator can set Terminal emulation settings using Setup > Port Configuration. 1. Choose Emulator > Settings. The Settings screen displays the General tab with the default settings. 2. The Main Menu Shortcut default is None; accept this, or choose one of the following from the Main Menu Shortcut drop-down menu: ...
- Page 58 Chapter 4: Raritan Serial Console (RSC) Help 1. Choose Emulator > Settings and click the Display tab. 2. Click Default to accept the Default settings, and then click Ok to close the Display Settings window. To change the settings, follow these steps: a.
- Page 59 Chapter 4: Raritan Serial Console (RSC) Help c. The default font property is Monospace, or you can choose a font from the GUI Font Properties scrolling list. Note: For Simplified Chinese characters, RSC supports EUC-CN encoding system. 3. Choose the following from their respective drop-down menus: ...
- Page 60 Chapter 4: Raritan Serial Console (RSC) Help Korean Chinese Bulgarian 6. Click Ok to close the Display Settings window. If you changed the Language setting, the RSC changes to that language when the Display Settings window is closed.
- Page 61 Chapter 4: Raritan Serial Console (RSC) Help Get Write Lock Write lock prevents other users from taking the write access while you are using it. 1. To get write lock, choose Emulator > Get Write Lock. 2. If Get Write Lock is not available, a request rejected message appears.
-
Page 62: Edit
Chapter 4: Raritan Serial Console (RSC) Help 2. A check mark appears in the Write Access column after the name of the User who has Write Access to the console. 3. Click Close to close the Connected Users window. Exit 1. -
Page 63: Start And Stop Logging
• Use Ctrl+V to paste text. Start and Stop Logging When you start Raritan Serial Console (RSC), the Logging indicator on the status bar indicates whether logging is on or off. Start Logging The Start Logging function allows you to collect raw console data from the target device and save it to a file on your computer. - Page 64 Chapter 4: Raritan Serial Console (RSC) Help 3. Click Save after selecting or creating a file. Stop Logging • Choose Tools > Stop Logging.
-
Page 65: Send A Text File
Chapter 4: Raritan Serial Console (RSC) Help The logging stops. Send a Text File 1. Select Tools > Send Text File. A Send Text File screen appears. 2. Open the directory of the Text file. 3. Click on or enter the file name of the text file. -
Page 66: Toggle Power
Chapter 4: Raritan Serial Console (RSC) Help When you click Open, Raritan Serial Console (RSC) sends whatever file you selected directly to the port. If there is currently no target connected, nothing is visible on the screen. ®... -
Page 67: Power On A Target
Power On a Target Use this option to power on a target from Raritan Serial Console (RSC). This option is visible only when there are one or more power associations to the target, and when you have permission to manage the target's power. -
Page 68: Power Off A Target
2. Click Yes when prompted to confirm. Power Off a Target Use this option to power off a target from Raritan Serial Console (RSC). This option is visible only when there are one or more power associations to the target, and when you have permission to manage the target's power. -
Page 69: Power Cycle A Target
Chapter 4: Raritan Serial Console (RSC) Help 2. Click Yes when prompted to confirm. Power Cycle a Target Power cycling allows you to turn a target off and then back on through the outlet it is plugged into. This option is visible only when - •... - Page 70 Chapter 4: Raritan Serial Console (RSC) Help 2. Click Yes when prompted to confirm.
-
Page 71: Chat
Chapter 4: Raritan Serial Console (RSC) Help Chat When using browser access over SSL, an interactive chat feature called Chat allows you and other users on the same port to communicate. The maximum length of a chat message is 300 characters. -
Page 72: Help And About
Chapter 4: Raritan Serial Console (RSC) Help Help and About Help Topics include online assistance for operating the Raritan Serial Console (RSC) and release information about RSC. Help Topics • Choose Help > Help Topics. Help is displayed in a secondary window. -
Page 73: Chapter 5 Connect A Rack Pdu To Sx Ii And Configure Power Control Options
1. Connect an ASCSDB9F adapter to the PX2 DB9 console/modem port. Note: The adapter is purchased from Raritan. It does not come with PX or SX II appliances. 2. Plug a Cat5 cable into the ASCSDB9F adapter, then plug the other... -
Page 74: Connecting The Sx Ii To The Px2 Feature Port
Chapter 5: Connect a Rack PDU to SX II and Configure Power Control Options 3. Power on the PX2 (if it is not already). The command line interface (CLI) interface appears. PX appliance SX II Connecting the SX II to the PX2 FEATURE Port In this configuration, the PX is managed from the SX II interface like any other powerstrip. - Page 75 Chapter 5: Connect a Rack PDU to SX II and Configure Power Control Options You can now add the PX as a managed power strip to the SX II. See Configure Power Strips from the Remote Console or Configure Power Strips Using CLI. PX appliance SX II...
-
Page 76: Appendix A Specifications
Appendix A Specifications In This Chapter SX II Dimensions and Physical Specifications ........70 Supported Remote Connections ............. 70 Supported Number of Ports and Remote Users per SX II Model .... 71 Maximum Number of Users Session ............71 Maximum Number of Support Users Per Port ......... 71 Port Access Protocol Requirements ............ -
Page 77: Supported Number Of Ports And Remote Users Per Sx Ii Model
Appendix A: Specifications • TCP/IP • HTTP • HTTPS • RADIUS • LDAP/LDAPS • • Telnet • TACACS+ • • SNTP Supported Number of Ports and Remote Users per SX II Model Model Number of ports SX2-04 and SX2-04M SX2-08 and SX2-08M SX2-16 and SX2-16M SX2-32 and SX2-32M SX2-48 and SX2-48M... - Page 78 Port 5000 This port is used to discover other Dominion devices and for communication between Raritan devices and systems, including CC-SG for devices that CC-SG management is available. By default, this is set to Port 5000, but you may configure it to use any TCP port not currently in use.
- Page 79 Appendix A: Specifications Protocol Port Communication direction RADIUS Port 1812 Outgoing If SX II is configured to remotely authenticate user logins via the RADIUS protocol, port 1812 is used and must be open. However, but the system can also be configured to use any port of your designation.
-
Page 80: Sx Ii Port Pins
Appendix A: Specifications You may have to open additional ports when NFS logging, using LDAP servers, and so forth. These ports may vary from installation-to-installation depending on network topologies, virtual Local Area Networks (VLANs), and firewall configurations. Contact your network administrator for site-specific information and settings. -
Page 81: Sx2 Port Ranges
Appendix A: Specifications DCE Mode on Serve Port pin 2 Input pin 3 Input pin 4 Ground pin 5 Ground pin 6 Output pin 7 Output pin 8 Output SX2 Port Ranges The port range for internal port configuration - CSC, HTTP, HTTPS, SSH, Telnet, DPA SSH , DPA Telnet - is 1 to 64510. -
Page 82: Default User Session Timeouts
Appendix A: Specifications SX II network speed setting SX II: 10/Full SX II: 10/Full 10/Half Communica Communica Communicat 10/Half tion tion Switch: Switch: 10/Full 10/Full 10/Half SX II: 10/Half 10/Half Communica Communica Communicat 10/Full tion tion Switch: 10/Half Legend: Does not function as expected Supported Functions;... -
Page 83: Sx Ii Supported Local Port Dvi Resolutions
Appendix A: Specifications SX II Supported Local Port DVI Resolutions Following are the resolutions supported when connecting to a DVI monitor from the SX II local port. • 1920x1080@60Hz • 1280x720@60Hz • 1024x768@60Hz (default) • 1024x768@75Hz • 1280x1024@60Hz • 1280x1024@75Hz •... -
Page 84: Target Cable Connection Distances And Rates
When you physically disconnect a target from a port on an SX II, the port channel's LED turns off. • When you log in to SX II and connect to a target via either Raritan Serial Console (RSC), SSH or the Local Console, the port channel's LED blinks. -
Page 85: Appendix B Faqs
Appendix B FAQs Dominion SX II Overview... - Page 86 Appendix B: FAQs Dominion SX II Overview The Dominion SX II is Raritan's next- What is the Dominion SX II? generation Serial Console Server that provides IP access and control of serial devices, anytime, anywhere. The new SX II is the most powerful, secure, reliable, easy-to-use and manageable serial-over-IP console server on the market.
- Page 87 Appendix B: FAQs Dominion SX II Overview SX models! The Dominion SX II will replace the current What are the end-of-life plans Dominion SX. In the 4th quarter of 2015, (lifecycle) for the current SX? Raritan will announce the end-of-sales for the current SX models, with opportunities for last-time-buys for a few months.
- Page 88 DTE pinout (Pin/ Signal): SX II's local admin port? 1/RTS, 3/TXD, 4/GND, 5/GND, 6/RXD, 8/CTS. You can connect to a DB9 port on a laptop using the Raritan ASCSDB9F RJ- 45(female) to DB9 (female) adapter with a Cat5 cable.
- Page 89 Appendix B: FAQs Dominion SX II Hardware Platform Yes. Dominion SX II comes standard with Does Dominion SX include a 19" a complete ready-to-install 19" rack mount rack mount kit? kit. Serial-over-IP Sessions and Access...
- Page 90 In addition the modem itself has a firewall capability. The Dominion SX II provides multiple types How can I access the SX II when I of at-the-rack access. To connect to a am in the data center? laptop or PC you can connect to its RJ45 serial port or USB mini-B port.
- Page 91 Port Configuration page or CLI. Dominion SX release 3.0 or higher What code-sets does the terminal supports VT100/VT220/VT320 and ANSI emulator in Dominion SX II with the following code-sets: default, US- support? ASCII, ISO-8859-1, ISO-8859-15, UTF-8, Shift-JIS, EUC-JP, EUC-CN, and EUC-KR.
- Page 92 To connect to RJ45 console ports, a regular Are adapters required? Cat5 cable can be used with no adapter. Raritan also sells male and female DB9 and DB25 adapters for devices with these types of serial ports. Adapters are also available to connect to Raritan PX intelligent Rack PDU's.
- Page 93 Appendix B: FAQs Installation, Management & Configuration...
- Page 94 SX II. The SX II SNMP MIB is available from the Where can I get a copy of the Dominion SX II Support Page on raritan.com. It SNMP MIB for Dominion SX? is also available from the Event Management - Settings page on the web GUI.
- Page 95 Appendix B: FAQs Security Yes, the Dominion SX II has rock-solid security Is the Dominion SX II secure? with military grade security features such as 256 bit AES encryption with a FIPS 140-2 mode and encryption module. The SX II has a long list of security features and each release is tested with a vulnerability scanner.
- Page 96 Appendix B: FAQs User Interface & Documentation The Dominion SX II Graphical User Interface is What type of web-based user similar to the other Dominion products, providing interface does the Dominion SX II a common look-and-feel across the Dominion SX have? II, KX, KSX and KX2-101-V2.
-
Page 97: Appendix C Sx Ii Support
SX II Online Help SX II online help is considered your primary help resource. Raritan Serial Console (RSC) help is provided as part of SX II online help. To use online help, Active Content must be enabled in your browser. -
Page 98: Contact The Documentation Team With Feedback
Contact the Documentation directly with any questions or feedback related to the online help or user guides . Email us at documentation@raritan.com, or directly from online help by doing one of the following - Use the "Send Feedback" feature in online help: •... - Page 99 For CommandCenter Secure Gateway: Press 6, then Press 2 Phone: +31-10-2844040 Fax: 732-764-8887 Email: tech.europe@raritan.com Email for CommandCenter NOC: tech-ccnoc@raritan.com Email for all other products: tech@raritan.com United Kingdom Monday - Friday 8:30 a.m. to 5 p.m. GMT China Phone +44(0)20-7090-1390...
Need help?
Do you have a question about the Dominion SX II and is the answer not in the manual?
Questions and answers