Table of Contents
Advertisement
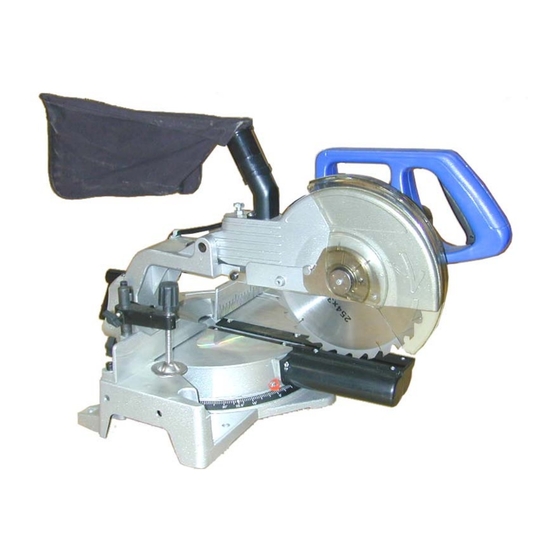
10 INCH COMPOUND SLIDE
10 INCH COMPOUND SLIDE
10 INCH COMPOUND SLIDE
10 INCH COMPOUND SLIDE
10 INCH COMPOUND SLIDE
ASSEMBLY AND OPERATING INSTRUCTIONS
Copyright © 2001 by Harbor Freight Tools
this manual or any artwork contained herein may be reproduced in any shape or
form without the express written consent of Harbor Freight Tools.
For technical questions and replacement parts, please call 1-800-444-3353
45885.p65
1
MITER SA W W W W W
MITER SA
MITER SA
MITER SA
MITER SA
3491 Mission Oaks Blvd., Camarillo, CA 93011
Visit our Web site at http://www.harborfreight.com
®
. All rights reserved. No portion of
10/15/03, 10:41 AM
REV 05/03
Advertisement
Table of Contents

Related Manuals for CHICAGO 45885


Summary of Contents for CHICAGO 45885
- Page 1 . All rights reserved. No portion of this manual or any artwork contained herein may be reproduced in any shape or form without the express written consent of Harbor Freight Tools. For technical questions and replacement parts, please call 1-800-444-3353 REV 05/03 45885.p65 10/15/03, 10:41 AM...
- Page 2 Observe work area conditions. Do not use machines or power tools in damp or wet locations. Don’t expose to rain. Keep work area well lighted. Do not use electrically powered tools in the presence of flammable gases or liquids. SKU 45885 Page 2 REV 04/02 45885.p65...
- Page 3 Any part that is damaged should be properly repaired or replaced by a qualified technician. Do not use the tool if any switch does not turn On and Off properly. SKU 45885 Page 3 45885.p65...
- Page 4 Assembled Compound Slide Miter Saw, dust collection bag, material Clamp (123), and single slide bar extension Bracket (121). If any parts are missing or broken, please call Harbor Freight Tools at the number on the cover of this manual as soon as possible. SKU 45885 Page 4 45885.p65...
- Page 5 The wood to be cut needs to be positioned under the center of the saw blade. If you are cutting a small workpiece, use a spacer block to move the wood to be cut so that you are cutting lined up with the center of the blade. SKU 45885 Page 5 45885.p65...
- Page 6 To slide the cutting arm backward, loosen the Bevel Knob (100), and slide the arm back. Tighten the Bevel Knob. See photo at the bottom of page 6. Plug the Power Cord Plug (64) plug into the electrical outlet. SKU 45885 Page 6 REV 05/03 45885.p65...
- Page 7 Optionally, you can remove the entire Shield assembly as shown on the next page. Press in on the Spindle Lock (32) button. Place a wrench on the Lock Bolt (19) and turn clockwise until the Bolt and Washer can be removed. REV 05/03 SKU 45885 Page 7 45885.p65 10/15/03, 10:41 AM...
- Page 8 This procedure should be done by a qualified technician. Unplug the Power Cord Plug from the electrical outlet. Remove the Screws (51) and Cover (52) from the Field Case (43). Field Case (43) Screws (51) REV 05/03 SKU 45885 Page 8 45885.p65 10/15/03, 10:41 AM...
- Page 9 Saw Blade. Loosen the two Hex Socket Head Screws on each side of the Fence. Move the Fence 90 degrees to the left edge of the Table slot. Retighten screws. SKU 45885 Page 9 REV 10/03 45885.p65 10/15/03, 10:41 AM...
- Page 10 BUYER. THE BUYER ASSUMES ALL RISK AND LIABILITY ARISING OUT OF HIS OR HER REPAIRS TO THE ORIGINAL PRODUCT OR REPLACEMENT PARTS THERETO, OR ARISING OUT OF HIS OR HER INSTALLATION OF REPLACEMENT PARTS THERETO. REV 05/03 SKU 45885 Page 10 45885.p65 10/15/03, 10:41 AM...
- Page 11 Dust Collector Cloth Bag Field Bevel Pointer Saw Blade NOTE: Some parts are listed and shown for illustration purposes only and are not available individually as re- placement parts. REV 05/03 SKU 45885 Page 11 REV 04/03 45885.p65 10/15/03, 10:41 AM...
- Page 12 REV 04/03 SKU 45885 Page 12 45885.p65 10/15/03, 10:41 AM...
Need help?
Do you have a question about the 45885 and is the answer not in the manual?
Questions and answers
where can I purchase a new switch for this saw?
Where does rorsion spring go?
Replace safety sheild Rorsion spring on chicago 45885 miter saw